



What is a laser engraver: how it works and what to use it for
A laser engraver is a machine that uses a focused laser beam to remove material and create permanent marks or grooves on a surface. Unlike ink, labels, or paint, the mark is physically part of the material itself — which is why engraved serial numbers survive industrial cleaning cycles and engraved gifts outlast the people who give them.
A few quick distinctions worth knowing from the start:
- Engraving removes material to create depth. The laser ablates or vaporises the surface, leaving a groove or recess.
- Marking alters the surface colour or texture without significant material removal — charring, foaming, or oxidizing the top layer.
- Cutting uses higher power to penetrate the material fully. The same machine can often do all three, depending on the settings and intent.
Pro Tip: If you see “laser engraver” and “laser marker” used interchangeably in product listings, that is not a mistake. Many machines perform both functions. The distinction matters most in regulated industries — medical devices and aerospace components often specify engraving depth as a compliance requirement.
Key takeaways
A laser engraver removes material using a focused beam to create permanent marks — the laser family, settings, and material together determine the result.
| Point | Details |
|---|---|
| Laser type determines material | CO2 suits most non-metals; fibre suits bare metals; diode suits hobby work; UV suits specialised plastics and glass. |
| Four settings control every job | Power, speed, frequency/DPI, and number of passes together define depth, contrast, and finish. |
| Safety is non-negotiable | Fume extraction, correct PPE, and MSDS checks are required before engraving any material indoors. |
| Beginners can start affordably | Desktop diode machines are available under £500; prosumer enclosed CO2 units cover most small-business needs. |
| Subliblanks for UK trade buyers | Subliblanks supplies xTool laser engravers and engravable blanks with no minimum order and UK-based support. |
Table of Contents
- How does a laser engraver work?
- Raster vs vector: which mode should you use?
- Which laser types suit which materials?
- What materials can you engrave?
- Where is laser engraving used?
- What are the core components of a laser engraver?
- How does the software and workflow operate?
- Safety, ventilation, and UK best practices
- Can a beginner use a laser engraver, and what does it cost?
- A practical material test: how settings affect results
- Why small UK businesses are adopting laser engraving
- Subliblanks supplies xTool laser engravers and engravable blanks for UK trade buyers
- Sources
How does a laser engraver work?
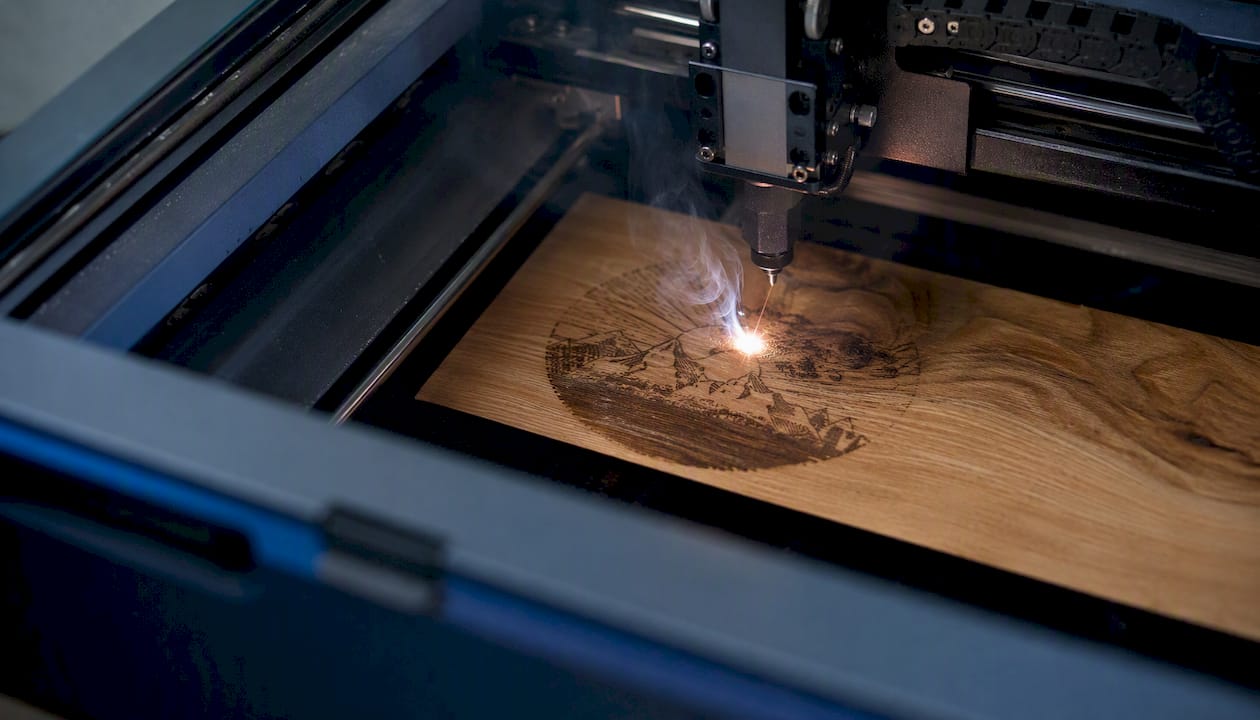
The core mechanism is straightforward: a focused light beam delivers concentrated energy to a very small area, and that energy vapourises, melts, or chars the material at the focal point. According to Wikipedia’s technical overview of laser engraving, only the area inside the focal point is significantly affected, with typical spot sizes well under a millimetre. That precision is what separates a laser from a router or a sandblaster.
The beam path
The laser source generates a beam, which travels through a series of mirrors or fibre optics to a focusing lens. That lens concentrates the beam to its smallest point — the focal plane. Move the workpiece above or below that plane and the spot size grows, the energy density drops, and the mark becomes softer or disappears entirely. Getting the focus right is not optional; it is the single biggest variable beginners get wrong.
Energy and material interaction
What happens at the focal point depends on the material and the power delivered:
- Vapourisation / ablation: the material converts directly from solid to gas. Clean, precise, typical for wood, acrylic, and anodised aluminium.
- Melting: the material liquefies and re-solidifies. Common with some plastics and metals; can leave a raised edge.
- Charring: organic materials (wood, leather, paper) carbonise at the surface. Produces the familiar dark-brown engraved look.
- Glassing: stone and ceramics can vitrify at the surface, creating a frosted or glassy finish.
The controllable variables
Every job is defined by four parameters. Change any one and the result changes:
- Power (expressed as a percentage of maximum wattage): higher power removes more material or marks more deeply.
- Speed (mm/s or mm/min): slower passes deliver more energy per unit area.
- Frequency / pulse rate (Hz or DPI for raster): affects how pulses overlap and how smooth the result appears.
- Number of passes: multiple lighter passes often produce cleaner results than one heavy pass.
Correct power, speed and focus settings are the foundation of reliable results — and KEYENCE’s process guide confirms that accurate material positioning is equally critical for consistent quality.
Pro Tip: Before running a full job, run a small test grid in a corner of your material — vary power in one axis and speed in the other. Five minutes of testing saves a ruined blank.
Raster vs vector: which mode should you use?
The answer depends on what you are trying to produce. Raster engraving treats the image like a printer: the laser sweeps back and forth line by line, varying power to create tonal depth. Vector engraving follows a path, like a pen plotter, tracing outlines and single lines.
| Mode | How it works | Best for | Typical file formats |
|---|---|---|---|
| Raster | Line-by-line scan, pixel-by-pixel | Photos, shaded artwork, filled areas | PNG, BMP, JPG |
| Vector | Follows paths/outlines | Text, logos, line art, cutting | SVG, DXF, AI, PDF |
A photograph of a dog on a wooden plaque needs raster. A company logo in clean lines on anodised aluminium needs vector. Many jobs use both in the same file — a raster image surrounded by a vector border cut.
Engraving, marking, and cutting compared
- Engraving: material is removed to a depth that is durable and tactile, often preferred for compliance marks and personalisation where longevity matters.
- Marking: surface alteration only — a colour change, oxidation layer, or texture shift. Faster, shallower, and sufficient for many decorative applications.
- Etching: a subset of marking; typically refers to a shallow chemical or laser-induced surface change, often used on glass or coated metals.
- Cutting: full penetration of the material. Requires higher power, slower speed, and often multiple passes. The same laser that engraves a name can cut a shape from acrylic if it has sufficient wattage.
Thomas Publishing’s laser engraving reference notes that the choice between these methods has real compliance implications: in medical device and aerospace manufacturing, engraving depth is often specified precisely because shallower marks may not survive sterilisation or surface finishing.
Which laser types suit which materials?
The main choices are CO2 for most non-metals, fibre for metals, diode for hobby and lower-cost work, and UV for specialised plastics and glass. Industrial laser guides consistently recommend matching the laser family to the material family first, then choosing the form factor.
Galvo vs gantry
A gantry system moves the laser head on X and Y rails over a flat bed. It is slower but handles large formats and is the standard for CO2 machines used in craft and signage.
A galvo system uses mirrors to steer the beam at very high speed across a fixed field. Fibre lasers almost always use galvo heads, which is why they can mark thousands of parts per hour. The trade-off is a smaller working area.
MOPA fibre lasers
MOPA (Master Oscillator Power Amplifier) fibre lasers add pulse-width control on top of the standard fibre laser parameters. That extra variable allows colour marking on stainless steel and titanium — a useful capability for jewellery and premium product branding.
For a practical overview of machine types and what they handle, the Subliblanks guide to laser engraver machines covers the main options available to UK buyers.
What materials can you engrave?
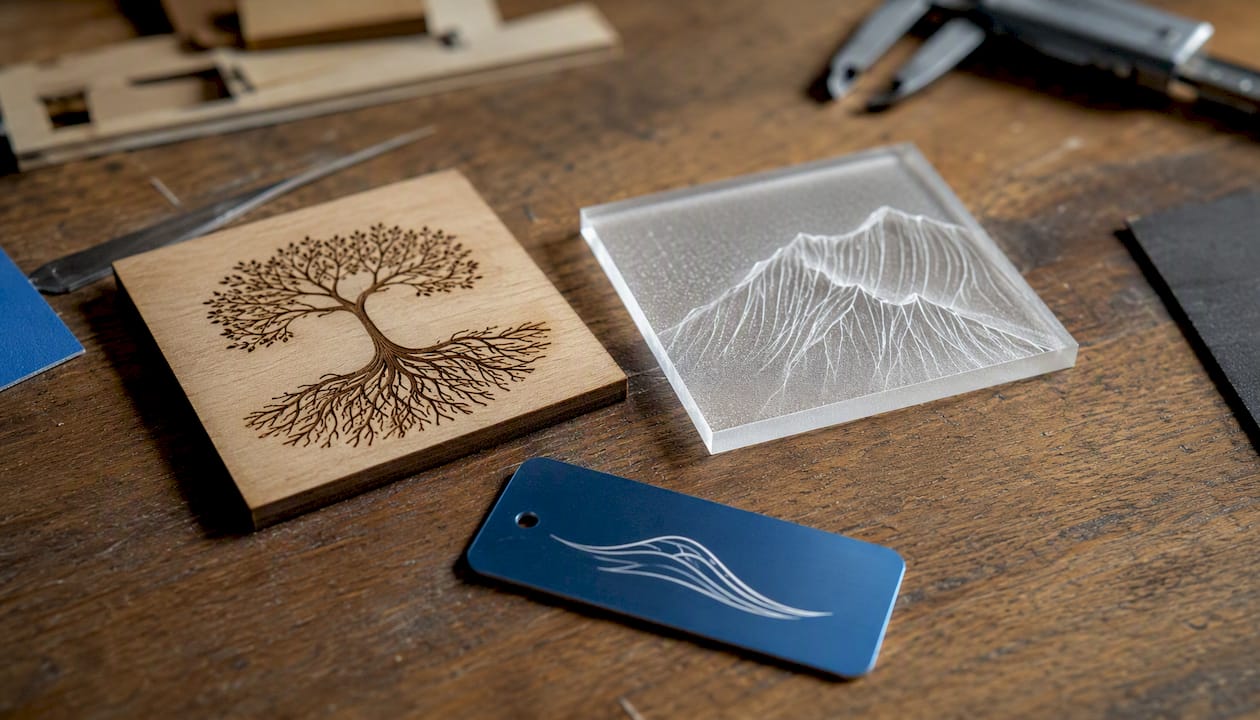
Most common materials can be engraved, but the result, finish, and machine needed differ significantly by material. Here is what to expect:
| Material | Recommended laser | Finish | Common uses | Notes |
|---|---|---|---|---|
| Wood | CO2, diode | Dark brown char, tactile depth | Plaques, gifts, signage | Grain affects consistency; mask with tape to reduce scorching |
| Acrylic | CO2 | Frosted white, clean edge | Signage, awards, displays | Cast acrylic engraves better than extruded |
| Anodised aluminium | CO2, fibre | High-contrast white mark | Tumblers, tags, panels | CO2 removes anodising layer; fibre marks bare metal |
| Bare steel / stainless | Fibre | Oxidised dark mark or colour (MOPA) | Industrial parts, jewellery | CO2 cannot mark bare metal without coating |
| Glass | CO2, UV | Frosted, micro-fracture | Glassware, awards | Fragile; use low power and multiple passes |
| Leather | CO2, diode | Dark brown char | Wallets, belts, bags | Natural leather engraves cleanly; PU leather varies |
| Stone / slate | CO2 | Light frosted ablation | Coasters, plaques | Slow speed, multiple passes for depth |
| Fabric / textiles | CO2, diode | Ablated surface, cut edges | Patches, denim, felt | Test for synthetic content before running |
| Coated metals | CO2 | Contrasting mark through coating | Trophies, branded items | Result depends on coating type and thickness |
For a deeper look at which blanks perform best under engraving, the Subliblanks guide to laser-engravable materials covers material-specific preparation and compatibility.
Safety note: Never engrave PVC or any chlorinated plastic. The process releases hydrogen chloride gas, which is toxic and corrosive to both the operator and the machine. Check the material safety data sheet (MSDS) before engraving any unfamiliar plastic.
Pro Tip: For cylindrical items — tumblers, bottles, pens — you need a rotary attachment. This replaces the flat bed with a set of rollers that rotate the workpiece in sync with the laser’s Y-axis movement, keeping the focal distance constant around the curve.
Leather and wood both benefit from masking tape applied before engraving. The tape catches residue and smoke staining, leaving a cleaner edge when peeled away.
Where is laser engraving used?
Engraved marks are physically part of the material, so they survive wear, heat, and cleaning that would destroy ink or labels. That permanence is the reason Thomas Publishing’s industry reference identifies laser engraving as the preferred method wherever durable marks are required — from jewellery to aerospace.
Common applications span three broad scales:
Hobby and craft
- Personalised gifts: keyrings, photo plaques, wooden signs
- Custom jewellery and accessories
- Art prints on wood, slate, and leather
- Decorative items for markets and online shops
Small business and trade
- Branded merchandise: tumblers, notebooks, phone cases
- Trophies and awards
- Signage and nameplates
- Wedding and event stationery (place cards, favours)
- Custom packaging inserts
Industrial and commercial
- Serial numbers and part identification on metal components
- QR codes and barcodes for traceability
- Medical device marking (where depth and permanence are regulated)
- PCB identification and electronics labelling
- Aerospace component marking
Laser-engraved marks are physically part of the material — unlike ink labels, they cannot peel, fade, or be removed without damaging the substrate itself. For businesses where traceability is a compliance requirement, that permanence is not a nice feature; it is the specification.
For businesses considering laser engraving as a revenue stream, the Subliblanks article on laser engraving in business growth sets out the commercial case clearly.
Production environments that need to track engraved parts through a workflow can benefit from production tracking software that integrates with permanent marking processes.
What are the core components of a laser engraver?
A laser system is, at its simplest, a laser source plus optics plus a motion controller plus workholding plus exhaust and cooling. Understanding each part helps you set up correctly and diagnose problems when they arise.
Key components
- Laser source: the tube (CO2) or module (diode/fibre) that generates the beam. Wattage determines maximum cutting and engraving depth.
- Mirrors and focusing lens: direct and concentrate the beam to the focal point. Dirty optics are the most common cause of degraded results.
- Galvanometer scan head (fibre/UV machines): two motorised mirrors that steer the beam at high speed without moving the whole head assembly.
- Gantry and stepper motors (CO2/diode machines): the X/Y rail system that moves the laser head across the bed.
- Bed / worktable: honeycomb or slat surface that supports the workpiece and allows fumes to pass through.
- Controller and driver board: interprets the design file and translates it into motor movements and laser pulses.
- Exhaust and filtration: removes fumes and particulates. Non-negotiable for safe operation indoors.
- Cooling system: water cooling (larger CO2 tubes) or air cooling (smaller diode and fibre modules) keeps the laser source within operating temperature.
First-run setup checklist
- Clean the bed and remove any debris from the previous job.
- Set the correct focal distance using the manufacturer’s focus tool or a test burn.
- Secure the workpiece so it cannot shift during the job.
- Load and position the design file in the driver software.
- Run a low-power frame trace to confirm placement before engraving.
- Confirm the exhaust is running and the filtration is in place.
- Run a small test patch at your intended settings.
- Run the full job with the machine attended.
Pro Tip: For cylindrical work, check that the rotary attachment’s roller spacing matches your workpiece diameter. An incorrectly spaced rotary causes the image to stretch or compress around the curve — a problem that is immediately obvious but wastes a blank.
For workholding strategies on small or irregular parts, advanced workholding techniques from CNC practice translate well to laser engraving fixtures.
How does the software and workflow operate?
The workflow is: prepare artwork → import to driver → position and focus → set power/speed/frequency/DPI → run test → run job. KEYENCE’s process guide confirms that beginners commonly use CorelDraw, Adobe Illustrator, or Inkscape to create files before importing them into the machine’s driver software.
File formats
- SVG, DXF, AI: vector formats for outlines, text, and line engraving. Use these for logos and text.
- PDF: can contain both vector and raster elements; check how your driver handles it.
- PNG, BMP, JPG: raster formats for photographs and shaded artwork. PNG is preferred for transparency support.
Step-by-step workflow
- Create or source your artwork in the correct format (vector for outlines, raster for photos).
- Import the file into your driver software (LightBurn, xTool Creative Space, RDWorks, EzCad, or similar).
- Set the canvas size to match your machine’s working area.
- Position the design on the canvas relative to your workpiece origin.
- Set focus: either manually with a focus tool or via autofocus if your machine supports it.
- Assign power, speed, frequency, and DPI to each layer or colour in the file.
- Run a low-power frame pass to check alignment.
- Run a small test patch at full settings on a scrap piece of the same material.
- Run the full job, staying present throughout.
Sample starting parameters
These are starting points only. Always test on your specific material before running a production job.
Pro Tip: For vector line engraving, set your stroke to hairline (0.001mm or “hairline” in CorelDraw). Any stroke with a visible width will be interpreted as a filled shape and engraved as a raster fill, not a single line pass.
For a full step-by-step process guide, the Subliblanks laser engraving process guide covers the workflow from artwork to finished part.
Safety, ventilation, and UK best practices
Adequate ventilation, correct material choices, and fire procedures are non-negotiable when running a laser engraver. The risks are real: fumes from engraving wood, acrylic, and coated materials include particulates, volatile organic compounds, and in some cases toxic gases. A machine left unattended is a fire risk.
Practical safety checklist
- Fume extraction: use an inline exhaust fan ducted outside, or an active carbon filtration unit rated for laser fumes. A domestic extractor fan is not sufficient.
- Material safety data sheets: check the MSDS for every material before engraving it. If it contains PVC, chlorine, or halogens, do not engrave it.
- Fire extinguisher: keep a CO2 or dry powder extinguisher within reach. Never leave the machine running unattended.
- Machine interlocks: most enclosed machines have a lid interlock that stops the laser if the cover is opened. Do not bypass it.
- PPE: laser safety glasses rated for your machine’s wavelength are required if the beam path is not fully enclosed. CO2 wavelength (10,600nm) requires different protection from diode (400–980nm) or fibre (1,064nm).
- Electrical safety: follow the manufacturer’s installation guidance. Larger CO2 machines may require a dedicated circuit.
UK-specific guidance
Machines sold in the UK should carry a CE or UKCA declaration of conformity. The Health and Safety Executive (HSE) publishes guidance on laser safety in workplaces, including classification requirements under BS EN 60825-1. Most desktop and prosumer machines are Class 1 when enclosed (safe under normal use) but Class 4 with the lid open or on open-frame diode machines. Treat any open-frame machine as Class 4 and use appropriate eye protection at all times.
Environmental considerations
Laser engraving produces fine particulates, resin dust, and in some cases hazardous offcuts (coated metals, treated woods). Hazardous material offcuts — anything containing heavy metals, coatings, or halogenated compounds — should be treated as controlled waste and disposed of via a licensed contractor, not in general waste.
Can a beginner use a laser engraver, and what does it cost?
Yes — many models are genuinely accessible to beginners, particularly diode machines and enclosed CO2 desktop units. The learning curve is real but manageable. The main variables are the materials you want to work with and the volume you intend to produce.
UK cost brackets
- Desktop / entry-level (diode): typically under £500. Suitable for wood, leather, and some plastics. Open-frame designs require more safety awareness. Good for hobbyists and low-volume craft sellers.
- Prosumer (enclosed CO2 or higher-wattage diode): roughly £500–£3,000. Handles a wider material range, faster throughput, and better safety features. The right choice for most small UK businesses starting out.
- Industrial (fibre, high-wattage CO2, galvo systems): £3,000 upwards, often significantly more. Designed for production volumes, metal marking, and regulated applications.
What drives price upward: higher wattage, galvo scan heads, enclosed safety housing, autofocus, rotary included, CE/UKCA certification, and UK-based aftercare.
Beginner checklist before buying
- Confirm which materials you need to engrave and match the laser family accordingly.
- Assess your workspace: ventilation, power supply, and available bench space.
- Check whether the supplier offers UK-based technical support and spare parts.
- Download the driver software before buying and check whether it runs on your computer.
- Look for a machine with an active user community — forums and YouTube tutorials accelerate the learning curve significantly.
For one-off custom work before committing to a machine, ordering from a maker is a practical route. Providing the object and material, exact text or image files, quantities, and deadlines gives a maker everything needed to produce the job without rework.
Pro Tip: Buy from a supplier who stocks consumables and spare parts in the UK. Import delays on a replacement lens or laser module can halt production for weeks. Subliblanks stocks xTool machines and accessories with UK-based support.
For buyer guidance on which machine families suit UK small businesses, the Subliblanks laser engraving tools buyer’s guide is a practical starting point.
A practical material test: how settings affect results
Testing is the only reliable way to dial in settings for a given machine and material. Manufacturer datasheets give starting points; your specific machine, lens condition, material batch, and ambient temperature all shift the result. Industrial laser guides consistently recommend keeping a test log that correlates power, speed, and frequency with the observed finish and depth.
Illustrative test matrix
These figures are illustrative starting bands from trade practice. Your machine and material will vary.
How to run a test
Set up a grid on a scrap piece of the same material. Run the grid, photograph it, and note the settings that produced the best result. Repeat when you change material batches, clean the lens, or adjust the focus distance.
The test matrix is not a one-time exercise. Lens condition, material batch variation, and even humidity affect results. Keeping a dated log per material means you can reproduce a result months later without starting from scratch.
Pro Tip: Keep a physical sample card for each material and settings combination — a small engraved tile or strip with the settings written on the back. A digital log is useful; a physical reference you can hold next to a new blank is faster.
For practical tips on preparing blanks and getting consistent results, the Subliblanks guide to engraving laser blanks covers finishing and workshop technique for UK makers.
Why small UK businesses are adopting laser engraving
From a trade wholesaler’s vantage point, the demand for laser engraving equipment among small UK businesses has been steady and growing. The reasons are consistent: personalisation commands a premium, engraved marks are permanent, and the consumable cost per unit is low once the machine is paid for.
The business case is straightforward. A laser engraver reduces the need for outsourcing personalisation, shortens turnaround times, and opens upsell opportunities on existing product lines. A print shop that already produces sublimated mugs can add engraved slate coasters or leather keyrings with the same customer base and no additional marketing spend. The repeatability of laser engraving also means that a settings profile dialled in once can be reproduced reliably across hundreds of units — something that matters enormously when a corporate client orders a run of branded gifts.
Traceability is a growing driver too. Small manufacturers supplying larger businesses are increasingly asked to mark parts with serial numbers or QR codes. Laser engraving is the most cost-effective way to meet that requirement without outsourcing to a specialist.
For a fuller look at the business case, the Subliblanks guide to why small businesses use laser engraving machines sets out the efficiency and margin arguments in detail.
Subliblanks supplies xTool laser engravers and engravable blanks for UK trade buyers
Subliblanks stocks xTool laser engraving machines alongside a full range of laser-engravable blanks — tumblers, slates, leather goods, wooden plaques, and more — all available with no minimum order quantity. Whether you are setting up your first desktop machine or scaling a personalisation business, the catalogue covers entry-level diode machines through to trade-grade CO2 units, plus the consumables and accessories to run them.

No minimum order means you can test a new blank format before committing to stock. UK-based support means spare parts and technical guidance are available without import delays. Browse the full range at Subliblanks and place your first order today.
Sources
Manufacturer datasheets and HSE guidance are the most reliable references for safety and exact settings — always check the documentation specific to your machine model and the materials you are working with.
- Laser Engraving: Definition, Process, Materials, and Types
- Industrial Laser Engraver Guide: Types, Uses & Buying Tips
- Laser engraving - Wikipedia
When reading a manufacturer datasheet, look for: rated wattage and wattage range, pulse options (CW vs pulsed, MOPA if applicable), recommended materials list, focal length and spot size, and CE/UKCA declaration of conformity. Those six data points tell you whether a machine suits your intended application before you buy.
Recommended
- Understanding laser engraver machines: a practical guide – SubliBlanks Ltd
- Why use laser engraving machines: a guide for UK small businesses – SubliBlanks Ltd
- The role of laser engraving in business growth – SubliBlanks Ltd
- Laser engraving process guide for beginners and small businesses – SubliBlanks Ltd


