



Laser engraving process guide for beginners and small businesses
TL;DR:
- Laser engraving removes tiny layers of material to create permanent, ink-free marks on various surfaces.
- Using ventilation and checking material safety data sheets are essential safety steps for UK hobbyists and small businesses.
Laser engraving removes microscopic layers of material using a focused beam of light, burning or ablating the surface to leave a permanent, ink-free mark. For most beginners in the UK, a desktop CO2 laser is the most practical starting point: it handles wood, acrylic, leather, and coated metals without the cost or complexity of a fibre system. Before you switch anything on, the single most important thing to sort is ventilation. Laser engraving produces fumes and particulates that vary from mildly irritating to genuinely hazardous depending on the material. Get extraction working first, check the material’s MSDS (Material Safety Data Sheet), and treat every new material as unknown until you have done both.
Table of Contents
- What is laser engraving, and how does it differ from marking, etching, and cutting?
- How does laser engraving work, and which laser type should you choose?
- Which materials can you engrave, and what do you need to know about each?
- What does a step-by-step laser engraving workflow look like?
- What do laser settings mean, and where should you start?
- How do you control engraving depth, and what finishing options are available?
- What safety measures and UK compliance steps do you need in place?
- How do you maintain your machine and fix common problems?
- How long do jobs take, and what does it cost to run a laser engraver in the UK?
- UK starter checklist: what to buy, test, and record first
- Key takeaways
- What beginners consistently get wrong (and how to avoid it)
- Subliblanks: starter kits, safe blanks, and UK-ready laser machines
- Useful references and where to read more
What is laser engraving, and how does it differ from marking, etching, and cutting?
Laser engraving, marking, etching, and cutting are related but distinct processes, and mixing them up leads to wrong settings and poor results.
- Laser engraving removes material to create a recessed mark with measurable depth, typically 100 µm and beyond. The surface is physically altered.
- Laser marking is the broader category. It includes colour change, charring, foaming, and chemical alteration without necessarily removing significant material.
- Laser etching is a subset of marking where the surface melts slightly and re-solidifies, raising a slightly textured mark rather than cutting into it.
- Laser cutting drives the beam all the way through the material, separating it rather than marking it.
When to choose which process:
- Choose engraving when you need depth, tactile texture, or a mark that survives heavy use (trophies, personalised gifts, industrial parts).
- Choose marking when you want a surface-level colour change without removing material, common on anodised aluminium or stainless steel with a marking compound.
- Choose cutting when you need to shape or separate the material entirely, such as cutting acrylic letters or wooden shapes.
The practical difference that catches beginners out: engraving takes longer and uses more power than marking, but it produces a result you can feel with your fingertip. Marking is faster but shallower.
How does laser engraving work, and which laser type should you choose?
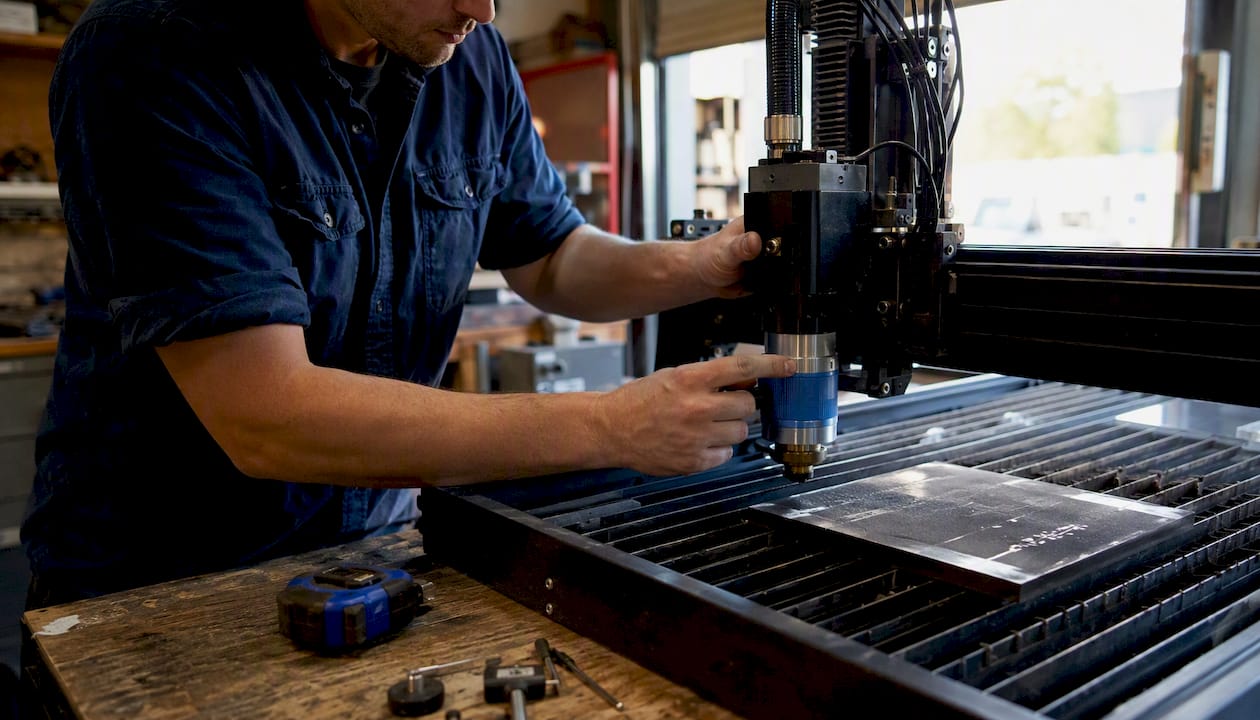
A laser engraver concentrates light into a tiny focal spot, typically less than a fraction of a millimetre across. At that point, energy density is high enough to vaporise or ablate the material. The controller moves the beam across the surface in one of two patterns: raster (back-and-forth lines, like a printer’s printhead) for filled areas and photographs, or vector (following a path) for outlines and cuts. Raster mode is what most engraving jobs use.
CO2, fibre, and diode lasers compared
CO2 lasers operate at a wavelength of around 10,600 nm, which organic materials absorb well. Wood, leather, acrylic, MDF, paper, and most non-metals are natural fits. CO2 lasers work well on organic and many non-metal materials; they struggle on bare reflective metals without a marking compound. For most UK hobbyists and small businesses making personalised gifts or signage, a CO2 machine is the right first choice.
Fibre lasers operate at around 1,064 nm, a wavelength that bare metals absorb far more readily. They are the standard for permanent direct marking on stainless steel, aluminium, brass, and titanium. The trade-off is cost: entry-level fibre systems typically start higher than comparable CO2 machines, and they do not engrave wood or acrylic well.
Diode lasers are the most affordable entry point. Modern diode machines have improved significantly and can handle wood, leather, and some coated metals at lower power. They are open-frame by default, which raises ventilation and eye-safety demands, and their beam quality is generally lower than CO2 at equivalent power. Good for testing the hobby before committing to a larger machine.
Lenses, focal length, and working area
Lens selection affects both detail and working field size: a shorter focal length produces a smaller dot for finer detail but reduces the area you can engrave in one pass. A longer focal length gives a larger working area with slightly less resolution. Match the lens to your typical job. For small detailed items like jewellery tags or keyrings, a short focal length wins. For large plaques or signage panels, a longer focal length or a larger machine bed is more practical. Understanding laser engraver machines in detail before buying saves expensive mistakes.
Which materials can you engrave, and what do you need to know about each?
Material choice is where most beginner errors happen. The same machine setting that produces a crisp result on one wood species can char another beyond recognition.
Wood
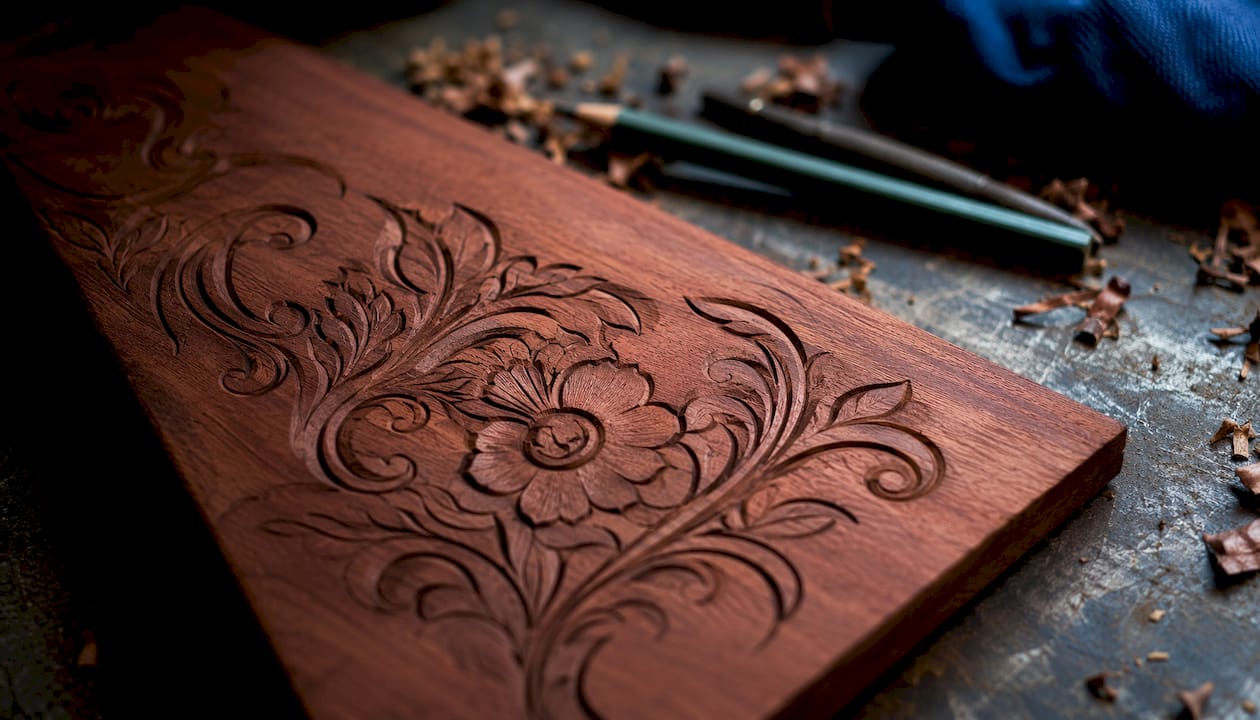
Wood is forgiving and produces satisfying contrast. Lighter woods like basswood, alder, and maple engrave cleanly with good contrast. High-resin species such as pine need lower dwell time and stronger air assist to prevent smearing and surface charring. Dense hardwoods like oak or walnut often need higher power or extra passes. Always test a small corner first; grain direction and moisture content both affect the result. For a practical overview of laser engravable materials including wood types, Subliblanks has a dedicated guide.
Acrylic
Cast acrylic engraves to a frosted white finish that looks excellent on coloured stock. Extruded acrylic tends to engrave less cleanly and can melt rather than ablate. Use masking tape on the surface to reduce smoke residue, and peel it off after the job. Backfilling engraved acrylic with paint or resin is a popular finishing technique for awards and signage.
Leather
Genuine leather engraves well at moderate power, producing a brown-to-dark mark with a slight texture change. Faux leather (PU) can work but check the MSDS first: some synthetic leathers contain chlorinated compounds. Keep power moderate and speed higher to avoid burning through thin stock.
Glass
Glass requires a different approach. The laser fractures the surface rather than ablating it cleanly, which can produce a frosted but slightly rough finish. Applying a thin layer of washing-up liquid or specialist glass engraving compound before the job dampens thermal shock and improves the result. Reduce power and increase speed compared to wood settings.
Metals
Bare metals generally need a fibre laser for direct engraving. On a CO2 machine, anodised aluminium engraves well because the anodising layer absorbs the beam and changes colour. Bare stainless steel on a CO2 machine requires a marking compound (such as Cermark or a dry moly spray) applied to the surface before engraving; the compound bonds to the metal under heat and is wiped away after.
Paper, card, and MDF
Paper and card engrave at very low power and high speed. MDF is popular for signs and decorative items but produces significant fumes from the adhesive binders. Always run MDF with strong extraction. Laser-rated MDF, which uses lower-formaldehyde binders, is worth seeking out for regular production work.
Plastics and the PVC warning
This is the most important hazard in the materials list. PVC and other chlorinated plastics produce hazardous, corrosive gases when vaporised. These gases damage the machine’s optics and metalwork, and they are harmful to breathe even in small quantities. Never engrave any plastic without first checking the MSDS to confirm it contains no chlorine. Acrylic (PMMA), HDPE, and polypropylene are generally considered laser-safe; PVC is not. If you cannot identify the plastic, do not engrave it.
Pro Tip: Mask acrylic and wood surfaces with transfer tape before engraving. It catches smoke residue and peels off cleanly, saving you a lengthy cleaning session.
What does a step-by-step laser engraving workflow look like?
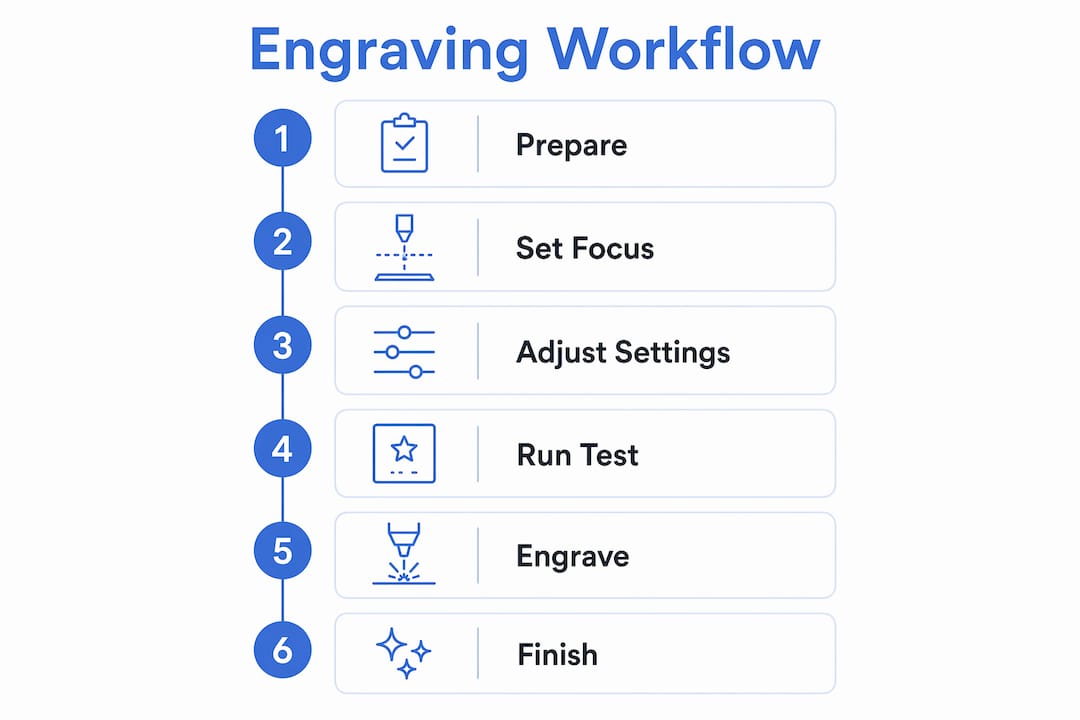
Laser engraving follows five core steps: design preparation, material setup, parameter setting, focusing, and running the job. Here is the full sequence for a beginner.
-
Prepare your design file. Vector files (SVG, AI, DXF) give the cleanest results for outlines and text. Raster images (PNG, JPG) work for photographs and filled areas but should be at least 300 DPI at the intended output size. Convert all text to outlines or curves before exporting so fonts do not shift between computers. Set stroke weights to hairline for cut lines.
-
Confirm your material and check the MSDS. Before fixing anything to the bed, verify the material is laser-safe. Check the supplier’s MSDS for hazardous compounds, especially for plastics, coated metals, and composite boards.
-
Secure the material. Use honeycomb pins, clamps, or double-sided tape to stop the material moving mid-job. Any movement produces a blurred or double-imaged result. For repeat jobs, make a simple jig from scrap material to position pieces consistently.
-
Set up the machine and focus the beam. Set your origin point (usually the top-left corner of the design). Focus the beam using the manufacturer’s focus tool or autofocus if available. Correct focus is the single biggest factor in edge sharpness.
-
Run a test grid first. Before committing to a full job, run a small power-and-speed grid on a scrap piece of the same material. A 3×3 or 4×4 grid of small squares at varying power and speed settings takes a few minutes and saves wasted material. Treating the machine like a high-precision digital printer with well-optimised files and recorded settings makes repeatable results much easier.
-
Run the job with ventilation active. Switch on extraction before starting. Never run the laser without airflow. Stay nearby for the first run on any new material.
-
Clean and finish. Remove masking tape, brush away debris, and apply any finishing treatment (stain, sealant, paint fill). Log the settings that worked.
Pro Tip: Change only one variable at a time when tuning settings. If you adjust both power and speed simultaneously, you will not know which change produced the improvement.
What do laser settings mean, and where should you start?
Power, speed, DPI, passes, and focus all interact. Change one at a time and you will understand what each does.
- Power (W or %): Controls how much energy hits the material per unit area. Higher power removes more material but risks charring or burning through.
- Speed (mm/s): Controls how fast the head moves. Slower speed means more dwell time and more material removal. Speed and power work together: high power at high speed can equal low power at low speed.
- DPI (dots per inch) / frequency (Hz): For raster engraving, DPI sets how many lines the beam traces per inch. Higher DPI gives finer detail but increases job time. For vector/cutting, frequency sets how many pulses per second the laser fires.
- Passes: Running the job multiple times deepens the engrave without needing to increase power, which reduces charring risk. More passes at lower power is generally better for deep engraving.
- Focus position: The beam must be focused at the material surface. For deep engraving, the focal point climbs relative to the remaining surface as material is removed; adjust focus between passes or use automatic Z-adjust.
- Air assist: A jet of air directed at the focal point clears debris and reduces flare-ups. Use it on wood, acrylic, and MDF. Reduce or disable it on glass to avoid thermal shock.
Starter settings table for common materials (CO2 laser, 40–60 W)
These are starting points only. Always run a test grid on your specific material before a production job. Material behaviour varies by density, coating, colour, and composition, so treat these as a baseline, not a guarantee.
| Material | Power (%) | Speed (mm/s) | DPI | Passes | Notes |
|---|---|---|---|---|---|
| Basswood / alder (3 mm) | 20–30 | 300–400 | 300 | 1 | Light air assist; mask surface |
| MDF (3 mm) | 30–40 | 250–350 | 300 | 1–2 | Strong extraction essential |
| Cast acrylic (3 mm) | 15–25 | 350–450 | 300 | 1 | Mask surface; no air assist for engraving |
| Leather (genuine, 2–3 mm) | 20–30 | 400–500 | 300 | 1 | Test on scrap; avoid PU without MSDS check |
| Glass | 20–30 | 300–400 | 300 | 1 | Apply damp cloth or compound; reduce air assist |
| Anodised aluminium | 40–60 | 200–300 | 500 | 1–2 | High DPI for fine detail; no air assist |
| Paper / card | 5–10 | 500–600 | 300 | 1 | Very low power; risk of ignition at higher settings |
Safety note: Coated metals and unknown plastics can produce toxic fumes at any power level. Always confirm the material composition via MSDS before running any job.
How do you control engraving depth, and what finishing options are available?
Depth is a function of power, speed, and passes working together. Shallow engraving (under 0.5 mm) is sufficient for most decorative work: logos on wood, text on acrylic, photographs on leather. Deep engraving, commonly defined as greater than 0.5 mm, requires higher power and multiple passes, and often needs focus adjustment through the job to maintain precision as the surface drops away.
For most hobby and small-business work, one or two passes at moderate power produces the best balance of speed and quality. Going deeper than 1 mm on wood or acrylic is possible but time-consuming and rarely necessary for personalised gifts or signage.
Finishing options after engraving:
- Brushing and cleaning: Remove char and debris with a soft brush or compressed air. For wood, a stiff brush followed by a tack cloth works well.
- Staining engraved wood: Apply wood stain or ink to the engraved area, let it soak in, then wipe the surface clean. The recessed engraving retains colour while the surface wipes clean.
- Paint-filling acrylic: Mask the engraved acrylic, apply acrylic paint or enamel to the engraved area, let it cure, then remove the masking. Produces a sharp, professional two-colour finish.
- Sealing wood and leather: Apply a clear lacquer, wax, or oil to protect the surface and enhance contrast. For outdoor items, use an exterior-grade sealant.
- Backfilling acrylic: Pour two-part resin or epoxy into deep engraved areas for a filled, flush finish. Popular for awards and plaques.
When durability matters more than appearance, consider whether a mechanical or chemical finishing step is more appropriate than additional laser passes. A sealed and stained wooden plaque will outlast an unsealed deeply engraved one in most conditions.
What safety measures and UK compliance steps do you need in place?
Extraction and ventilation are as important as correct machine settings, and for plastics and composites, extraction is often the limiting factor in what you can safely process. In the UK, laser engraving in a workshop or business context falls under the Control of Substances Hazardous to Health (COSHH) Regulations, administered by the Health and Safety Executive (HSE).
Essential safety checklist:
- Obtain the MSDS for every material before engraving it. Check for chlorinated compounds, heavy-metal coatings, and formaldehyde-based binders.
- Install a fume extraction unit that captures at source, ideally ducted to the outside or fitted with a multi-stage filter (HEPA plus activated carbon). For plastics, add specialist gas scrubbing if the material produces acid gases.
- Use laser-appropriate eye protection for open-beam setups. Enclosed machines with interlocked lids provide passive protection; open diode lasers require wavelength-specific OD-rated goggles.
- Keep a fire extinguisher (CO2 type) within reach. Never leave the machine unattended during a job on a new material.
- Conduct a COSHH assessment for your workshop. Record the substances you process, the controls in place, and the residual risk. The HSE provides free guidance and templates at hse.gov.uk.
- Store hazardous waste (used filters, contaminated masking tape from PVC-adjacent jobs) in sealed containers and dispose of via a registered waste carrier.
- Post an emergency shutdown procedure near the machine. Know how to kill power quickly.
For enclosed CO2 machines, the interlocked lid is your primary engineering control. For open diode machines, the operator is responsible for maintaining a safe exclusion zone and wearing appropriate eye protection at all times.
How do you maintain your machine and fix common problems?
A clean machine produces consistent results. Most beginner problems trace back to dirty optics, a loose belt, or incorrect focus rather than a fundamental settings error.
Maintenance schedule
Daily: Wipe the lens and mirror surfaces with a lens tissue and isopropyl alcohol (IPA). Check the air-assist nozzle for debris. Empty the extraction pre-filter if it collects debris.
Weekly: Check belt tension on X and Y axes. A loose belt causes banding (regular horizontal or vertical lines across the engraving). Clean the rails and apply a light machine oil or dry lubricant. Check the exhaust filter loading.
Monthly: Inspect the laser tube (CO2 machines) for discolouration or coolant issues. Check all electrical connections. Replace the exhaust filter if airflow has dropped noticeably.
Troubleshooting quick reference
Banding (regular lines across the engraving): Usually a loose or worn belt, or inconsistent motor stepping. Check belt tension first, then check the driver settings in the software.
Inconsistent depth: Focus drift is the most common cause. Re-check focus, especially on warped or uneven material. Also check for a dirty lens reducing power delivery.
Charring or burning: Power too high or speed too low for the material. Increase speed, reduce power, or add more passes at lower settings. For wood, increase air assist.
Poor contrast on wood: Often a species or moisture issue. Denser, drier wood produces better contrast. Try a slightly higher power or slower speed.
No mark on metal (CO2 machine): Bare metal reflects CO2 wavelengths. Apply a marking compound and re-run, or switch to a fibre laser for direct metal marking.
Keep a settings log for every material you run. A simple spreadsheet with material, machine, power, speed, DPI, passes, and result notes takes seconds to update and saves hours of re-testing.
How long do jobs take, and what does it cost to run a laser engraver in the UK?
Job time depends on the engraving area, DPI, and speed. A small logo on a keyring at typical engraving resolution usually takes a few minutes. A full A4 photograph engraved on wood at high resolution can take up to an hour or more. Deep multi-pass jobs on large areas can run for extended periods.
Rough cost brackets for UK operators:
- Hobby setup (desktop CO2, 40 W, home workshop): Machine cost typically ranges from several hundred to over a thousand pounds. Electricity costs are low per hour at 40 W power consumption. Consumables such as lens tissues and filters add modest ongoing costs. Blanks are the main variable cost.
- Small business setup (60–100 W CO2, dedicated workspace): Higher-end machines for small business use can cost several thousand pounds, plus additional costs for extraction, optics, and safety equipment. Monthly running costs including electricity, consumables, and filter replacement are modest but worth budgeting.
Worked example: engraved wooden plaque (A5 size)
A plain laser-ready wooden plaque blank may cost a few pounds from trade suppliers. Electricity for a 15-minute job at 60 W is negligible. Extraction filter depreciation and machine depreciation add a small additional cost per job. Total material and running cost per plaque is modest, allowing a healthy margin on retail pricing. A small business selling personalised plaques at £15–£25 each has a healthy margin, provided volume justifies the machine investment. For a deeper look at how laser engraving supports business growth, Subliblanks has published a practical overview.
UK starter checklist: what to buy, test, and record first
Getting started in the right order prevents the most common and expensive beginner mistakes.
Machine and workspace priorities:
- Choose an enclosed CO2 machine if you plan to engrave a variety of materials including acrylic and MDF. The enclosed body reduces fume escape and provides passive eye protection.
- For a tight budget or outdoor/portable use, a diode machine is a viable start, but budget for a proper extraction unit and OD-rated goggles from day one.
- Confirm your workspace has adequate ventilation before the machine arrives. A window fan is not sufficient for regular production work.
- Keep a CO2 fire extinguisher and a fire blanket within arm’s reach of the machine.
- Order spare lenses and mirrors when you buy the machine. Optics degrade and break; having spares avoids downtime.
Three-step starter test protocol:
- Sample grid: Cut a 4×4 grid of 10 mm squares on a scrap piece of your intended material. Run each row at a different power level and each column at a different speed. Photograph the result and note the settings.
- Incremental adjustment: Identify the best-looking square. Run a second, finer grid around those settings (±5% power, ±25 mm/s speed) to narrow in on the optimum.
- Record and repeat: Log the winning settings in a spreadsheet: material, supplier, machine, date, power, speed, DPI, passes, focus distance, air assist on/off, and result quality. Repeat for every new material or blank batch.
Sourcing safe blanks in the UK:
Always request the MSDS from your blank supplier before ordering. Choose suppliers who stock laser-rated products with confirmed material compositions. Subliblanks supplies laser-engraveable blanks for UK makers with material guidance, and carries xTool laser engraving machines suited to both hobby and small-business use. Buying blanks and machines from the same trade supplier simplifies MSDS access and compatibility checks.
Key takeaways
Laser engraving produces reliable, professional results when you match the laser type to the material, run a test grid before every new job, and treat extraction as non-negotiable rather than optional.
| Point | Details |
|---|---|
| Match laser to material | CO2 for wood, acrylic, and leather; fibre for bare metals; diode for budget entry-level work. |
| Run a test grid first | A small power-and-speed grid on scrap saves material and reveals the optimum settings before a production run. |
| Extraction before everything | Fume extraction must be active for every job; check the MSDS for every new material, especially plastics. |
| Log every setting | Record material, power, speed, DPI, passes, and result for every job to make results repeatable across batches. |
| Subliblanks for UK starters | Subliblanks supplies xTool laser machines, laser-engraveable blanks, and material guidance suited to UK hobby and small-business setups. |
What beginners consistently get wrong (and how to avoid it)
The most common mistake is not the settings. It is skipping the test grid and going straight to a full job on an expensive blank, then blaming the machine when the result is charred or faint. Every experienced engraver runs tests. Every single one.
The second mistake is underestimating ventilation. A small desktop machine in a spare bedroom with the window open is not a safe setup for regular MDF or acrylic work. The fumes are not just unpleasant; over time, they are genuinely harmful. A proper extraction unit with a HEPA and activated-carbon filter is not optional equipment for anyone running a machine more than occasionally.
The third thing that surprises most beginners is how much material behaviour varies between batches. A setting that worked perfectly on last month’s basswood blanks may produce a different result on a new batch from the same supplier, because moisture content, density, and surface treatment all shift. This is why the settings log matters. It is not bureaucracy; it is the difference between a repeatable business and a frustrating hobby.
The ‘treat it like printing’ mindset that Trotec Laser describes is genuinely useful here. Reliable drivers, standard file formats, and versioned setting logs make scaling from a single machine to a small production workflow far less painful than starting from scratch each time.
Subliblanks: starter kits, safe blanks, and UK-ready laser machines
Subliblanks is a UK trade wholesaler with no minimum order quantities, which means you can order a single machine, a small batch of blanks, and the extraction accessories you need without committing to bulk quantities you are not ready for.

The xTool laser engraving machines stocked by Subliblanks cover both enclosed CO2 and diode options, with models suited to hobby budgets and small-business production alike. Every blank in the range is laser-rated, and the team can point you to the right MSDS before you order. There is no guesswork about compatibility: the machines and blanks are selected to work together. Whether you are setting up your first workspace or scaling an existing personalisation business, browse the Subliblanks shop to see the current range of machines, blanks, and accessories, and place an order with no minimum quantity commitment.
Useful references and where to read more
These sources are worth bookmarking for safety guidance, material settings, and machine documentation.
- HSE COSHH guidance: The Health and Safety Executive’s COSHH pages cover risk assessment templates, substance hazard databases, and legal obligations for UK workshops. Start here for your COSHH assessment.
- HSE woodworking and dust guidance: Relevant for MDF and wood engraving; covers extraction performance requirements and wood dust exposure limits.
- Wikipedia: Laser engraving: A solid technical overview of the physics, machine types, and process variants. Useful for understanding terminology in machine manuals.
- Xometry: Laser engraving overview: Covers workflow, materials, and safety in a concise format; good for cross-referencing settings and process steps.
- Thunder Laser materials guide: Covers material-specific behaviour across a wide range of substrates with practical processing notes.
- Trotec material catalogue: Manufacturer-produced material catalogue with engraving depth, recommended usage, and suitability notes for a wide range of laser-rated materials.
- LaserPecker: laser-safe materials: Practical hazard notes on plastics and other materials, including the PVC warning and MSDS guidance.
This article is general information for educational purposes. For your specific materials, machine, and workspace, verify current HSE guidance and consult a qualified health and safety professional before beginning production work.


