



Badge production process: a step-by-step guide for small businesses
TL;DR:
- Badge production begins with custom metal sheets, evolving through precise tooling and stamping processes. Each stage depends on previous steps, making early error detection essential for quality badges and cost efficiency. The entire process typically takes five to fifteen working days from artwork approval.
Custom pin badges start from raw metal sheets, not pre-made blanks. Every professional badge goes through a precise sequence of tooling, stamping, finishing, and inspection before it reaches you. The core method is die stamping, also called coining, which presses a hardened steel die into metal to produce sharp, durable detail that casting simply cannot match. Understanding each stage helps you commission better badges, avoid costly redesigns, and know exactly what you are paying for.
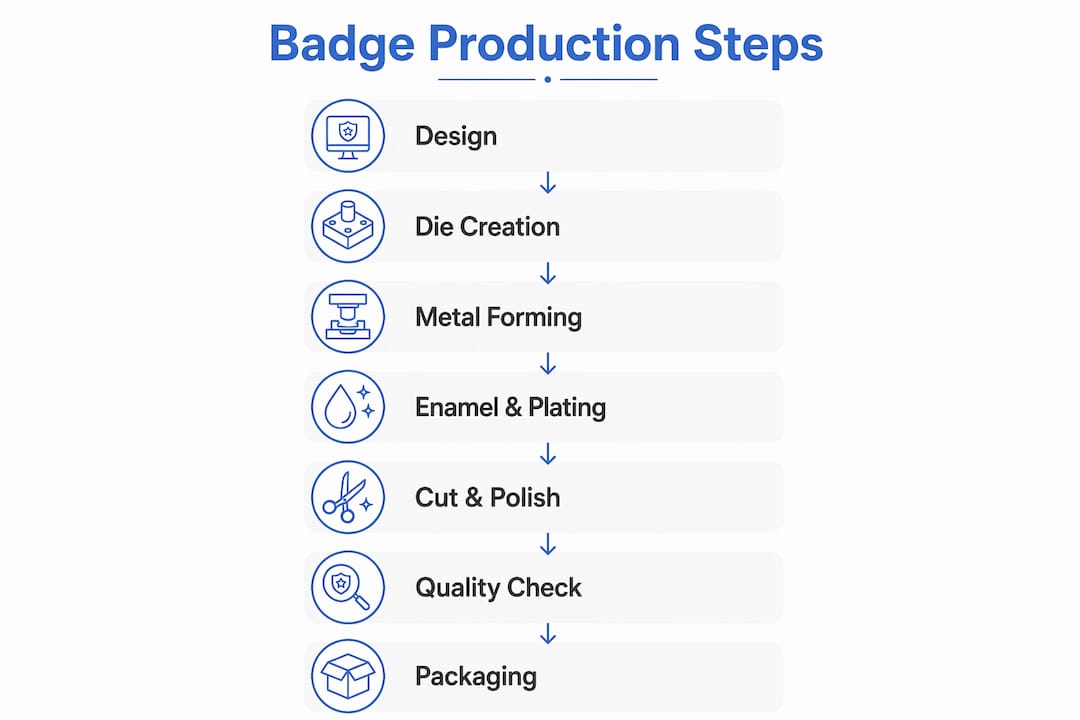
- Design and artwork approval
- Die and mould creation
- Metal stamping and trimming
- Attachment fitting
- Enamel or plating application
- Baking and curing
- Polishing and quality control
- Packaging and shipping
Pro Tip: Badge production is not a single-pass process. Each stage depends on the one before it, so errors caught early cost far less than those discovered after plating.
How the badge production process starts: design and artwork
Good badge design is not just about aesthetics. It must survive translation into metal. Manufacturers work with your logo or sketch and convert it into production-ready artwork, adjusting line weights, separating colours, and simplifying any detail that would be lost during stamping.
A common design mistake is submitting artwork with fine gradients, thin serifs, or complex layered graphics. These elements disappear under a hydraulic press. The fix is straightforward: bold outlines, clear colour separation, and no detail smaller than 1mm. Designers working with tools like Adobe Illustrator can export clean vector files that manufacturers accept without revision.
Once artwork is approved, it becomes the master reference for every subsequent stage. No production step begins until the client signs off on the final rendering.

Pro Tip: Ask your manufacturer for a digital proof overlaid on the actual badge dimensions before approving. What looks fine at A4 size can lose clarity at 25mm.
For a deeper look at badge design preparation, Subliblanks covers the key considerations for getting artwork right first time.
Die and mould creation: the foundation of every badge
The die is a block of hardened tool steel cut with a reverse relief of your badge design. A skilled die cutter carves every line, letter, and contour into softened steel, then the block is hardened to withstand thousands of press cycles. Alongside the main die, manufacturers produce trim tools, piercing tools, and marking devices needed to stamp and finish the badge shape.
The quality of this tooling directly determines the sharpness of the finished badge. A poorly cut die produces blurred edges and shallow detail that no amount of polishing can fix. Precision here is not optional.
“The art of faithfully recreating the original design in metal with such detail is what separates a quality badge from an ordinary one.” — V. H. Blackinton
Dies are typically stored after production, allowing repeat orders to skip this stage entirely. Many UK manufacturers retain moulds for up to two years, which reduces lead times and cost for reorders.
Metal forming: how stamping and die cutting shape the badge
Raw metal sheet, usually brass, zinc alloy, or iron, feeds into a hydraulic press. The press drops several tons of force onto the metal, squeezing it into the shape of the die. This process requires anywhere from 3 to 12 strikes per badge, depending on design complexity.
Between strikes, the metal is annealed: heated and slowly cooled to relieve internal stress. Without annealing, repeated impacts cause the metal to work-harden and crack, destroying fine detail. Once all strikes are complete, automatic power presses trim away excess material, leaving a clean edge.
- Sheet metal is fed into the hydraulic press
- The die stamps the design into the metal with multiple high-pressure blows
- Metal is annealed between strikes to prevent brittleness
- Excess material is trimmed using precision cutting tools
- The badge blank is inspected for edge quality before moving on
For a practical breakdown of metal forming techniques, Subliblanks covers the specifics of steel badge production in detail.
Enamel and plating: where colour and finish are applied
The sequence of enamel and plating differs depending on badge type, and getting it wrong ruins the finish.
| Badge type | Plating sequence | Enamel sequence | Surface result |
|---|---|---|---|
| Hard enamel | After enamel | Applied first, then fired | Flat, smooth, jewellery-like |
| Soft enamel | Applied first | Filled after plating | Recessed, textured feel |
| Printed badge | N/A | UV-LED or pad printing | Full-colour, photographic |
Hard enamel badges are fired in ovens at around 1,400°F, then stoned flush with the surrounding metal. Soft enamel skips the stoning step, leaving colour sitting slightly below the metal surface. UV-LED direct printing is now the preferred method for short-run printed badges, offering lower setup costs and the ability to print variable data across individual pieces.
Electroplating follows or precedes enamel depending on type. Badges are cleaned, wired, and immersed in plating solutions to apply gold, silver, black nickel, or antique bronze finishes. Pantone colour matching keeps enamel shades consistent across large runs.
Pro Tip: If your badge design includes photographic detail or gradients, a UV-LED printed badge will reproduce it far more accurately than enamel. Reserve hard enamel for bold, flat-colour designs.
Cutting, polishing, and fitting badge attachments
After stamping and initial finishing, intricate design details are cut or punched out using precision machinery. Any sharp edges are smoothed before polishing begins.
Polishing removes surface scratches left by grinding and stoning. Experienced polishers use rotating cotton wheels with abrasive compounds, working carefully around enamelled areas to avoid removing stamped detail. This stage is critical before plating, as any surface imperfection will show through the final finish.
Attachment fittings, including butterfly clutches, brooch pins, and magnets, are welded or brazed to the back of the badge at temperatures exceeding 1,500°F. This happens before enamel application because the heat required would destroy any colour already applied. For event and promotional badges, a range of badge attachment options affects both wearability and production cost.
For custom event badges where durability and presentation matter equally, personalised badge solutions are worth exploring alongside pin badge options.
Quality control and shipping: the final stages
Industrial badge makers conduct multiple inspections throughout production, with a final check covering design fidelity, colour accuracy, plating consistency, edge smoothness, and attachment security. Any badge that fails is either corrected or remade.
Quality control checklist before dispatch:
- Design matches approved artwork at correct dimensions
- Enamel coverage is complete with no bare patches or air bubbles
- Plating is even with no discolouration or streaking
- Edges are smooth with no sharp burrs
- Attachment fitting is secure and correctly aligned
- No surface scratches visible after polishing
Once cleared, each badge is individually poly-bagged to protect the finish during transit. Backing cards and retail-ready boxes are available for presentation orders. Production timelines typically run 5 to 15 working days from artwork approval, depending on badge complexity and finish type.
Common mistakes and how to avoid them
Most production problems trace back to the design stage or material choices made before a single press strike.
- Overly complex artwork: Fine lines and small text disappear in metal. Simplify before submitting.
- Wrong metal for the finish: Zinc alloy suits most enamel badges; brass is better for high-end plating.
- Skipping annealing: Rushing press cycles without softening the metal causes cracking and lost detail.
- Applying enamel before fittings: Heat from brazing destroys enamel. Always fit attachments first.
- Poor polishing before plating: Plating amplifies surface defects rather than hiding them.
Pro Tip: Send a physical sample request before approving a full production run. A single prototype badge reveals fit, finish, and colour accuracy in a way no digital proof can.
Environmental and safety regulations in UK badge production
UK badge manufacturers operate under several regulatory frameworks. The Control of Substances Hazardous to Health (COSHH) regulations govern the handling of electroplating chemicals, including nickel and chromium compounds, which require proper ventilation, protective equipment, and waste disposal procedures. The Environment Agency sets limits on effluent discharge from plating baths, and non-compliance carries significant penalties.
The Restriction of Hazardous Substances (RoHS) directive, retained in UK law post-Brexit, restricts the use of lead, mercury, cadmium, and certain other substances in electrical and electronic equipment, which can affect badge components with electronic elements. REACH regulations similarly control chemical substances used in metal finishing. Responsible UK manufacturers hold relevant accreditations and can provide material safety data sheets on request.
Key takeaways
The badge production process moves from raw metal sheet through stamping, finishing, and inspection, with each stage building directly on the last.
| Point | Details |
|---|---|
| Die stamping is the standard | Professional badges use coining, not casting, for sharper detail and greater durability. |
| Attachment fittings go on first | Pins and clutches are brazed at over 1,500°F before any enamel is applied. |
| Enamel sequence varies by type | Hard enamel is applied before plating; soft enamel is filled after plating. |
| Production typically takes 5 to 15 working days from artwork approval, depending on badge complexity and the finish type. | Timeline depends on badge complexity and the finish type chosen. |
| Design simplicity protects quality | Fine gradients and thin text are lost in stamping; bold, flat artwork survives the process. |
Subliblanks supplies badge-making machines and supplies for small businesses and trade buyers, with no minimum order quantities. Whether you are starting out or scaling up, the range covers everything from badge presses to printing equipment.



