



Badge making ideas: creative DIY guide for 2026
Badge making is one of those crafts that rewards you immediately. Cut a circle, add a message, attach a pin, and you have something wearable and personal in under half an hour. Whether you are working with a classroom of eight-year-olds, preparing party favours, or just want a creative afternoon project, the range of approaches is wider than most people realise.
Here is a quick overview of the most popular methods and materials to get you started:
- Felt layering: Stack concentric felt circles in contrasting colours, add letter beads and ribbon tails for an award-style badge with no machinery required.
- Cardboard and paper badges: Trace a circle onto stiff cardboard, glue a printed or hand-drawn design on top, fold the edges over, and fix a safety pin to the back.
- Button maker machine badges: Feed a metal shell, printed design, mylar sheet, and pin back into a press for a durable, waterproof finish.
- Glitter foam badges: Cut foam circles, decorate with rhinestones and sequins, and attach ribbon fringing for a medallion effect.
- Eco-friendly badges: Use recycled cardboard, scrap fabric, or offcuts of felt to keep costs and waste low.
- Attachment options: Safety pins, magnetic backs, and bulldog clips each suit different fabrics and occasions.
How to make your first badge without a machine
You need very little to get started. The no-machine method uses household items and costs almost nothing, which makes it ideal for schools, parties, or a first attempt before investing in equipment.
What you will need:
- Stiff cardboard (an old cereal box or shipping box works well)
- Plain white paper or card for the design
- Scissors or a craft knife
- PVA glue or a glue stick
- A hot glue gun or strong adhesive
- Safety pins
- Optional: clear nail varnish or Mod Podge for waterproofing, markers, paints, glitter
Step-by-step instructions:
- Cut your base. Find a small circular object suitable for tracing, such as a bottle cap or small glass, and trace it onto the cardboard. Cut it out cleanly.
- Design your badge front. Draw or print your design on paper, making the circle slightly larger than the cardboard base so you have a border to fold over.
- Assemble the front. Apply a thin layer of PVA glue to one side of the cardboard disc and press it firmly onto the centre of your design.
- Finish the edges. Cut small slits around the paper border, from the outer edge inward to the cardboard. Fold each tab over and glue it to the back for a neat finish.
- Attach the pin. Use a hot glue gun or super glue to fix a safety pin to the back, with the opening facing outward so it can clip onto clothing. Leave it to dry fully before wearing.
- Waterproof it (optional). Paint a thin coat of clear nail varnish or Mod Podge over the front to protect against moisture and smudging.
Pro Tip: Apply the waterproofing coat in a well-ventilated room and let it dry completely before handling. Two thin coats outperform one thick one every time.
For a more polished result without much extra effort, free online tools like MakeBadge and Certopus let you design badge artwork using drag-and-drop templates, then download a print-ready file. Print onto good paper, cut to size, and assemble as above.
Creative badge design ideas for every occasion
The design is where badge making gets genuinely fun. A badge that carries a specific message or suits a particular occasion lands far better than a generic one. Handmade badges work best when they lean into their kitschy, personal nature rather than trying to look corporate.
Themed and occasion-based ideas
- Birthday badges: “Officially 10,” “Birthday Girl,” or “Happy Birthday to Me!” in bold colours with a ribbon tail.
- Achievement badges: Classroom rewards like “Star Reader,” “Kindness Champion,” or “Maths Wizard” motivate children without any cost.
- Funny adult badges: Messages like “Hooray I Showered Today” or “Chaos Coordinator” make brilliant gifts for friends who appreciate a laugh.
- Event and party badges: Colour-coded badges for different guest roles at weddings, school fairs, or community events.
- Teacher appreciation: “Most Patient Human Alive” or “Queen of the Classroom” in layered felt with rhinestones.
Decoration techniques worth trying
- Ribbon fringing: Layering different textures of ribbon, satin, tinsel fringe, and ric rac creates a cascading tail that transforms a simple badge into something genuinely striking. Mix colours to match your foam or go full rainbow.
- Letter beads: Spell out your message on the top felt circle before assembly. Arrange the beads first, then stitch or glue each one individually.
- Glitter foam circles: Stack three graduating sizes for a rosette effect. The layered borders show off contrasting colours without any extra effort.
- Sequins and rhinestones: Fill gaps around the text with flat-back rhinestones. More is more here; restraint rarely improves a badge.
- Embroidery: A whipstitch or blanket stitch around the edge of a felt circle in a bold contrasting thread adds texture and a handmade quality that printed badges cannot replicate.
Eco-friendly and budget-conscious approaches
Recycled materials work surprisingly well for badge making. Corrugated cardboard from packaging gives a sturdier base than cereal boxes. Scrap fabric offcuts replace felt for the layered circles. Old buttons, broken jewellery, and fabric scraps from other projects all become decoration. For a classroom setting, this approach also doubles as a lesson in sustainable crafting, and the cost per badge drops to almost nothing.
Pro Tip: For badge ideas for kids at parties, set out pre-cut felt circles, a selection of letter beads, and foam adhesive dots instead of a hot glue gun. Children can assemble their own badges independently, and no adult supervision is needed for the gluing step.
For a ready-made example of how badges work in educational settings, the Team Genius Squad lab coat kit shows how patches and name badges combine to create a personalised, wearable identity for young learners.
How to make your badges look genuinely professional
The gap between a homemade badge that looks polished and one that looks rushed usually comes down to three things: paper quality, cutting accuracy, and even pressure during assembly.
Choose the right materials
Using 24–28 lb laser paper produces noticeably more vibrant colours and a crisper feel than standard copy paper. For felt badges, choose a medium-weight felt that holds its shape without fraying excessively. Thin, stretchy fabric causes problems in button maker machines because it prevents the shell from crimping cleanly.
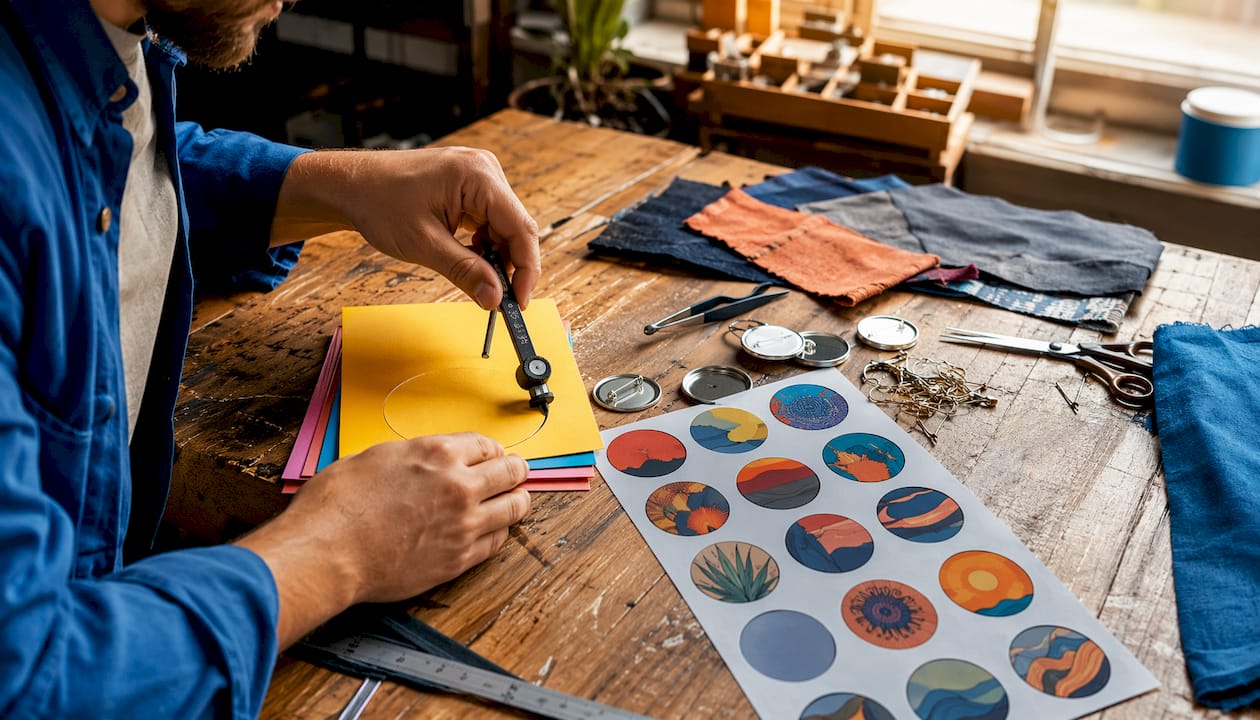
For your badge making supplies, prioritise quality over quantity. A small batch of well-made badges beats a large pile of wonky ones every time.
Cut with precision
A dedicated circle cutter is the single biggest upgrade you can make to your process. Cutting perfect circles with scissors is genuinely difficult, and even a slight irregularity becomes obvious once the badge is assembled. A circle cutter guarantees that every design is centred and sized consistently, which matters especially when you are making batches for an event.
Calibrate your machine and press evenly
Proper machine calibration prevents the two most common problems with button maker badges: off-centre designs and sideways pin backs. Most machines have an alignment notch for the design and a specific orientation for the pin back component. Check both before every batch, not just at the start.
Apply firm, even pressure on every pull of the press handle. Inconsistent pressure causes the shell to crimp unevenly, which shows as a wrinkled edge on the finished badge.
Secure decorations properly
Hot glue is the most reliable adhesive for attaching ribbon, beads, and rhinestones to felt badges. Use strong adhesives for pin backs too; a decoration or fastener that detaches during daily wear is the most common complaint with handmade badges. For paper badges, a hot glue gun or super glue on the pin back holds far better than a standard glue stick.
Pro Tip: Before gluing letter beads to a felt circle, arrange the full message and photograph it on your phone. That way you have a reference if beads shift during gluing, and you avoid spelling mistakes that only appear after everything is fixed in place.
If you are considering a machine for higher-volume badge making, Subliblanks stocks badge making machines and supplies suited to both beginners and more experienced crafters, with no minimum order quantities.
Key takeaways
The most effective badge making combines quality materials, precise cutting, and a design that suits its occasion, whether you are working by hand or with a press machine.
| Point | Details |
|---|---|
| Start without machinery | Cardboard, paper, glue, and a safety pin are enough to make a finished badge at home. |
| Paper quality changes the result | 24–28 lb laser paper produces sharper colours and a crisper feel than standard copy paper. |
| A circle cutter is worth buying | It guarantees centred, consistent cuts and removes the biggest source of wonky-looking badges. |
| Design drives emotional impact | Specific, funny, or heartfelt messages make handmade badges far more memorable than generic ones. |
| Eco-friendly materials work well | Recycled cardboard, scrap fabric, and offcuts reduce cost and waste without affecting badge quality. |


