



Step-by-step laser engraving for beginners: first project
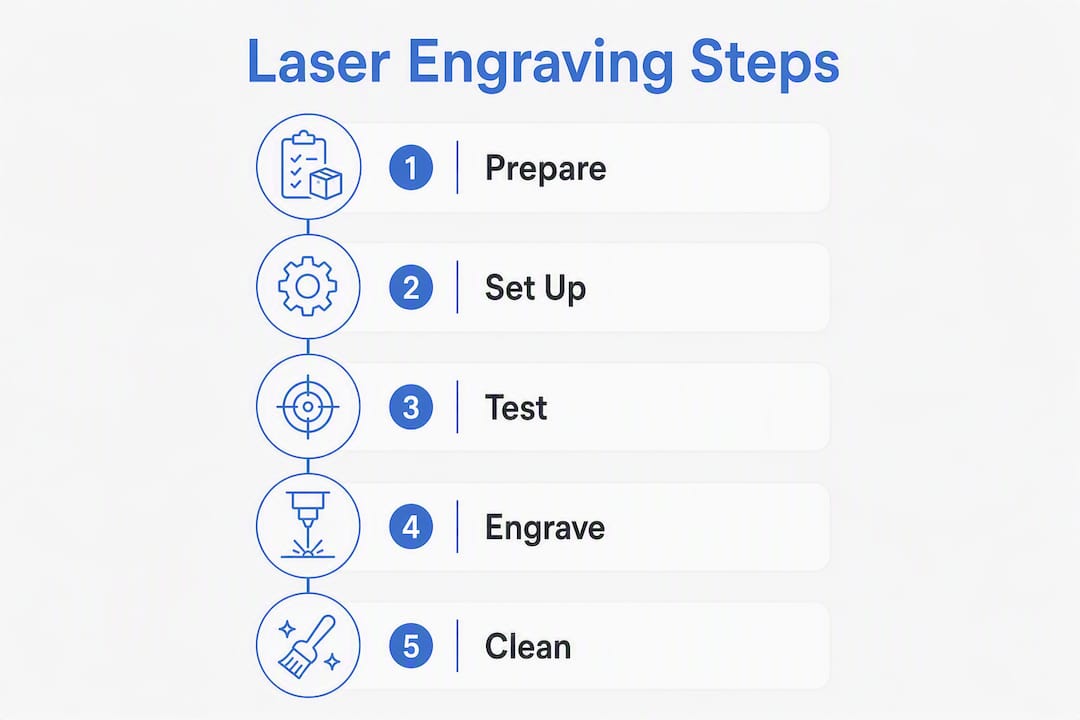
You can complete a safe, good-quality laser engraving on your first project by following this short workflow: prepare your material, set up and focus the machine, run a test grid, save the winning settings, frame the job, then run it while staying in the room. That is the whole process. Everything below explains each step in enough detail to get you there without ruining a blank or breathing in fumes.
Quick-start checklist:
- Choose a safe starter material (basswood, slate, cork, or laser-safe plywood).
- Set up ventilation and put on laser-rated eye protection before switching anything on.
- Load your design file and set the correct dimensions in your software.
- Focus the laser head using a focus gauge or the manufacturer’s method.
- Run a test grid on scrap material to find your power and speed settings.
- Frame the job, confirm the position, then run the final engrave while monitoring it throughout.
Never leave the machine unattended, and always run active ventilation. Those two rules prevent most serious incidents.
Table of Contents
- What do you need before you start engraving?
- UK safety, ventilation and sensible precautions for hobbyists
- How do you prepare your artwork for laser engraving?
- How do you set up the machine, focus it, and run a test grid?
- How do you choose the right power, speed and resolution for each material?
- Running the final engrave: step by step
- How do you clean and finish an engraved piece?
- What goes wrong and how do you fix it fast?
- Five beginner projects worth starting with
- UK materials and safety: what the evidence says
- Key takeaways
- Why the test-grid habit matters more than any settings chart
- Subliblanks: UK supplies for your first laser project
- Useful sources and what to check next
What do you need before you start engraving?
Getting the right kit together before you touch the machine saves a lot of frustration. A missing focus gauge or the wrong eye protection will stop you dead.
Hardware essentials
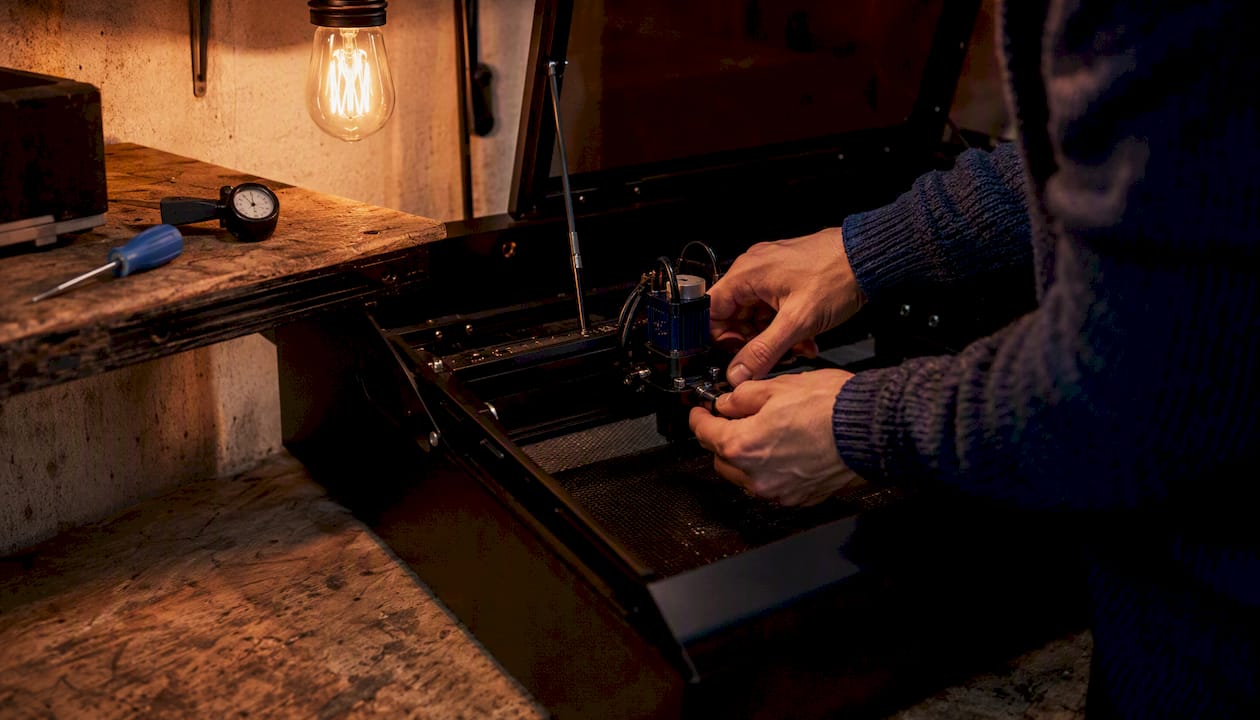
Beginner diode lasers in the 10W–20W range are the standard starting point for hobbyists. The xTool range, available through Subliblanks, sits squarely in this category and covers wood, slate, cork, and anodised aluminium without difficulty. You also need a stable, non-flammable bench surface, a smoke extractor or inline fan, and a dry-powder or CO₂ fire extinguisher within arm’s reach.
Safe starter materials for UK makers
Safe materials for beginners include basswood, laser-safe plywood, slate, cork, cardboard, uncoated paper, and anodised aluminium. Each is forgiving, widely available in the UK, and produces minimal toxic fumes when engraved correctly.
Never engrave: PVC, PTFE (such as Teflon-coated items), artificial leather or vinyl, or any coated wood with an unknown finish. PVC releases hydrogen chloride gas, which damages lungs and corrodes the machine. If you are unsure what a material is, check its MSDS before loading it.
Kit comparison table
| Item | Why you need it | Must / Optional |
|---|---|---|
| 10W–20W diode laser (e.g. xTool) | Core engraving machine for beginner materials | Must |
| Laser-rated eye protection (correct wavelength) | Protects against reflected beam damage | Must |
| Smoke extractor or inline fan | Removes toxic fumes and smoke haze | Must |
| Dry-powder or CO₂ fire extinguisher | First response to any flame | Must |
| Focus gauge | Ensures repeatable, accurate focal distance | Must |
| Low-tack painter’s tape / masking tape | Reduces smoke haze on the blank surface | Must |
| Clamps or hold-down pins | Stops material shifting mid-job | Must |
| Spare lens wipes and isopropyl alcohol | Keeps optics clean for sharp results | Must |
| Air assist kit | Blows smoke away from the cut zone | Optional but strongly recommended |
| Scrap material (same batch as your blank) | Test grid substrate | Must |
Pro Tip: Buy masking tape in bulk. Applying it to every blank before engraving is the single easiest way to keep smoke residue off the surface and cut your cleaning time significantly.
UK safety, ventilation and sensible precautions for hobbyists
Safety with a laser is not complicated, but it is unforgiving. Get these basics right before you run a single job.
Eye protection
Laser-rated eye protection must match your machine’s wavelength. A 450 nm blue diode laser requires different optical density ratings than a 1,064 nm fibre laser. Check the wavelength in your machine’s manual and buy goggles rated for that specific range. Standard sunglasses offer no protection.
Ventilation
Active extraction is the only reliable option for a small workshop. A window left open does not create enough airflow to clear the particulates and volatile organic compounds that engraving produces. Use an inline fan ducted outside, a dedicated laser fume extractor, or at minimum an extractor hood positioned directly above the work area. The HSE’s guidance on woodworking dust and fumes applies to laser-engraved wood too; fine particulates from engraving are a respiratory hazard with repeated exposure.
Fire safety
Keep all flammable materials at least a metre from the machine while it is running. Always test on scrap before committing to a final blank. Never leave the machine unattended during a job, even for two minutes. A small flame on a piece of cardboard can become a serious fire faster than most beginners expect.
Insurance and MSDS
If you run a home workshop, check your home insurance policy. Many standard policies exclude business activities, and laser engraving for sale typically counts as one. For any unfamiliar substrate, download the MSDS from the supplier’s product page before engraving it. Manufacturer manuals are the final word on machine-specific safety interlocks and maintenance.
How do you prepare your artwork for laser engraving?
The machine reads your file exactly as you give it. A poorly prepared image produces a poor engrave regardless of how well the machine is set up.
The short answer: use SVG, AI, or PDF for vector artwork (crisp lines, scalable without quality loss); use PNG, BMP, or TIFF for raster images such as photographs. For photos, convert to high-contrast greyscale and apply a dither pattern before sending to the laser.
Step-by-step image preparation
- Crop and clean the background. Remove anything outside your intended design area. A white background is standard; transparent PNG also works in most laser software.
- Convert to greyscale. Colour information confuses raster engraving. Greyscale gives the software a clear tonal map to work from.
- Adjust contrast. Push the contrast higher than looks natural on screen. Laser engraving compresses tonal range, so a flat image produces a flat result.
- Resize to final dimensions. Set the image to the exact size you want engraved before importing. Resizing inside laser software can introduce resampling artefacts.
- Set DPI. For most wood and slate engravings, 254–508 DPI is a practical range. Higher DPI increases detail but also engraving time; lower DPI suits textured materials where fine detail is lost anyway.
- Apply dither for photos. In LightBurn, use Jarvis or Stucki dithering for photographic images on wood. These algorithms distribute dot patterns in a way that mimics tonal gradients. LaserGRBL offers similar dither options for free GRBL-based machines.
- Export without resampling. Save as PNG or BMP at the DPI you set. Do not let the export dialogue resample to a different resolution.
Software choices: LightBurn (paid, around £50 one-off licence) is the most capable option for most diode and CO₂ lasers and handles both vector and raster jobs cleanly. LaserGRBL is free and works well for GRBL-based machines on simpler raster jobs. For photo preparation specifically, GIMP (free) handles greyscale conversion and contrast adjustment without needing a paid subscription.
Before starting the job, use LightBurn’s frame tool (or your software’s equivalent) to preview the exact position of the design on the material. This takes ten seconds and prevents off-centre engravings.
How do you set up the machine, focus it, and run a test grid?
Focus and a test grid are the two steps that separate a good first result from a ruined blank. Focus is the single most important mechanical variable: a beam that is even slightly out of focus produces a blurry, weak engraving regardless of power or speed.
Focus procedure
- Place your material on the bed.
- Use the manufacturer’s focus gauge (a small block that sets the correct distance between the lens and the surface) or follow the manual’s autofocus procedure if your machine has one.
- Check the focus distance matches the material thickness. A 6 mm piece of basswood and a 3 mm piece sit at different heights.
- Re-focus every time you change material or thickness. Do not assume the previous setting carries over.
Building and reading a test grid
A test grid is a small matrix of squares, each engraved at a different combination of power and speed. Run it on a scrap piece from the same batch as your final blank.
Set up a grid with power increasing down the rows (e.g. 30%, 50%, 70%, 90%) and speed increasing across the columns (e.g. 200 mm/min, 400 mm/min, 600 mm/min, 800 mm/min). Each cell shows you exactly what that combination produces on that material. The test-grid method requires changing one variable at a time so you can isolate what is actually causing a change in result.
Zap Tracker log template
Record your results in a simple log. A spreadsheet or even a notebook works fine.
| Field | What to record |
|---|---|
| Date | Date of test |
| Material | Name, supplier, thickness |
| Machine / lens | Model, lens focal length |
| Focus distance | mm from lens to surface |
| Power (%) | Setting used |
| Speed (mm/min) | Setting used |
| Passes | Number of passes |
| Air assist | On / Off |
| Masking | Yes / No |
| Result notes | Depth, clarity, char, blurring |
| Photo | File name or folder path |
Keeping a log like this means you never have to re-run a test grid for the same material batch. It is the single most effective habit for repeatable results.
How do you choose the right power, speed and resolution for each material?
Start conservative and change one variable at a time. Generic settings charts from the internet are a starting point, not a guarantee, because every laser and every material batch behaves slightly differently.
The core rule: higher power burns deeper and darker; slower speed has the same effect. If you want a lighter result, increase speed or reduce power. If you want more depth, do the opposite. Multiple light passes often produce cleaner results than one heavy pass, particularly on wood where a single high-power pass can char the surface.
Qualitative starting guidance by material
Basswood and lime wood: Very responsive. Start at low-to-mid power and a moderate speed. Basswood engraves cleanly and shows good contrast. It is the best material for a first test.
Laser-safe plywood: Similar to basswood but the glue layers can produce more fumes and occasionally resist the beam. Keep air assist on and ventilate well.
Cork: Soft and fast to engrave. Use lower power than you think you need; cork chars easily. Good for coasters and notice boards.
Slate: Requires higher power than wood. The laser does not remove material; it creates a colour change on the surface. Results are permanent and sharp. Slate is very forgiving of minor focus errors compared with wood.
Anodised aluminium: The laser removes the anodised coating to reveal the bare metal beneath. Requires precise focus and moderate power. Results are crisp and professional-looking.
Cardboard and uncoated paper: Very low power needed. Useful for stencils and prototyping designs before committing to a more expensive blank.
DPI and line spacing
Higher DPI (above 400) suits detailed photographic images on smooth materials. For text and simple graphics on wood, 254 DPI is usually sufficient and engraves faster. On textured materials like slate or rough cork, very high DPI is wasted because the surface texture limits visible detail anyway.
For a deeper look at which laser-engravable materials suit which projects, Subliblanks has a practical guide covering the full range.
Running the final engrave: step by step
Once you have a winning test-grid result, the final run is straightforward. The checklist below keeps you from the most common last-minute mistakes.
- Apply masking tape to the blank surface if you have not already. Cover the entire area to be engraved.
- Clamp the material securely. Any movement during the job ruins the result.
- Load your saved settings from the test grid. Do not guess or adjust from memory.
- Re-check focus. Even if you set it earlier, confirm it again now.
- Confirm ventilation is running before you press start.
- Run the frame tool to preview the job boundary on the material. Adjust position if needed.
- Start the job at a slightly reduced power if you are at all uncertain about the settings. You can always run a second pass; you cannot un-burn an over-engraved blank.
- Watch the first pass closely. Look for excessive smoke, any flame, unusual smells, or the material shifting.
- Pause immediately if you see flame, heavy smoke, lens haze, or the design drifting out of position. Investigate before continuing.
- On completion, wait for smoke to clear before opening any enclosure. Remove the blank, peel the masking tape while it is still slightly warm, and inspect the result.
Stay in the room for the entire job. A two-minute absence is enough for a small flame to become a real problem.
How do you clean and finish an engraved piece?
A freshly engraved piece often looks rougher than the final result will be. Cleaning and a light finish transform it.
Cleaning
Peel the masking tape while the blank is still slightly warm from engraving. The adhesive releases cleanly and takes most of the smoke residue with it. For any remaining haze, wipe with a slightly damp cloth. On wood, a very light pass with 320-grit sandpaper along the grain removes surface char without affecting the engraved depth.

Sealing and finishing
A clear wax (such as beeswax or a furniture paste wax) applied with a soft cloth gives wood a clean, natural look and protects the surface. Water-based sealants work well for items that will be handled frequently. For coasters or items that will contact food or drink, use only food-safe finishes and check the manufacturer’s guidance on the specific product.
Pro Tip: For a more decorative finish on wood, rub a small amount of acrylic paint into the engraved area, let it dry, then sand the surface lightly. The paint stays in the recessed engraving and creates a strong colour contrast.
For more detailed guidance on finishing engraved blanks for customer-ready results, Subliblanks covers the full post-processing workflow.
What goes wrong and how do you fix it fast?
Most beginner problems come down to focus, settings, or material preparation. Here is a quick diagnostic list:
- Blurry or fuzzy engraving: Re-focus. Check that the material is flat and not bowing. Check belt tension if the blur is directional.
- Engraving too light: Increase power, reduce speed, or add a second pass. Check the lens is clean.
- Charring or excessive burning: Reduce power or increase speed. Check air assist is running. Consider multiple lighter passes.
- Uneven lines or banding: Check belt tension on both axes. Clean the lens. Confirm the material is clamped flat.
- Smoke haze on the surface: Apply masking tape before the next job. Increase air assist flow.
- Design in the wrong position: Use the frame tool before every job. Mark the material corner with a pencil before removing it from the bed.
- Inconsistent results between jobs: Check your Zap Tracker log. Confirm you are using the same material batch and that focus has not shifted.
Before blaming the design or the software, run through four quick checks: is the lens clean, is the focus set correctly, is the material clamped flat, and is the material what you think it is? Those four cover the majority of faults.
When a fault persists, return to the test grid. Change one variable, run a new grid on scrap, and compare. Do not change power and speed simultaneously; you will not know which one fixed it.
Five beginner projects worth starting with
These five projects are chosen for their small size, low material cost, and fast turnaround. Each one reinforces the test-grid habit and gives you a finished piece you can actually use.
- Small plywood key fob: — Introduces you to cutting as well as engraving if your machine supports it. The small size means a test grid and a finished piece fit on one scrap sheet.
Free SVG templates for all of these are available on sites such as Instructables and Thingiverse. Download, resize to your material dimensions in LightBurn or Inkscape, and run your test grid first.
For ready-to-engrave blank examples suited to UK makers, Subliblanks stocks a range that covers all five project types above.
UK materials and safety: what the evidence says
The material safety guidance in this article is not opinion. Safe starter materials for beginners are well established across the industry: basswood, laser-safe plywood, slate, cork, cardboard, uncoated paper, and anodised aluminium all produce minimal toxic by-products when engraved with a correctly set-up diode laser. PVC, PTFE, and vinyl are categorically unsafe because of the gases they release.
“Maintaining air assist, active smoke extraction or ventilation, and laser-rated eye protection specific to the machine wavelength are essential for a sustainable, compliant workspace. These are not optional extras — they are the baseline for safe long-term operation.” — craftverge.com
Manufacturer manuals and MSDS documents are the final authority on material safety. No online guide, including this one, overrides what the MSDS says about a specific substrate. Download the MSDS for every unfamiliar material before engraving it, and keep a copy in your workshop.
For workshop setups in the UK, the HSE’s guidance on dust and fume extraction is the relevant primary source. Insurers increasingly ask about extraction and fire suppression for home workshop policies, so documenting your setup is worth doing early.
Key takeaways
A test grid, correct focus, and active ventilation are the three non-negotiable habits that determine whether your first laser engraving project succeeds or wastes a blank.
| Point | Details |
|---|---|
| Test grid first, always | Run a power/speed grid on scrap before every new material or batch. |
| Focus is the critical variable | Re-focus after every material change; a blurry result is almost always a focus problem. |
| Log your winning settings | Keep a Zap Tracker with material, power, speed, passes, and a photo for repeatable results. |
| Ventilate and monitor | Run active extraction for every job and stay in the room throughout. |
| Subliblanks for UK supplies | Subliblanks stocks xTool machines, laser-engravable blanks, and accessories with no minimum order. |
Why the test-grid habit matters more than any settings chart
Most beginners spend too long hunting for the “correct” settings online and not enough time running a five-minute test grid on their actual material. The problem with settings charts is that they describe averages. Your specific machine, your specific material batch, and your specific focus distance all shift the result. A chart that works for one person’s 10W xTool on a particular sheet of basswood may be noticeably off for yours.
The test-grid approach forces you to engage with what is actually happening on the material in front of you. After three or four sessions, you start to read the results intuitively: you can see when the power is too high before you even measure the depth. That instinct does not come from reading charts. It comes from running grids and logging the results.
The Zap Tracker habit compounds this. After a dozen sessions, you have a personal reference library that is more accurate than any generic guide because it is built on your machine, your materials, and your workspace conditions. That is the real skill in laser engraving, and it is available to any beginner who starts with scrap and a notebook.
Subliblanks: UK supplies for your first laser project
If you are ready to move from reading to engraving, Subliblanks is a practical first stop for UK makers. The range covers xTool diode laser machines, a full selection of laser-engravable blanks including basswood, slate coasters, anodised aluminium tags, and cork products, plus masking tape, lens wipes, and accessories. There is no minimum order quantity, so you can buy a small starter pack of blanks and scrap material without committing to bulk stock.

Every product page carries compatibility and safety information, and MSDS documents are available for materials that require them. For a practical checklist to ensure quality results, see the garment printing checklist from Transfer Kingz. For anyone adding laser engraving to an existing sublimation or DTF workflow, Subliblanks supplies all three from one account. Browse the full range at subliblanks.com and check machine compatibility before ordering.
Useful sources and what to check next
The sources below are worth bookmarking before your first session. Each one covers a specific aspect of the process in more depth than a single article can.
- HSE guidance on woodworking dust and fumes: The primary UK reference for workshop ventilation and respiratory risk. Applies directly to laser-engraved wood and MDF.
- Instructables: laser engraving photo guide: A practical walkthrough for photo preparation and dithering, with step-by-step images.
- Zapcraft beginner workflow guide: Covers the full beginner workflow including the Zap Tracker logging method and material library recommendations.
- Craftgineer beginner guide: Strong on focus, test grids, and the single-variable change principle.
Save your test-grid photos alongside your Zap Tracker log. When a result changes unexpectedly, comparing a current photo against an earlier one from the same material batch is the fastest way to diagnose what has shifted.
Recommended
- Laser engraving process guide for beginners and small businesses – SubliBlanks Ltd
- Understanding laser engraver machines: a practical guide – SubliBlanks Ltd
- Laser engravable materials: a practical guide for 2026 – SubliBlanks Ltd
- Why use laser engraving machines: a guide for UK small businesses – SubliBlanks Ltd


