


How to prepare artwork for sublimation: a complete guide
Preparing artwork for sublimation printing can feel like a minefield. You’ve designed something brilliant, sent it to print, and then watched in horror as colours shift, edges blur, or the entire image comes out faded. These frustrations aren’t just annoying, they cost you time, materials, and client trust. The good news? Most sublimation disasters stem from simple preparation mistakes that are entirely preventable. This guide walks you through every critical step to set up your artwork correctly, from choosing the right file format to final verification checks, so you can produce vibrant, professional prints every single time.
Table of Contents
- Key takeaways
- Understanding the requirements for sublimation artwork
- Setting up your artwork correctly in design software
- Common mistakes when preparing artwork and how to avoid them
- Final checks and preparing files for print submission
- Discover quality sublimation blanks and supplies
- Frequently asked questions
Key Takeaways
| Point | Details |
|---|---|
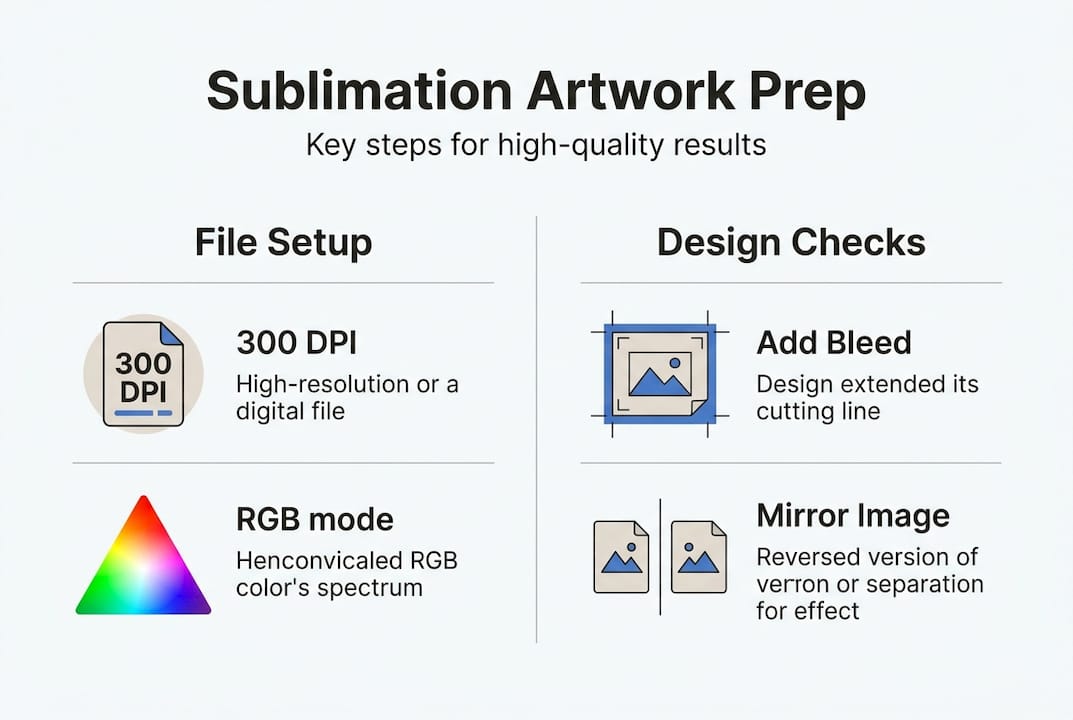
| File formats and colour space | Use PNG TIFF or PSD and ensure RGB colour space at 300 DPI for all designs. |
| High resolution requirements | Work at 300 DPI minimum to avoid pixelation and preserve gradients. |
| Bleed and safe area | Add 3 to 5 mm bleed beyond the trim and keep all art within the safe zone to prevent white edges. |
| Mirroring and substrate considerations | Check whether mirroring is required for your heat press method and substrate when exporting. |
Understanding the requirements for sublimation artwork
Before you even open your design software, you need to understand what sublimation printing demands from your files. Unlike traditional printing methods, sublimation uses heat to transform solid dye particles into gas, which then bonds with polyester fibres or polymer-coated surfaces. This unique process has specific technical requirements that directly impact your final print quality.
Start with file formats that preserve every detail. PNG, TIFF, and PSD files work brilliantly because they support transparency and avoid lossy compression. JPEG files might seem convenient, but they discard image data every time you save, creating artefacts that become glaringly obvious on sublimated products. Your artwork must be created in RGB colour mode with 300 DPI for high-quality sublimation prints, not CMYK, because sublimation printers use cyan, magenta, yellow, and black inks that function in RGB colour space.
Resolution matters more than most designers realise. Sublimation exposes every flaw, so working at 300 DPI minimum ensures crisp edges and smooth gradients. Drop below this threshold and you’ll see pixelation, especially on larger items like textiles or signage. Consider your substrate colour too, white or light-coloured materials show vibrant results, whilst darker substrates require special polymer coatings or alternative printing methods.
Pro Tip: Always design on a white background layer to preview how your artwork will appear on light substrates, then toggle it off to check transparency areas.
Here’s your essential artwork requirements checklist:
- Use PNG, TIFF, or PSD file formats exclusively
- Set colour mode to RGB, never CMYK
- Maintain 300 DPI resolution throughout the entire design process
- Avoid any compression when saving final files
- Design with substrate material and colour in mind
Understanding these fundamentals prevents the most common sublimation failures. When you’re ready to explore equipment that complements proper artwork preparation, check out our sublimation printer setup guide for technical specifications. For textile-specific considerations, our guide on sublimation for textiles covers fabric preparation and coating requirements.
Setting up your artwork correctly in design software
Now that you understand what sublimation demands, let’s get your design software configured properly. This stage determines whether your artwork translates accurately from screen to substrate, so precision matters.
Follow these setup steps in order:
- Create a new document with dimensions matching your exact product size, then add bleed
- Set resolution to 300 DPI before placing any images or creating vector elements
- Confirm colour mode is RGB in your document settings
- Design your artwork with all elements positioned within the safe area
- Add 3-5mm bleed extending beyond the trim line on all sides
- Check if mirroring artwork before printing is required depending on your heat press method and substrates
- Flatten all layers and convert text to outlines before exporting
Bleed prevents disaster. When you cut a printed product to size, slight misalignments happen. Without bleed, you risk white edges appearing where your design should extend to the edge. Adding 3-5mm of extra image area beyond your trim line ensures full coverage even with minor cutting variations.
Mirroring confuses many designers, but the rule is straightforward. If you’re printing onto transfer paper that will be pressed face-down onto your substrate, mirror your design horizontally. This ensures text reads correctly and directional elements face the right way after transfer. Some substrates and press configurations don’t require mirroring, so verify your specific setup before batch production.
Pro Tip: Create a template document for each product type you regularly produce, with bleed, safe areas, and resolution pre-configured to save setup time.
Font handling deserves special attention. When you send files to print, missing fonts cause automatic substitutions that ruin your carefully chosen typography. Converting text to outlines (or curves) eliminates this risk entirely. Yes, you lose editability, but you gain certainty that your design prints exactly as intended. Always keep an editable master file separate from your print-ready version.
For detailed equipment setup that complements proper artwork preparation, explore our sublimation equipment setup guide. When working with specific products, our guide on using sublimation blanks provides product-specific preparation tips.
Common mistakes when preparing artwork and how to avoid them
Even experienced designers make sublimation artwork errors that waste materials and time. Recognising these pitfalls helps you sidestep them entirely.
The CMYK trap catches designers who work primarily in print. Your instinct might be to use CMYK since you’re creating something physical, but sublimation printers function differently. Incorrect colour profiles or low resolution often cause faded or blurry sublimation prints, so staying in RGB throughout your workflow is non-negotiable. Converting from CMYK to RGB after designing causes colour shifts that are difficult to correct.
Resizing raster images destroys quality faster than anything else. Enlarging a 150 DPI image to meet your canvas size doesn’t magically add detail, it just makes pixels bigger and more obvious. Start with high-resolution source images or use vector graphics that scale infinitely without quality loss. If you must resize, only scale down, never up.
“The difference between a professional sublimation print and an amateur attempt often comes down to artwork preparation, not equipment quality.”
Invisible layers create mysterious printing problems. You’ve designed something beautiful, exported it, and suddenly random elements appear in your print that you didn’t intend. Hidden layers, objects placed outside the canvas, or stray anchor points all export with your file. Before saving your final version, methodically check every layer, delete anything unnecessary, and flatten your document.
Here are the mistakes that cost designers the most:
- Using CMYK colour mode instead of RGB
- Upscaling low-resolution images beyond their original dimensions
- Leaving hidden layers or objects that print unexpectedly
- Forgetting to outline fonts, causing substitution issues
- Skipping test prints to verify colour accuracy
Colour proofing saves heartbreak. Your screen displays colours using backlit pixels, whilst sublimation creates colour through dye absorption into materials. These two processes produce different results. Always run test prints on your actual substrate material to see how colours translate. Adjust your artwork based on these tests rather than trusting your monitor alone.
For product-specific preparation considerations, our guide on sublimation for promotional items covers common pitfalls with different substrate types. When working with rigid materials, check our MDF blank guide for surface preparation tips.
Final checks and preparing files for print submission
You’ve designed brilliantly and avoided common mistakes. Now comes the final verification stage that separates professionals from amateurs. This systematic check catches errors before they become expensive problems.
Work through this final verification sequence:
- Zoom to 100% and scan the entire design for stray pixels or artifacts
- Verify colour mode is RGB and resolution remains at 300 DPI
- Confirm bleed extends 3-5mm beyond trim lines on all edges
- Check that all fonts are outlined and embedded
- Review layer structure and delete anything unnecessary
- Export using maximum quality settings in PNG or TIFF format
- Open the exported file in a different program to verify it displays correctly
File naming matters more than you’d think. Saving files with correct naming conventions and in preferred formats helps streamline print production and prevents confusion when managing multiple projects. Use descriptive names that include product type, size, and version number. “MugDesign_11oz_v3_FINAL.png” tells you everything at a glance, whilst “Design1.jpg” tells you nothing.
| Export setting | Recommended value | Why it matters |
|---|---|---|
| File format | PNG or TIFF | Preserves transparency and quality without compression |
| Colour mode | RGB | Matches sublimation printer colour space |
| Resolution | 300 DPI minimum | Ensures sharp, detailed prints on all substrate sizes |
| Compression | None | Prevents quality degradation and artifacts |
| Colour profile | sRGB or printer-specific ICC | Maintains colour accuracy from screen to print |
Export settings determine your final file quality. Choose PNG for designs with transparency or TIFF for maximum quality without transparency needs. Set compression to none or maximum quality. If your sublimation printer manufacturer provides ICC colour profiles, embed these during export to improve colour matching between your design and printed result.
Backup everything. Hard drives fail, files corrupt, and clients request revisions months later. Maintain organised archives of both your editable master files and final print-ready exports. Cloud storage provides redundancy, whilst external drives offer offline security. A robust backup system pays for itself the first time it saves a project.
When you’re ready to print, our comprehensive sublimation printing process guide walks through production steps from file to finished product.
Discover quality sublimation blanks and supplies
Perfect artwork preparation deserves equally perfect substrates and materials. You’ve invested time mastering the technical side of sublimation artwork, now ensure your prints transfer onto quality products that showcase your work brilliantly.

At SubliBlanks, we supply everything you need for professional sublimation production without minimum order quantities. Our round MDF name badges with pin provide an excellent canvas for detailed designs, whilst our A4 sublimation paper packs deliver consistent, vibrant colour transfer every time. Don’t overlook essential accessories like our heat press Teflon sheets that protect both your press and your prints during the transfer process. Whether you’re running a growing business or exploring sublimation as a creative outlet, we stock the comprehensive range of blanks, equipment, and supplies that turn your perfectly prepared artwork into tangible products your clients will love.
Frequently asked questions
How do I check if my artwork uses the correct colour profile for sublimation?
Open your design file and check the document colour mode in your software’s settings menu, it should display RGB. Most design programs like Photoshop show this in Image > Mode, whilst Illustrator displays it in File > Document Colour Mode. If your printer manufacturer provides specific ICC profiles, embed these when exporting to maintain colour accuracy throughout the production process.
What file formats are best for sublimation artwork?
PNG and TIFF formats work best because they preserve full image quality without compression artifacts. PNG supports transparency, making it ideal for designs that need clear backgrounds, whilst TIFF handles larger file sizes with maximum detail retention. Avoid JPEG entirely as it uses lossy compression that degrades image quality each time you save, creating visible artifacts in your sublimated prints.
How much bleed should I add to my sublimation design?
Add 3-5mm of bleed around all edges of your design, depending on the product size and your cutting precision. Smaller items like badges work fine with 3mm, whilst larger products like textiles benefit from 5mm to account for material movement during cutting. This extra image area ensures your design extends fully to the edge even if trimming alignment isn’t perfect.
Why is mirroring artwork important for sublimation printing?
Mirroring ensures your design appears correctly oriented after heat pressing, particularly when printing onto transfer paper that gets pressed face-down onto the substrate. Text must read left-to-right and directional elements must face the correct way in the final product. Not all sublimation methods require mirroring, so verify your specific press configuration and substrate type before production.
Can I use any design software for preparing sublimation artwork?
Adobe Photoshop, Illustrator, and Affinity Designer all work excellently because they support RGB colour mode, high-resolution output, and the precise layer control sublimation demands. The key requirements are software that handles 300 DPI resolution, exports lossless file formats like PNG or TIFF, and allows you to work in RGB colour space. Free alternatives like GIMP also work if they meet these technical specifications.
Recommended
- Sublimation Printing Step by Step for Personalised Goods – SubliBlanks Ltd
- Sublimation Transfer Process: Achieve Professional Prints Easily – SubliBlanks Ltd
- How to Use Sublimation Blanks for Custom Merchandise – SubliBlanks Ltd
- Sublimation Equipment Setup Guide for Business Success – SubliBlanks Ltd


