


How to print on mugs: step-by-step guide for beginners
Printing personalised mugs at home or for your small business no longer requires expensive outsourcing or complicated equipment. Whether you want to create custom gifts, build a side business, or expand your product range, learning how to print on mugs yourself opens countless creative possibilities. This guide walks you through popular printing methods including dye sublimation, heat transfer vinyl, waterslide decals, screen printing, and UV printing, explaining the equipment you need, step-by-step instructions, and troubleshooting tips to achieve professional results from your first attempt.
Table of Contents
- Key takeaways
- Understanding mug printing methods
- Gathering your materials and preparing your design
- Executing the mug printing process: step-by-step
- Troubleshooting common issues and verifying results
- Start creating personalised mugs with the right supplies
- How to print on mugs FAQ
Key Takeaways
| Point | Details |
|---|---|
| Sublimation best for mugs | Sublimation requires polymer coated ceramic mugs, a compatible sublimation printer, specialised inks, transfer paper and a heat press to bond dyes for durable full colour prints. |
| Multiple mug printing methods | There are several methods available including HTV, waterslide decals, screen printing and UV printing, each suited to different materials and production volumes. |
| Preparation and settings matter | Proper preparation and correct equipment settings are essential for durable professional results. |
| Test and align designs | Testing designs and careful alignment prevent common printing issues and wasted batches. |
| Low cost online entry | Online services provide a low cost entry point to start with before investing in equipment. |
Understanding mug printing methods
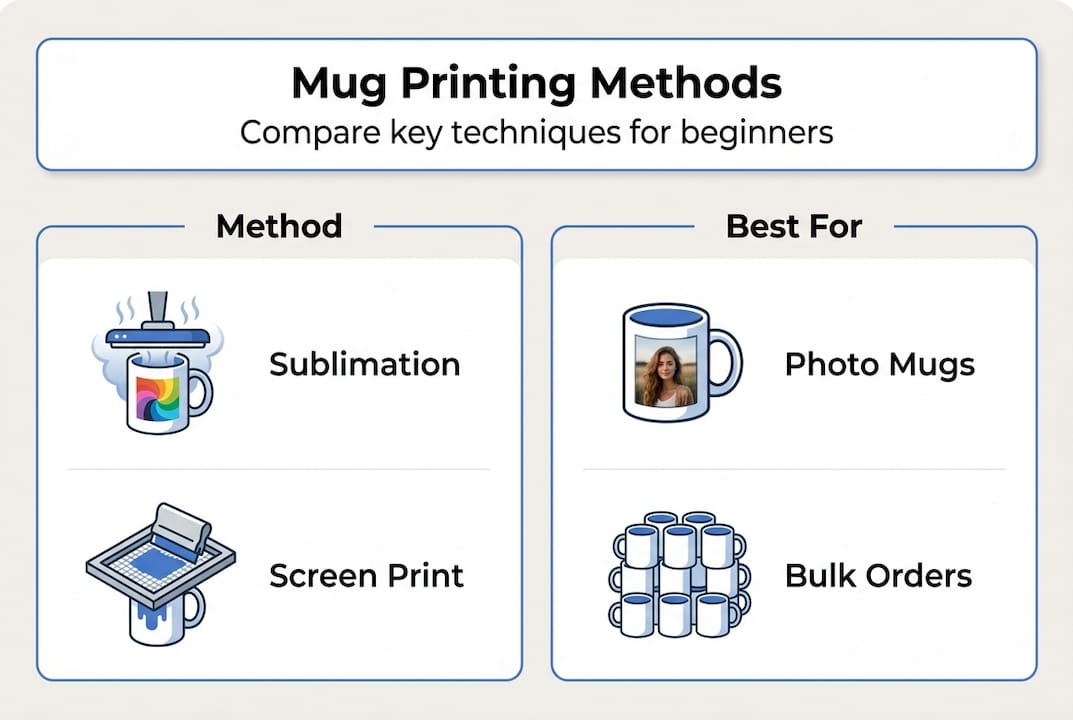
Choosing the right printing method determines your equipment investment, production speed, design flexibility, and final product quality. Dye sublimation is the primary method suitable for small businesses and hobbyists, offering vibrant, permanent prints that become part of the mug surface rather than sitting on top. This process requires polymer-coated ceramic mugs, a sublimation printer with specialised inks, sublimation transfer paper, and a heat press to transfer designs under high temperature. The polymer coating bonds with sublimation dyes when heated, creating photographic-quality images that withstand repeated washing and daily use.
Alternative methods include HTV, waterslide decals, screen printing, and UV printing with different use cases. Heat transfer vinyl works brilliantly for simple text or logo designs and appeals to crafters already using cutting machines like Cricut or Silhouette. You cut your design from coloured vinyl sheets, weed away excess material, then apply using a heat press or even a household iron for small projects. Waterslide decals suit delicate, intricate designs and use standard inkjet printers with special decal paper, though they require careful application and protective clear coating for durability.
Screen printing excels for bulk production with limited colour palettes, particularly on dark-coloured mugs where sublimation cannot work effectively. This traditional method uses mesh screens to apply opaque inks layer by layer, making it cost-effective once you have created screens for your designs. UV printing represents the newest technology, allowing direct printing onto various surfaces including non-coated ceramics, glass, and metal. UV printers cure ink instantly with ultraviolet light, producing durable results without heat pressing, though the equipment investment runs significantly higher than other methods.
Pro tip: Start with sublimation printing step by step if you plan to offer personalised photo mugs, as this method delivers the most professional results for full-colour imagery with relatively accessible equipment costs.
| Method | Best for | Mug type required | Volume scalability | Initial investment |
|---|---|---|---|---|
| Dye sublimation | Full-colour photos, gradients | Polymer-coated only | Medium to high | Medium |
| Heat transfer vinyl | Simple text, logos, solid colours | Any smooth surface | Low to medium | Low |
| Waterslide decals | Delicate designs, vintage looks | Any glazed ceramic | Low | Very low |
| Screen printing | Bulk orders, limited colours | Any, especially dark mugs | High | Medium to high |
| UV printing | Direct printing, various materials | Coated and uncoated | Medium to high | High |
Understanding these custom mug printing methods helps you match your business model or creative goals with the appropriate technology. Consider your target market, typical order sizes, design complexity, and budget before investing in equipment. Many successful mug printing businesses start with sublimation for personalised orders and add screen printing later for corporate bulk orders.
Gathering your materials and preparing your design
Successful mug printing begins long before you press the first transfer. Selecting appropriate mug blanks forms your foundation, with polymer-coated ceramic mugs essential for sublimation work. These specially treated mugs feature a polyester coating that bonds chemically with sublimation dyes under heat, creating permanent, vibrant prints. Standard ceramic mugs without this coating will not accept sublimation inks properly, resulting in faded or non-existent transfers. For alternative methods, choose blanks matching your process requirements, whether standard glazed ceramics for waterslide decals or any smooth surface for HTV application.
Design preparation separates amateur results from professional quality. Create or source artwork at 300 DPI resolution minimum to ensure sharp, clear prints without pixelation when wrapped around curved mug surfaces. Vector files work brilliantly because they scale infinitely without quality loss, perfect for text and logo designs. Always mirror your design before printing, as you will transfer it face-down onto the mug, flipping the image during the process. This critical step prevents backwards text and reversed imagery on your finished product.
Your equipment checklist should include:
- Sublimation printer loaded with sublimation inks
- High-quality sublimation transfer paper designed for mugs
- Mug heat press or convection oven with mug attachments
- Polymer-coated mug blanks in your preferred sizes
- Heat-resistant tape to secure transfers
- Teflon sheets or protective paper
- Heat-resistant gloves for safe handling
- Lint-free cloths for cleaning mug surfaces
Prepare your workspace with adequate ventilation, as sublimation releases fumes during heat pressing. Clean each mug thoroughly with isopropyl alcohol to remove oils, dust, or residues that interfere with transfer quality. Preheating mugs for 30 seconds helps reduce moisture content and improves ink absorption, particularly important in humid environments. Keep your design 5 to 10mm away from mug edges and handles to avoid smudging during pressing and ensure professional-looking margins.
Pro tip: Test print your design on regular paper first to verify colours, sizing, and alignment before committing to expensive sublimation paper and blanks. This simple step saves materials and identifies design issues early.
Follow these design preparation steps:
- Create or import your artwork in design software at 300 DPI or higher resolution
- Size your design to fit your mug template, typically 8 to 9 inches wide by 3.5 to 4 inches tall for standard 11oz mugs
- Mirror the entire design horizontally so text and images reverse
- Print onto sublimation paper using your sublimation printer with correct colour profiles
- Trim excess paper around your design, leaving 1 to 2cm margins for secure taping
- Allow printed paper to dry completely before handling to prevent smudging
Proper preparation eliminates most common printing problems before they occur. Investing time in this stage pays dividends in consistent, high-quality results that satisfy customers and build your reputation.
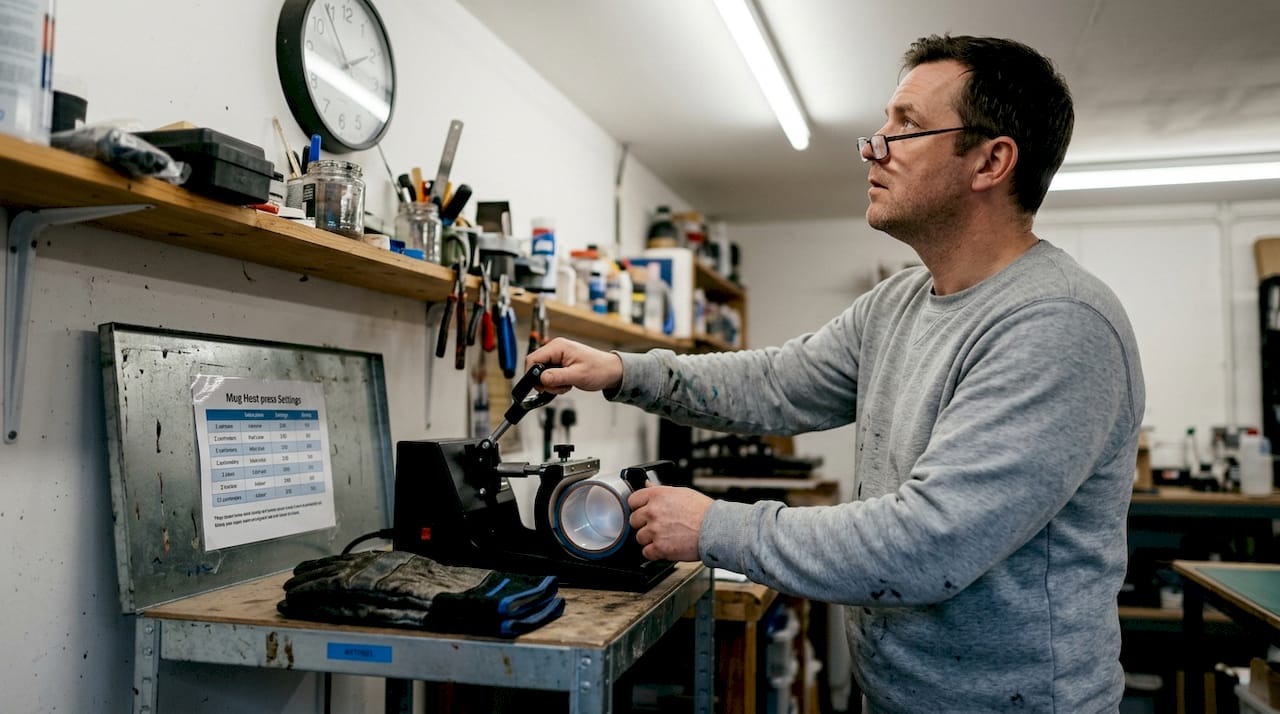
Executing the mug printing process: step-by-step
Once your materials are prepared and your design is printed, the actual transfer process requires precision and attention to detail. These step-by-step instructions focus on dye sublimation, the most popular method for personalised mug printing, though many principles apply to other heat transfer techniques as well.
-
Clean your polymer-coated mug thoroughly with a lint-free cloth and isopropyl alcohol, removing any fingerprints, dust, or manufacturing residues that could interfere with ink transfer.
-
Preheat your mug in the heat press for 30 to 45 seconds at your target temperature to remove moisture and bring the surface to optimal bonding conditions.
-
Wrap your printed sublimation paper around the mug with the printed side facing the mug surface, ensuring the design sits exactly where you want it to appear on the finished product.
-
Secure the paper tightly with heat-resistant tape along all edges, preventing any movement during pressing that would cause blurring or ghosting in your final image.
-
Place the wrapped mug into your heat press, ensuring even contact between the heating element and the entire design area without gaps or air pockets.
-
Press at 180°C for 180 seconds with medium pressure for optimal sublimation results, though exact settings may vary slightly based on your specific equipment and mug coating.
-
Remove the mug immediately after the timer completes, using heat-resistant gloves to protect your hands from the extremely hot ceramic surface.
-
Carefully peel away the sublimation paper whilst the mug remains hot, working quickly but smoothly to prevent the design from continuing to transfer in unwanted areas.
-
Allow the mug to cool completely on a heat-resistant surface before handling or quality checking, as colours may appear slightly different when hot.
Protect your heat press platen and mug surface by placing Teflon sheets between the heating elements and your transfer. These reusable protective sheets prevent scorching, distribute heat evenly, and extend the life of your equipment whilst ensuring consistent results across multiple mugs. Position them carefully to cover all contact points without creating wrinkles that could mark your finished product.
Pro tip: If you notice colours bleeding or quality suffering, adjust your temperature in 5°C increments rather than making large changes. Small adjustments help you dial in perfect settings for your specific equipment and blank combination.
Safety note: Always use heat-resistant gloves when handling hot mugs and ensure adequate workspace ventilation during sublimation pressing. The process releases fumes that should not accumulate in enclosed spaces, and ceramic mugs retain heat for several minutes after removal from the press.
Maintain consistent pressure throughout the pressing cycle by checking your heat press calibration regularly. Too little pressure results in patchy, incomplete transfers with visible gaps, whilst excessive pressure can cause colour bleeding and distortion around curved surfaces. Most mug presses include pressure adjustment guides, but experience teaches you the ideal feel for different mug sizes and designs.
Document your successful settings for different mug types and designs, creating a reference guide that ensures repeatable results. Record temperature, time, pressure, and any specific techniques that worked particularly well for certain design types or colour combinations. This personalised knowledge base becomes invaluable as you scale production and train additional team members.
Troubleshooting common issues and verifying results
Even experienced printers encounter occasional problems, but understanding common issues helps you identify and resolve them quickly. Common issues include bleeding, poor alignment, low-quality blanks, and incorrect equipment settings that compromise your finished products. Systematic troubleshooting saves time, materials, and customer relationships.
Print bleeding occurs when colours spread beyond their intended boundaries, creating blurry edges and muddy details. This typically results from excessive heat, too much pressure, or prolonged pressing times that drive sublimation dyes deeper into the polymer coating than intended. Lower your heat temperature in 5°C increments and reduce pressing time by 10 to 15 seconds, testing results between adjustments. Check that your heat press pressure sits at medium rather than maximum, as lighter pressure often produces sharper results on curved surfaces.
Misalignment problems stem from paper movement during pressing or incorrect initial placement. Check your design alignment carefully before pressing, using guide marks or templates to position artwork consistently across multiple mugs. Secure transfer paper with sufficient heat-resistant tape along all edges, paying particular attention to areas that might lift during pressing. Consider using mug wraps or positioning jigs that hold paper precisely in place throughout the entire transfer cycle.
Dull or faded colours indicate several possible causes:
- Insufficient pressing temperature failing to activate sublimation dyes fully
- Expired or low-quality sublimation inks producing weak colour saturation
- Non-polymer or poorly coated mug blanks that cannot accept sublimation properly
- Incorrect colour profiles in your printer settings reducing output vibrancy
- Excessive moisture in paper or mugs interfering with dye transfer
Peeling or flaking prints suggest the design never bonded properly with the mug surface. This almost always points to inadequate heat, insufficient pressing time, or contaminated mug surfaces preventing proper adhesion. Ensure you clean mugs thoroughly before pressing and verify your heat press reaches the target temperature before beginning production runs. Low-quality blanks with inconsistent polymer coatings also contribute to adhesion failures.
Pro tip: Maintain consistent equipment calibration and order blanks from reputable suppliers like SubliBlanks for best outcomes. Cheap, inconsistent blanks create frustrating quality variations that waste time and materials whilst damaging your reputation.
Validate print durability through practical testing before delivering customer orders. Properly executed sublimation prints are dishwasher safe and withstand hundreds of wash cycles without fading or peeling. Run test mugs through your dishwasher multiple times, checking for colour retention, surface integrity, and overall appearance. Microwave testing ensures the polymer coating and sublimation dyes remain stable under heat exposure typical in daily use.
Inspect finished mugs under good lighting for:
- Complete colour coverage without gaps or light spots
- Sharp edges and clear details matching your original design
- Consistent colour saturation across the entire image area
- No visible tape marks, wrinkles, or pressing artefacts
- Smooth surface texture without bubbling or roughness
Document any recurring problems with specific design types, mug sizes, or production conditions. Patterns emerge that help you refine techniques and prevent future issues. Share successful solutions with team members to maintain quality standards across all production runs.
Start creating personalised mugs with the right supplies
Mastering mug printing techniques opens exciting opportunities for creative expression and business growth, but success depends heavily on using quality materials and reliable equipment. SubliBlanks supplies professional-grade polymer sublimation mugs and essential accessories to UK and Ireland customers with no minimum order quantities, making it easy to start small or scale production as your business grows.

Whether you are creating personalised gifts for friends and family or building a thriving custom mug business, investing in consistent, high-quality blanks eliminates frustrating variables that compromise results. Professional suppliers understand the technical requirements of sublimation printing and source blanks with properly applied polymer coatings that accept dye transfers beautifully. Pairing quality mugs with heat press Teflon sheets and proper sublimation papers creates a reliable system that produces professional results consistently. Explore the complete range of UK wholesale sublimation supplies to find everything you need for successful mug printing projects.
How to print on mugs FAQ
How do I choose the best mug blanks for sublimation?
Select polymer-coated ceramic mugs specifically manufactured for sublimation printing, as standard ceramic mugs will not accept sublimation dyes properly. Look for blanks from reputable suppliers with consistent coating quality, bright white surfaces, and appropriate sizes for your target market. Test samples from new suppliers before committing to large orders to verify coating performance and durability.
Can I use any printer for mug printing?
No, sublimation printing requires a dedicated sublimation printer or a converted inkjet printer loaded with sublimation inks rather than standard inks. Regular inkjet or laser printers cannot produce the specialised dyes needed for heat transfer onto polymer-coated surfaces. Invest in a proper sublimation printer designed for this purpose to achieve professional, permanent results.
How do I avoid colour fading on printed mugs?
Use correct pressing temperature and time settings, typically 180°C for 180 seconds, to ensure complete dye sublimation into the polymer coating. Source high-quality sublimation inks and polymer-coated blanks from reliable suppliers, as inferior materials produce faded results regardless of technique. Properly executed sublimation prints remain vibrant through hundreds of dishwasher cycles without fading.
What designs work best for mug printing?
Full-colour photographs, gradients, and complex artwork excel with sublimation printing, whilst simple text and logos work well with heat transfer vinyl or screen printing. Keep designs 5 to 10mm away from mug edges and handles to prevent smudging during pressing. High-resolution images at 300 DPI or higher ensure sharp, professional results without pixelation on curved surfaces.
Are sublimation prints dishwasher safe?
Yes, properly executed sublimation prints are fully dishwasher safe because the dyes bond permanently with the polymer coating at a molecular level rather than sitting on the surface. Test your specific equipment settings and blank quality by running sample mugs through multiple dishwasher cycles before delivering customer orders. Correct temperature, time, and pressure settings ensure maximum durability and fade resistance.
Recommended
- MDF Blank Guide: Your Ultimate Resource for Crafting – SubliBlanks Ltd
- 7 Essential Examples of Sublimation Equipment for Start-Ups – SubliBlanks Ltd
- Sublimation Printer Setup Guide for Small Businesses – SubliBlanks Ltd
- Sublimation Transfer Process: Achieve Professional Prints Easily – SubliBlanks Ltd


