



Dry, Seal, Monitor: Filament Moisture Control at 10–20% RH for Makers
Wet filament rarely announces itself before it ruins a print. Dry any spool showing popping, stringing or a rough surface using controlled heat, then keep every reel sealed with desiccant and monitor storage humidity. Spools that stay loaded on the printer need an in-line dryer or a proper dry box. Get that sequence right and most moisture problems disappear.
TL;DR:
- Filament moisture control requires airtight storage, desiccants, and humidity monitoring, especially for materials like nylon, PVA, and TPU that absorb water quickly.
- Signs of wet filament include popping, bubbling, stringing, dull surface finish, and brittle texture, which can be confirmed with a test print.
- Drying filaments effectively involves dedicated dryers or food dehydrators at specific temperatures for 4 to 12 hours, depending on the material, avoiding overly high temperatures.
- Storage should employ desiccants in sealed containers, vacuum sealing for long-term, and dry boxes or inline dryers for frequent use, with humidity kept below 20-30% RH.
- Over-drying at excessive heat risks damaging filament and reels; always check material-specific temperature ranges and monitor spool conditions after each drying cycle.
Table of Contents
- Quick checklist: the tools and targets that fix most moisture problems
- How do you know if your filament is wet?
- How to dry filament: methods, temperatures and timings by material
- Storage options: desiccant, vacuum seals, dry boxes and print-day feeding
- Monitoring and maintenance: hygrometers, desiccant life and RH targets
- A practical workflow for print day and storage
- Safety and over-drying: what to avoid
- What SubliBlanks’ own guidance adds to the picture
- What I reach for first, and what I add later
- Get your filament and storage supplies sorted in one order
- Sources
Quick checklist: the tools and targets that fix most moisture problems
Filament moisture control comes down to a handful of items and a couple of numbers worth memorising. Get these in place before you troubleshoot anything more complicated.
- Airtight tub or resealable bag rated for food storage, big enough to fit a spool flat.
- Rechargeable silica gel with a colour indicator, not the tiny sachets that come free in the box.
- A digital hygrometer placed inside the storage, not just sitting on a shelf nearby.
- A dedicated filament dryer or food dehydrator for actively drying wet spools.
- A vacuum sealer if you’re storing filament you won’t touch for weeks.
Target storage humidity sits around 10 to 20% relative humidity (RH) for most materials, according to guidance from FilamentSpecs. PLA and PETG tolerate a bit more drift than that. Nylon, PVA and TPU want the tighter end of that range, or lower, because they pull in moisture far faster.
If a print is already failing mid-job, don’t wait for the perfect setup. Pull the spool, run it through a dryer for a few hours at the temperature its material calls for, and switch to sealed storage the moment it’s done. Fixing the print in front of you matters more than getting every step textbook perfect.
How do you know if your filament is wet?
The printer usually tells you before the spool does. Wet filament pushes moisture out as steam the instant it hits the nozzle, and that shows up as specific, recognisable faults rather than vague quality drops.
- Popping or hissing sounds at the nozzle during extrusion, sometimes loud enough to hear over the fans.
- Fine white foaming or bubbling visible on the extruded strand as it lays down.
- Stringing and oozing that gets worse than usual between travel moves.
- A rough, matte or pitted surface finish where you’d normally get gloss.
- Snapping or brittle filament when you flex a length of it by hand.
A quick test print helps confirm it: run a simple tower with vertical walls at your normal settings, and watch the first layers under good light for those tiny craters and bubbles.
Statistic Callout: Moisture sorption testing on common filaments found that absorbed water can meaningfully cut mechanical strength, with Nylon showing the steepest drop among the materials examined, according to a peer-reviewed study on filament moisture sorption.
One caution worth flagging: a hygrometer tells you the humidity of the air around the spool, not the water content sitting inside the polymer itself, as 3DMag explains. A dry box reading 15% RH doesn’t guarantee the filament inside is dry if it went in wet. For that, you need the print symptoms, a manufacturer’s technical datasheet, or a drying pass to be sure.
How to dry filament: methods, temperatures and timings by material
Three methods cover almost every situation, and they’re not equally good.
- Dedicated filament dryer. Built for the job, with even heat and usually a built-in fan. This is the method Makers101 ranks highest for consistency and safety, particularly for anyone drying regularly.
- Food dehydrator. A genuinely solid budget substitute, provided it holds a stable, adjustable temperature. Many hobbyists start here before buying dedicated gear.
- Kitchen oven. Workable as a last resort only. Ovens overshoot their set temperature, cycle unevenly, and can scorch filament or a spool’s plastic core if you’re not watching closely.
Safe drying windows vary a lot by material, and this is where checking the manufacturer’s technical datasheet (TDS) pays off, especially for engineering-grade filaments where the margin for error is smaller. As a starting point, guidance from FilamentSpecs and Makers101 suggests:
- PLA: 45 to 55°C for around 6 to 8 hours.
- PETG: 55 to 65°C for around 6 to 8 hours.
- TPU: 50 to 60°C for around 6 hours, at lower airflow to avoid distorting the flexible strand.
- ABS/ASA: 60 to 70°C for around 4 to 6 hours.
- Nylon (PA): 75 to 85°C for 8 to 12 hours or longer, since Nylon absorbs moisture the fastest and holds onto it the hardest.
- PC: 70 to 80°C for 6 to 10 hours, again checking the specific grade’s TDS given how heat-sensitive some blends are.
- PVA: low and gentle, around 40 to 50°C, for short cycles since PVA is water-soluble by design and degrades quickly under sustained heat.
Lay spools flat where your dryer allows it, and give the reel enough clearance that warm air actually circulates around the windings rather than just skimming the top layer.
Pro Tip: If you’re drying a spool for the first time and you’re not sure which end of a temperature range to use, start low and extend the time rather than pushing the heat up. Warped spools and brittle filament are much harder to undo than an extra hour in the dryer.
Storage options: desiccant, vacuum seals, dry boxes and print-day feeding
Drying solves the moisture already inside the filament. Storage stops new moisture getting back in, and that’s a different job entirely, as 3DMag points out when it notes that a dry box won’t dry wet filament on its own.
- Desiccant packs or beads go inside every sealed container, sized roughly to the container’s volume rather than a token sachet dropped in and forgotten.
- Vacuum sealing plus desiccant suits spools you won’t touch for weeks or months, giving the longest stability with the least ongoing attention, per Makers101’s storage guidance.
- A dry box or cabinet with a continuous low-level desiccant load suits spools you’re actively feeding into a printer, where you need to repeat access without resealing every time.
- In-line drying units sit between the spool and the extruder, keeping filament warm and dry as it feeds during long or humidity-sensitive prints.
Rechargeable, colour-indicating silica gel beats disposable sachets for anyone drying and storing regularly. According to SpoolHound’s storage guide, you can recharge saturated beads at around 120°C in an oven to restore their capacity rather than buying replacements every few months.
The trade-off is mostly about convenience against capacity. Vacuum bags are cheap and effective but fiddly to reopen constantly. Dry boxes cost more up front but let you grab a spool, load it, and reseal in seconds, which matters once you’re running more than two or three materials at once.
Monitoring and maintenance: hygrometers, desiccant life and RH targets
A hygrometer only earns its keep if you put it where it matters, inside the sealed container itself, not on the workbench nearby. Cheap digital units can take 15 to 30 minutes to stabilise after you open and reseal a box, so don’t trust the first reading you see.
- Aim for storage RH below 20 to 30%, tightening toward the low end for hygroscopic materials like Nylon, TPU and PETG, based on guidance from Ruuvi’s humidity management notes.
- Check the desiccant colour indicator every few weeks; most shift from orange or blue toward pink or clear as they saturate.
- Recharge desiccant in an oven around 120°C once it’s saturated, rather than discarding it.
- If RH creeps above your target, check the seal first, then swap in fresh or recharged desiccant before assuming the container itself has failed.
Statistic Callout: Storage guidance consistently points to a working target of roughly 10 to 20% RH for most filament families, a range that gives enough margin even when a container gets opened and closed several times a day, according to FilamentSpecs.
A practical workflow for print day and storage
Treat every spool with a two-question check before it goes anywhere near the printer: has it shown wet symptoms, and has it been exposed to open air for more than a day or two? If either answer is yes, dry it first.
For a fresh, sealed spool, load it and print. For one that’s been sitting open, run it through a drying cycle matched to its material, then seal it in an airtight container with fresh desiccant the moment it cools. Spools that remain permanently on the printer benefit most from an in-line dryer or an enclosed dry box feeding filament directly, so they never sit exposed between jobs.
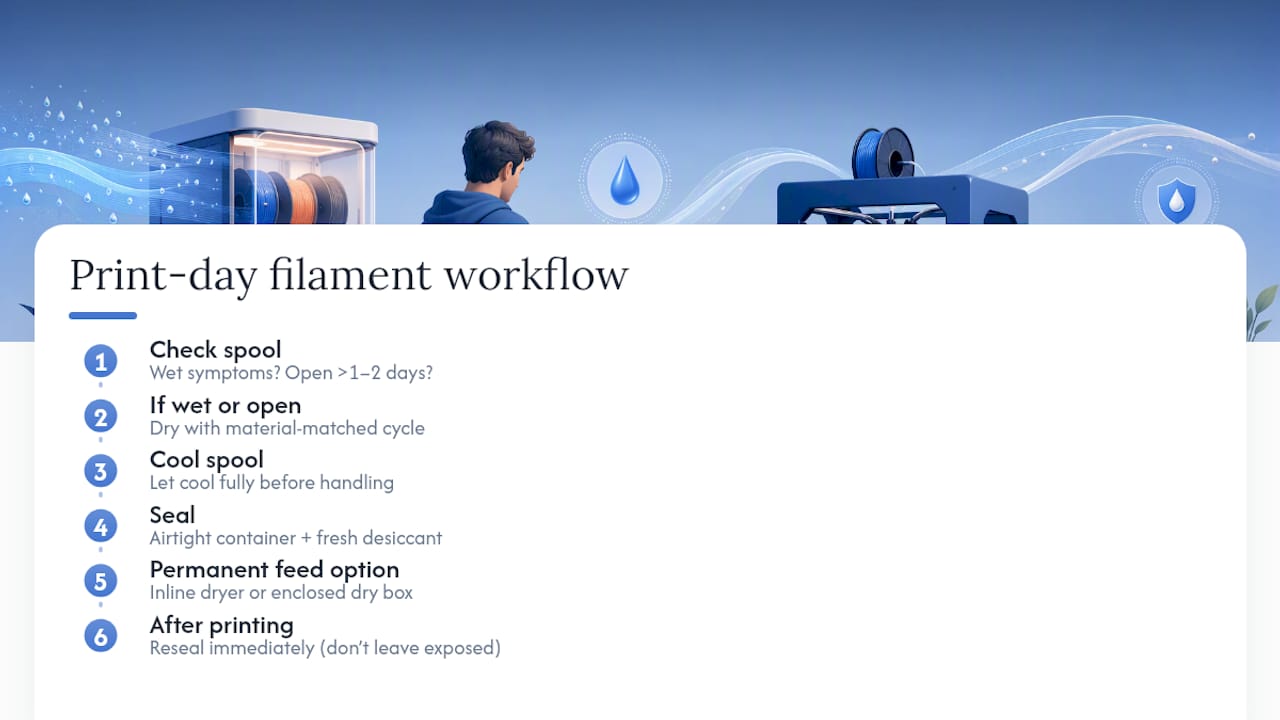
After printing, don’t leave a spool on the machine “just for tomorrow.” Reseal it. That single habit, treating dry then seal as one continuous action rather than two separate chores, prevents most of the moisture problems that show up weeks later as unexplained print failures.
Safety and over-drying: what to avoid
Excessive heat causes its own damage. Push Nylon or PC past their safe TDS range and you risk softening the spool itself, warping the reel, or making the filament brittle once it cools. Repeated drying cycles without a rest period can do the same over time, particularly to PVA, which degrades quickly under sustained heat.
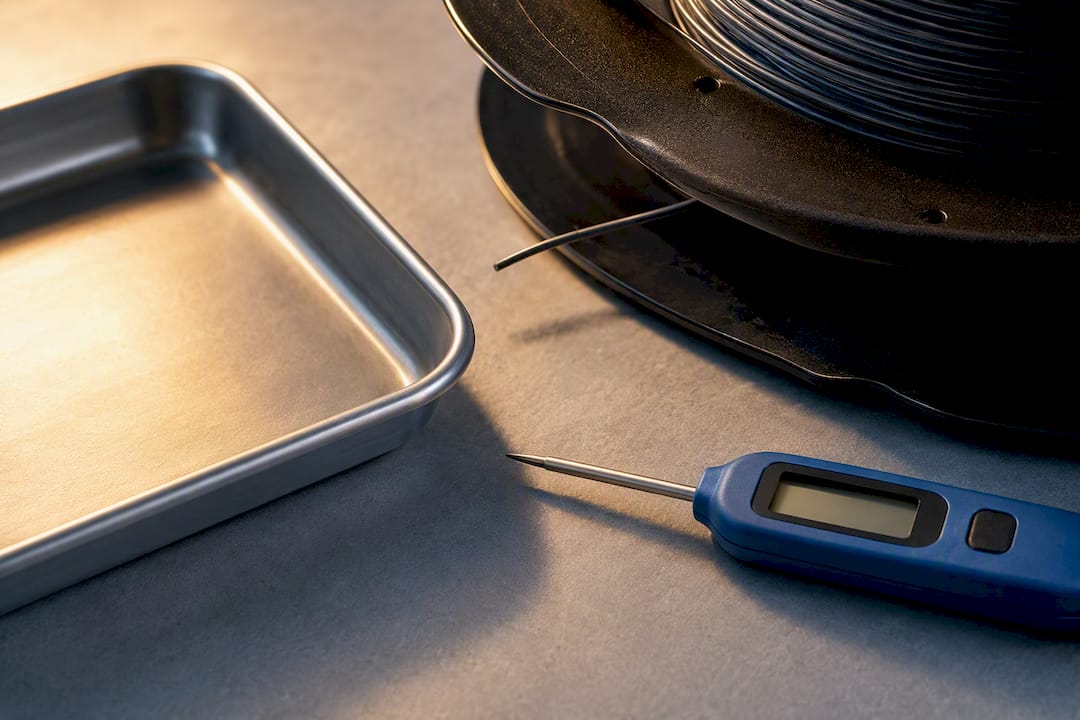
Never leave a kitchen oven unattended while drying filament, and always confirm its true internal temperature with a separate thermometer since built-in dials often run hot. When a material’s TDS isn’t available, default to the lower end of its family’s temperature range rather than guessing high.
Pro Tip: If a spool feels stiffer or the plastic reel has visibly warped after a drying cycle, that’s your sign you ran too hot for too long. Drop the temperature by 10°C and add time next round instead.
What SubliBlanks’ own guidance adds to the picture
SubliBlanks’ guide to 3D filament printing covers the setup side of getting consistent prints, which pairs naturally with a solid drying routine. For anyone running more than one spool through a small shop, batch drying at the end of the day, labelling each container with the drying date, and rotating desiccant on a fixed schedule keeps the process from becoming guesswork. The guide to what 3D printer filament actually is is worth a read if you’re still working out which material families need the strictest handling.
What I reach for first, and what I add later
For hobbyist work, I start with a sealed tub, rechargeable silica, and a cheap digital hygrometer inside it. That trio catches nearly every moisture issue before it reaches the nozzle. Once I’m running Nylon or TPU regularly, or feeding a printer for hours unattended, a dedicated dryer and an in-line drying setup earn their place. Buy the basics first. Scale up once a specific material forces your hand.
— chris
Get your filament and storage supplies sorted in one order
Choosing a single source for filament moisture control supplies can simplify obtaining desiccant, containers and hygrometers. You might have the option to order precisely the quantities you need, from a single spool and desiccant for hobby use to bulk stock for production.

A sensible starter bundle covers a spool in the material you print most, rechargeable silica beads, and a digital hygrometer to keep in your storage container. Add a vacuum sealer once you’re storing more than a couple of spools at a time. Browse the SubliBlanks storefront for current filament and supply stock, and check the sublimation printer range if you’re building out a wider print setup alongside your 3D printing gear.
Sources
For the technical detail behind the guidance above, the moisture sorption study on typical filaments shows how much mechanical strength different materials lose once wet. FilamentSpecs’ storage guide and Makers101’s drying guide both offer practical temperature tables and troubleshooting steps worth bookmarking.
- Moisture sorption study of typical filaments (MDPI, 2023)
- How to store 3D printer filament | 3DMag
- How To Dry And Store Filament: Beginner’s Guide (2026) | Makers101
- How to store filament | FilamentSpecs (2026)


