


Guide to 3D filament printing: choose, set up, print
TL;DR:
- D filament printing builds objects layer by layer using heated thermoplastic extrusion, with material choice crucial for success. Proper printer setup, filament handling, and troubleshooting are essential to avoid common issues like warping or stringing. Using high-quality, well-dried filament and following a consistent workflow significantly improve print reliability and outcome quality.
3D filament printing is the process of extruding heated thermoplastic filament through a printer nozzle to build physical objects layer by layer. Known formally as Fused Deposition Modelling (FDM), it is the most widely used desktop printing method for hobbyists and makers. Whether you are working with PLA, PETG, or ABS, your results depend on three things: choosing the right filament, preparing your printer correctly, and understanding the techniques that match your material. This guide to 3D filament printing covers all of it, from material selection through to troubleshooting.
What are the main types of 3D filament and how do they differ?
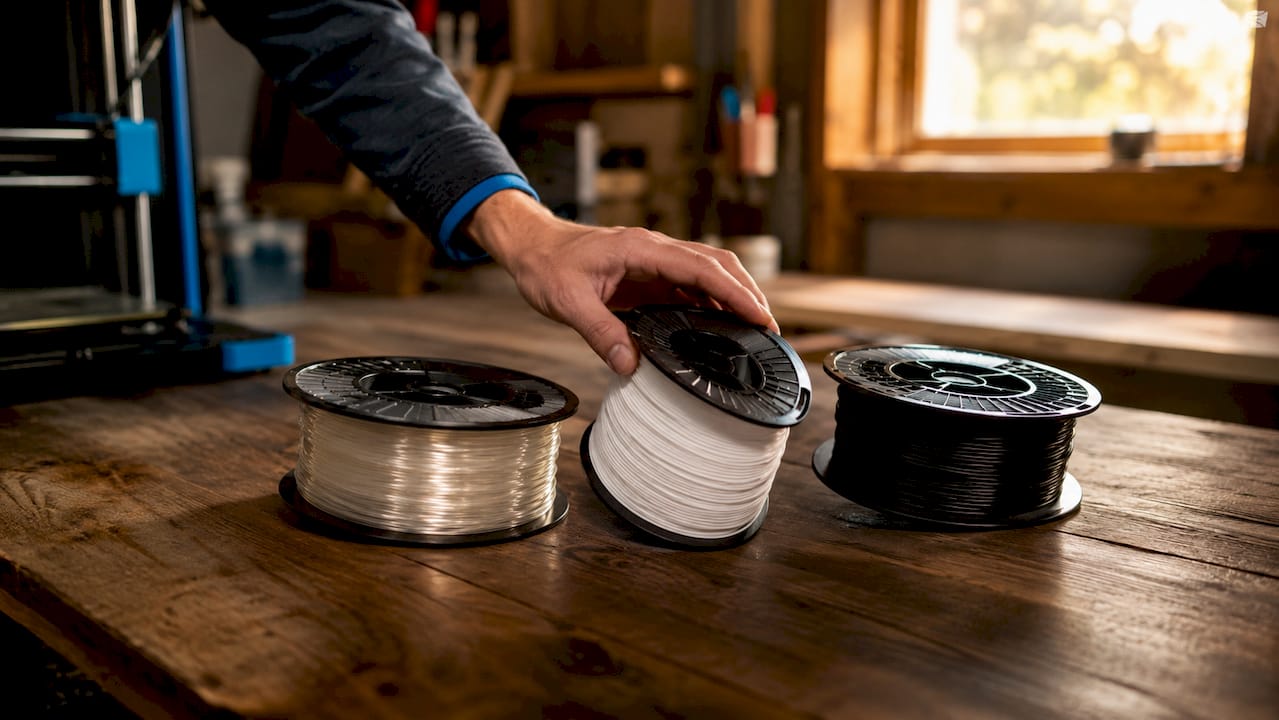
Choosing the right filament is the single most important decision you make before a print. No single best filament exists; the right choice depends on the stress, heat, and environmental conditions the finished part will face. Understanding each material’s properties stops you wasting time and filament on prints that fail before they leave the bed.
PLA: the beginner’s default
PLA (Polylactic Acid) is the starting point for almost every hobbyist. PLA is used in approximately 95% of hobbyist 3D prints because it prints at 190 to 220°C, requires no enclosure, and sticks reliably to glass or PEI beds. That accessibility means you spend less time fighting your printer and more time refining your designs. PLA+ is a modified version offering improved layer adhesion and slightly higher impact resistance, making it the smarter starting choice over standard PLA.
PETG: the functional parts workhorse
PETG (Polyethylene Terephthalate Glycol) sits between PLA and ABS in difficulty and capability. It requires 215 to 270°C nozzle and 70 to 90°C bed temperatures, offers UV durability and impact resistance, and does not need an enclosure. This makes it the go-to material for brackets, tool holders, and outdoor-use parts. The trade-off is that PETG strings more readily than PLA, so dialling in retraction settings is worth the effort.
ABS, ASA, and engineering-grade filaments
ABS and ASA both require higher temperatures and benefit strongly from an enclosure to prevent warping. ASA adds UV resistance over ABS, making it better suited to outdoor applications. At the advanced end, engineering filaments like Polycarbonate and Nylon need nozzle temperatures of 240 to 320°C, bed temperatures of 90 to 120°C, and enclosed chambers. These materials produce genuinely strong, heat-resistant parts, but they demand a printer capable of handling those conditions.
| Filament | Nozzle temp | Bed temp | Enclosure needed | Best for |
|---|---|---|---|---|
| PLA / PLA+ | 190–220°C | 20–60°C | No | Prototypes, decorative prints |
| PETG | 215–270°C | 70–90°C | No | Functional parts, outdoor use |
| ABS | 220–250°C | 90–110°C | Recommended | Heat-resistant parts |
| ASA | 230–260°C | 90–110°C | Recommended | UV-resistant outdoor parts |
| Nylon | 240–270°C | 70–90°C | Yes | Mechanical, wear-resistant parts |
| Polycarbonate | 260–320°C | 90–120°C | Yes | High-strength engineering parts |
Pro Tip: Start your calibration prints in white or grey filament. Light-coloured filaments help beginners diagnose print quality issues visually, making layer inconsistencies and adhesion problems far easier to spot.
What printer setup and filament handling practices matter most?
Good filament selection counts for nothing if your printer is not prepared correctly. The setup stage is where most hobbyist print failures originate, and most of those failures are preventable with a consistent pre-print routine.
Here is a practical setup checklist to work through before every session:
- Nozzle temperature: Match your nozzle temperature to the filament manufacturer’s recommended range, not a generic default. Running PLA at 215°C when it performs best at 200°C causes stringing and oozing.
- Bed temperature and surface: Use a heated bed for PETG, ABS, and ASA. PLA prints well on an unheated PEI sheet, but a 50 to 60°C bed improves first-layer adhesion noticeably.
- Bed levelling: Manual or automatic, your bed must be level before every print. A first layer that is too close or too far from the nozzle causes the majority of adhesion failures.
- Filament diameter consistency: Cheap filaments have significant diameter variation that causes uneven extrusion no slicer setting can fully compensate for. Stick to reputable brands with tight tolerances.
- Enclosure: ABS, ASA, Nylon, and Polycarbonate all benefit from an enclosed print environment to maintain ambient temperature and prevent warping.
- Filament storage: Keep spools in sealed bags or airtight containers with silica gel desiccant when not in use. Hygroscopic filaments like Nylon absorb moisture within hours of exposure to open air.
Moisture is the most underestimated problem in filament printing. Even sealed filaments may contain moisture causing print defects, so drying before critical prints is advisable. You will hear popping or crackling sounds during extrusion when moisture is present, and the resulting prints show bubbles, weak layer bonds, and surface roughness.
Pro Tip: A dedicated filament dryer, such as the Sunlu S2 or Polymaker PolyDryer, keeps your spool at the correct drying temperature while printing. This is particularly valuable for Nylon and TPU, which absorb moisture faster than most other materials.
High-quality filament brands deliver consistent diameter and reduce failure rates significantly compared to budget alternatives. Brands such as Polymaker, Prusament, and Bambu Lab maintain tight tolerances that translate directly into more reliable prints and less time recalibrating. For a broader look at building an efficient printing workflow, the setup stage is always the foundation.
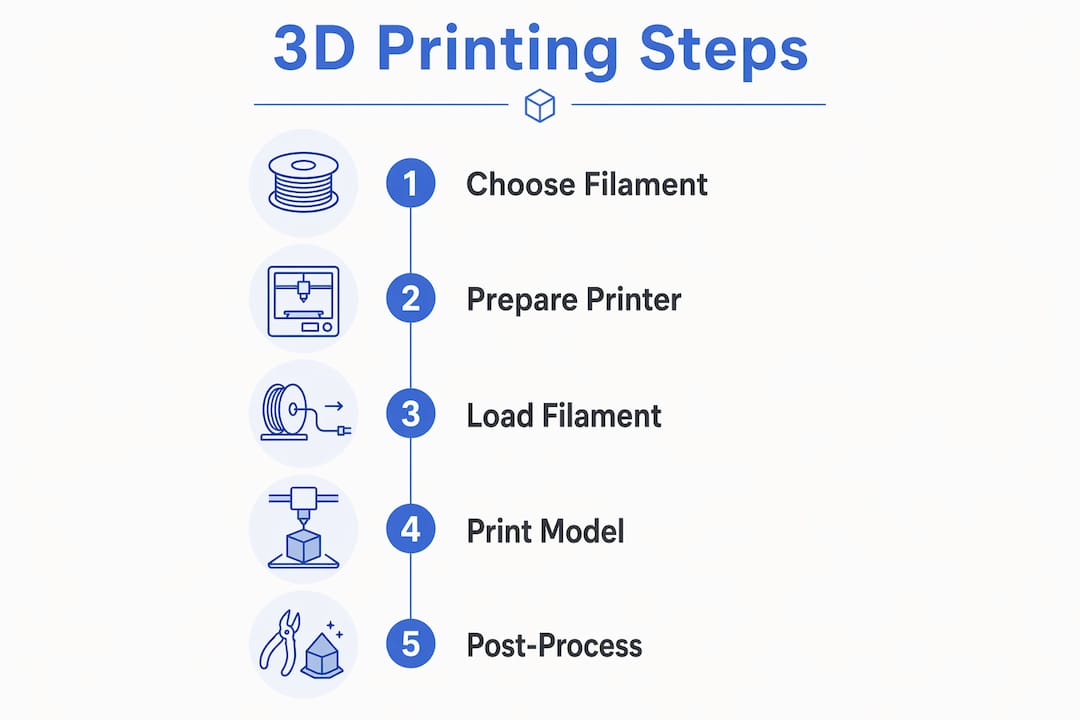
How do you execute an effective 3D filament printing process?
A reliable printing process follows a consistent workflow from digital model to finished part. Skipping steps, particularly slicing and calibration, is the fastest route to wasted filament and failed prints.
Follow this numbered workflow for every print:
- Prepare your model. Import your STL or 3MF file into your slicer, such as PrusaSlicer, Bambu Studio, or Ultimaker Cura. Orient the model to minimise overhangs and maximise bed contact area.
- Set filament-specific slicer profiles. Use or create a profile that matches your filament type. Layer height, print speed, and cooling settings all vary by material.
- Calibrate extrusion. Run an extrusion multiplier or flow rate calibration print before starting a new filament spool. Under-extrusion and over-extrusion are both visible in the first few layers.
- Level the bed. Use a piece of paper or a feeler gauge for manual levelling, or run your printer’s automatic bed levelling routine. Confirm the first layer visually before leaving the printer unattended.
- Start the print and monitor the first layer. The first layer is your quality indicator. If it is not adhering evenly, stop and adjust rather than hoping the rest of the print recovers.
- Post-process as needed. Sand PLA and PETG with 120 to 400 grit sandpaper for a smoother finish. ABS can be acetone-vapour smoothed for a near-injection-moulded surface quality.
The table below summarises typical slicer settings for the most common filaments:
| Filament | Layer height | Print speed | Cooling fan | Retraction |
|---|---|---|---|---|
| PLA / PLA+ | 0.1–0.3mm | 40–80mm/s | 100% | 1–6mm |
| PETG | 0.15–0.3mm | 30–60mm/s | 30–50% | 2–6mm |
| ABS | 0.15–0.3mm | 40–60mm/s | Off or minimal | 4–7mm |
| Nylon | 0.15–0.25mm | 30–50mm/s | Minimal | 4–6mm |
For a detailed walkthrough of the full process, the step-by-step 3D printing guide from Subliblanks covers the beginner workflow from first model to finished print.
What common filament printing problems can you troubleshoot?
Even experienced hobbyists encounter print failures. The key is diagnosing the cause systematically rather than changing multiple settings at once. Adjust one variable, run a test print, and assess before making another change.
Here are the most common issues and their fixes:
- Warping: The print lifts from the bed during printing. Increase bed temperature, add a brim in your slicer, and use an enclosure for ABS and ASA. Applying a thin layer of glue stick to the bed surface also improves adhesion on glass beds.
- Stringing: Fine threads of filament appear between parts of the print. Increase retraction distance and speed in your slicer, reduce print temperature by 5°C increments, and increase travel speed. PETG is particularly prone to stringing.
- Poor first-layer adhesion: The first layer does not stick or peels away. Re-level the bed, clean the surface with isopropyl alcohol, and confirm your bed temperature matches the filament requirement.
- Layer separation: Layers split or delaminate. This usually indicates under-extrusion or too-low printing temperature. Increase nozzle temperature by 5°C and check for partial blockages in the nozzle.
- Popping or bubbling during extrusion: Moisture in the filament. Dry the spool at the manufacturer’s recommended temperature before printing. Nylon typically requires 70 to 80°C for four to eight hours.
- Under-extrusion: Thin or incomplete layers. Check for a partial clog, confirm your extrusion multiplier is calibrated, and verify the filament is feeding freely from the spool.
The 3D printing benefits for small businesses article from Subliblanks also touches on how consistent print quality directly affects practical output, which is useful context if you are printing for more than personal projects.
Key takeaways
Successful 3D filament printing depends on matching your filament to the job, preparing your printer correctly, and troubleshooting methodically rather than guessing.
| Point | Details |
|---|---|
| Start with PLA+ | PLA+ is the most reliable entry point before progressing to PETG and advanced materials. |
| Match filament to application | Choose based on heat, stress, and environmental requirements, not brand marketing. |
| Dry your filament | Even sealed spools can contain moisture; dry hygroscopic materials before critical prints. |
| Prioritise diameter consistency | Consistent filament diameter from reputable brands reduces extrusion failures and recalibration. |
| Troubleshoot one variable at a time | Changing multiple settings simultaneously makes it impossible to identify the actual cause of failure. |
What I have learnt from years of filament printing
The advice I give every hobbyist starting out is the same: resist the urge to jump straight to ABS or Nylon because you want strong parts. Beginners benefit from a staged learning path starting with PLA+, then PETG, then more demanding materials as your understanding of your specific printer grows. Every printer behaves slightly differently, and you need to know yours before adding material difficulty on top.
The other thing most guides understate is filament quality. I have wasted more hours troubleshooting prints that turned out to be caused by cheap, inconsistent filament than by any slicer setting. Spending a little more on a reliable brand is not a luxury. It is the fastest way to reduce failed prints and frustration.
One practical note that does not appear in enough guides: if you are printing ABS, ASA, or Nylon in an enclosed space, use ventilation or a fume filter. These materials emit volatile compounds during printing that you should not be breathing regularly. A basic activated carbon filter attached to your enclosure costs very little and makes a real difference.
Finally, do not underestimate the 3D printing community. Forums like Reddit’s r/3Dprinting and the Printables community are full of people who have already solved the exact problem you are facing. Use them.
— chris
Expand your making skills with Subliblanks

If you enjoy the hands-on creativity of 3D filament printing, sublimation printing is a natural next step for any maker. Subliblanks supplies a full range of sublimation equipment, blanks, and accessories with no minimum order quantities, making it easy to experiment without committing to bulk stock. One popular starting point for hobbyists is the sublimation round MDF name badge, a simple, satisfying project that pairs well with the precision mindset you develop through 3D printing. Browse the full range at Subliblanks to find equipment and blanks that complement your existing workshop setup.
FAQ
What is the best filament for beginners?
PLA and PLA+ are the best starting filaments for beginners. PLA prints at 190 to 220°C, requires no enclosure, and adheres reliably to most bed surfaces.
Does PETG need an enclosure to print well?
PETG does not require an enclosure, but it does need a heated bed set to 70 to 90°C. It is more forgiving than ABS while still producing durable, functional parts.
Why does my filament make popping sounds during printing?
Popping or crackling during extrusion indicates moisture in the filament. Dry the spool in a filament dryer or oven at the manufacturer’s recommended temperature before your next print.
How do I stop my prints from warping?
Increase your bed temperature, add a brim in your slicer, and use an enclosure for materials like ABS and ASA. Cleaning the bed surface with isopropyl alcohol before each print also improves adhesion significantly.
Does filament brand really matter?
Yes. Consistent filament diameter from quality brands directly reduces extrusion failures. Budget filaments with poor diameter tolerance cause print defects that slicer adjustments alone cannot fix.


