



Step by step stamp making: a complete crafter's guide
TL;DR:
- Stamp making involves designing and crafting custom stamps using hand carving, foam layering, or laser engraving techniques. Choosing the right materials, designing at the final stamp size, and testing impressions beforehand ensure high-quality results. Patience during carving and matching the method to the intended use lead to successful, consistent stamps.
Step by step stamp making is the process of designing and crafting custom stamps using accessible materials and precise techniques. Whether you want to personalise gift wrap, brand your small business packaging, or add handmade touches to stationery, a custom stamp delivers results no printed label can match. This guide covers three core methods: hand carving, foam layering, and laser engraving preparation. Each method suits a different budget and skill level, and all three follow the same fundamental logic: design first, cut or carve second, assemble third, then test. Follow these stages and you will produce clean, repeatable impressions from the very first session.
What materials and tools do you need for stamp making?
The right materials determine whether your stamp lasts one project or one hundred. Hand carving requires a standard white eraser or a dedicated carving block, a set of wood carving tools with interchangeable blades, a cutting mat, and a ruler. Foam stamping needs craft foam sheets, a die-cutting machine such as the Sizzix Big Shot, and Bigz dies rated for thicker materials. Laser engraving preparation calls for a vector graphic file in AI, EPS, or SVG format, plus rubber sheet stock and a plywood mounting base.
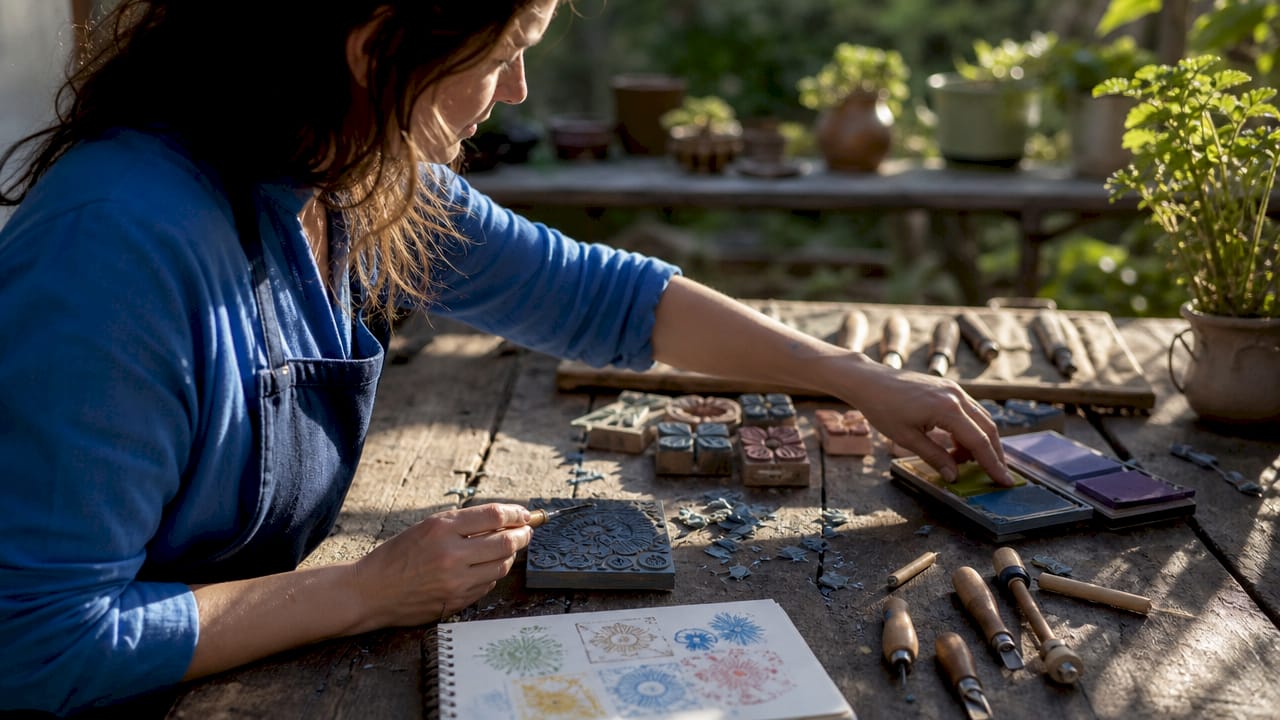
Ink choice matters as much as the stamp itself. Pigment inks work on most paper stocks and dry slowly enough to allow repositioning. Dye inks dry faster and suit absorbent surfaces. Archival inks resist fading and are the standard choice for business use. A quality ink pad with a firm, even surface produces far more consistent results than a foam pad that compresses unevenly under pressure.
| Method | Core materials | Key tools |
|---|---|---|
| Hand carving | White eraser or carving block | Wood carving set, cutting mat |
| Foam layering | Craft foam sheets | Die-cutting machine, Bigz dies |
| Laser engraving | Rubber sheet, plywood base | Laser engraver, vector software |
Pro Tip: Buy a dedicated carving block rather than a standard stationery eraser. Carving blocks are softer, cut more cleanly, and hold fine detail far better than the hard rubber found in office erasers.
How do you design a stamp for carving or engraving?
Stamp design follows rules that differ sharply from general graphic design. Successful stamp designs prioritise solid shapes and clear outlines rather than colour gradients or blended effects. A design that looks striking on screen can become a muddy smear once carved or engraved. Silhouette, contrast, and line weight carry the entire visual load.
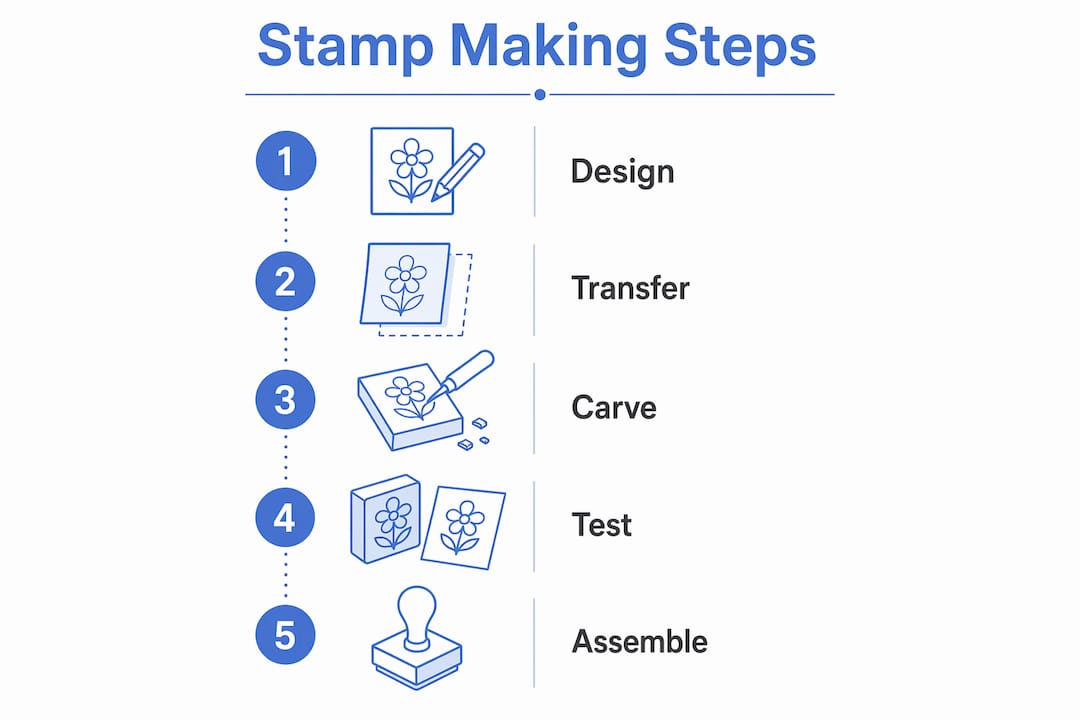
File format is non-negotiable for laser work. Professional-quality stamp designs require vector files with outlined fonts, or at minimum 300–600 DPI raster images at the final stamp size. Raster files often need manual vector conversion, which adds time and cost. Starting in vector from the outset removes that problem entirely.
Follow these steps to prepare your artwork:
- Sketch your design on paper at the exact physical size of the finished stamp.
- Scan or photograph the sketch, then redraw it in vector software such as Adobe Illustrator or Inkscape.
- Convert all fonts to outlines so letterforms do not shift between machines.
- Remove all colour fills, gradients, and drop shadows. Use black on white only.
- Check that no line is thinner than 0.5 mm at final size. Thinner lines collapse during carving or engraving.
- Print the design at 100% scale and hold it against a light source to spot any problem areas before committing to production.
Designing at the final physical size is the single most common mistake beginners skip. Scaling a large design down causes hairline strokes to become unusable. Always work at the size you intend to stamp.
Pro Tip: Print a test sheet at 100% scale and physically stamp the paper with an uninked block to check spacing and proportion before you carve a single line.
How do you carve and assemble a handmade stamp?
Beginner eraser stamps can be carved in under 15 minutes using a wood carving tool set and a standard white eraser. That speed is achievable because the technique is straightforward once you understand the order of cuts. Work from the outside edges inward, removing background material first before addressing fine interior details.
Follow these steps for a hand-carved stamp:
- Transfer your printed design onto the eraser surface. Lay the design face-down on the eraser and rub the back firmly with a pencil to transfer the graphite outline.
- Carve around the outer edge of the design first, removing the background rubber to a depth of roughly 2 mm.
- Switch to a finer blade and carve the interior details, working slowly and checking frequently.
- For text-based stamps, mirror your design before transferring it. Text must be reversed on the stamp to read correctly in the impression.
- Mount the carved eraser onto a plywood or wooden block using strong craft adhesive. Mounting on a sturdy plywood base is critical for even impressions and comfortable handling.
- Allow the adhesive to cure fully before testing.
Common mistakes to avoid:
- Cutting too deep on the first pass, which removes detail you cannot replace
- Applying uneven pressure when stamping, which causes one side of the impression to print darker
- Rocking or sliding the stamp during impression, which smears the ink
- Skipping test impressions on scrap paper before using the stamp on a final piece
Test impressions on scrap paper with straight, even downward pressure are the fastest way to identify areas that need further carving. Allow the ink to dry fully between tests so you read the true impression rather than a wet smear.
Pro Tip: Hold the stamp up to a lamp after carving. Light catches uneven surfaces immediately, showing you exactly where more material needs to come away.
What are the alternative methods: foam and laser engraving?
Foam stamping and laser engraving serve different needs but both produce results that hand carving cannot easily match at scale.
Building a foam stamp
DIY foam stamps use three stacked layers of craft foam cut by a die-cutting machine for a raised stamping surface. The layered construction creates a firm, even face that transfers ink consistently across the full design. Follow these steps:
- Cut your design shape from craft foam using a die-cutting machine and the appropriate Bigz die.
- Cut two additional identical layers from thinner craft foam.
- Stack and glue all three layers together, aligning edges carefully.
- Attach the foam stack to a wooden block or acrylic handle using strong adhesive.
- Press firmly on a well-inked pad and test on scrap paper before use.
Preparing for laser engraving
Laser engraving is preferred for high-precision, professional-grade rubber stamps, while hand carving suits affordable hobby projects. The method choice depends on budget, volume, and the level of detail required.
- Prepare your vector file with all elements as closed paths and no raster elements.
- Set the file dimensions to match the rubber sheet stock exactly.
- Run the laser at the manufacturer’s recommended settings for rubber, then inspect the engraved surface for clean, sharp edges.
- Cut the engraved rubber to size and mount it onto a plywood base with craft adhesive.
- Attach a handle or grip to the top of the plywood block.
| Method | Pros | Cons |
|---|---|---|
| Hand carving | Low cost, no equipment needed | Slower, limited fine detail |
| Foam layering | Fast, good for bold shapes | Less durable, lower detail |
| Laser engraving | High precision, repeatable | Higher equipment cost |
The choice of stamp making method depends on your goals. Hobbyists making occasional greeting card stamps need nothing more than a carving block and a wood carving set. Anyone producing stamps for regular business use will find the investment in laser equipment pays back quickly through speed and consistency.
Key takeaways
Successful stamp making depends on designing at the correct final size, choosing the right method for your budget and volume, and testing every stamp before committing it to a finished piece.
| Point | Details |
|---|---|
| Design at final size | Scaling down large designs destroys fine lines and makes stamps unusable. |
| Choose the right method | Hand carving suits hobbyists; laser engraving suits high-volume or precision work. |
| Use vector files for laser work | Vector formats prevent quality loss and avoid costly manual conversion. |
| Mount on a solid base | A plywood mount produces even pressure and a comfortable grip during stamping. |
| Test before final use | Scrap paper impressions reveal carving gaps and pressure problems early. |
Why patience is the skill no tutorial teaches you
I have watched crafters rush through their first carving session and then wonder why the impression looks ragged. The problem is almost never the tools or the material. It is the assumption that speed equals competence. Carving a stamp well is a slow, iterative process, and the crafters who accept that produce far better results than those who treat it as a race.
The design stage is where most beginners lose the most time, not the carving itself. New designers focus on colours and digital effects rather than creating simple, clear shapes suited for stamping. A design that works as a stamp looks almost boring on screen. Flat, solid, high-contrast. That simplicity is exactly what transfers cleanly to paper. If your design looks complicated in Illustrator, it will look worse on rubber.
My strongest recommendation is to read a custom stamp design guide before you pick up a carving tool. Understanding what makes a design stamp-ready changes how you approach the artwork entirely. You stop trying to replicate a logo and start thinking in silhouettes. That shift in thinking is worth more than any tool upgrade.
The method you choose should match your actual use case, not your aspirations. A foam stamp made with a Sizzix Big Shot is perfectly adequate for a crafter making 20 gift bags a year. Spending on laser equipment for that volume makes no sense. Equally, hand carving 500 business address stamps is a poor use of your time. Match the method to the job, and you will not regret either choice. For anyone wanting to understand the full range of options, the stamp making machine types guide at Subliblanks covers the mechanised end of the spectrum in useful detail.
— chris
Stamp making supplies and equipment at Subliblanks
Subliblanks supplies everything a crafter needs to move from first sketch to finished stamp, without requiring a minimum order.

The Subliblanks catalogue includes xTool laser engraving machines, laser-engraveable blanks, and a full range of stamp-making machines suited to both hobby and small business use. Crafters expanding beyond stamping will also find sublimation printers, DTF supplies, and packaging materials in one place. Whether you are carving your first eraser stamp or setting up a small production run, browse the full range at Subliblanks to find the right tools and materials for your project.
FAQ
What is the easiest stamp making method for beginners?
Hand carving with a white eraser and a wood carving tool set is the most accessible starting point. Beginner stamps can be completed in under 15 minutes with no specialist equipment.
What file format do I need for laser-engraved stamps?
Laser engraving requires vector files in AI, EPS, or SVG format with all fonts converted to outlines. Raster files at 300–600 DPI are acceptable for hand carving reference but not for laser production.
Why does my stamp impression look uneven?
Uneven impressions are usually caused by an unmounted stamp face, inconsistent downward pressure, or rocking the stamp during use. Mounting the carved rubber on a plywood base and pressing straight down resolves most cases.
How do I reverse text for a stamp design?
Mirror your design horizontally in your vector software before transferring it to the carving block or sending it to the laser. Text on the stamp must read backwards so the impression reads correctly.
Can I use craft foam instead of rubber for a stamp?
Yes. Stacking three layers of craft foam cut with a die-cutting machine produces a raised, firm stamping surface. Foam stamps are faster to make than carved rubber but wear more quickly under heavy use.


