



What is xTool laser engraving, explained for beginners
xTool laser engraving is a process that uses xTool-brand laser modules and its xTool Creative Space (XCS) or xTool Studio software to etch, mark, or cut materials with controlled beams of light. Instead of a blade or bit touching the surface, focused laser energy heats the material until it burns, discolours, or vaporises in exactly the pattern you designed.
Three things matter most when you’re starting out. First, xTool’s range spans diode, CO2, and fibre laser types, each suited to different materials. Second, every project follows the same basic path: design the artwork, load it into XCS or xTool Studio, dial in material settings, run a test, then commit to the full job. Third, ventilation is non-negotiable, and certain plastics such as PVC must never go near the beam.
Typical first projects include:
- Personalised wooden signs, coasters, and photo frames
- Decorating blanks like tumblers, keyrings, and slate for resale
- Small-batch production runs for gifts, awards, or branded merchandise.
Key Takeaways
xTool laser engraving works by using focused laser light through XCS or xTool Studio software to etch or cut materials, with results depending on matching laser type, settings, and testing to the material.
| Point | Details |
|---|---|
| Definition | xTool laser engraving uses xTool laser modules and XCS/xTool Studio software to etch or mark materials with controlled beams. |
| Laser types matter | Diode (around 455 nm) and CO2 (10.6 μm) suit wood and acrylic; fibre (1064 nm) suits metal. |
| Follow the standard workflow | Design, load into XCS/Studio, choose a material setting, test, then run the full job. |
| Test before you commit | Run a power/speed test array on scrap and save the winning setting as a user-defined profile. |
| Safety is non-negotiable | Use ventilation always, and never engrave PVC, foam, or unidentified leathers. |
| Where to buy equipment | SubliBlanks supplies xTool machines and laser-engraveable blanks with no minimum order quantity. |
Table of Contents
- How does an xTool laser engraver actually work?
- Which xTool models suit different projects?
- What materials can you engrave, and which should you avoid?
- What does a typical xTool workflow look like?
- How do you get consistently better engraving results?
- What can you actually make with an xTool laser?
- Why is my engraving too light, too dark, or blurry?
- How do you choose the right xTool machine for your projects?
- Frequently asked questions
- Sources
How does an xTool laser engraver actually work?
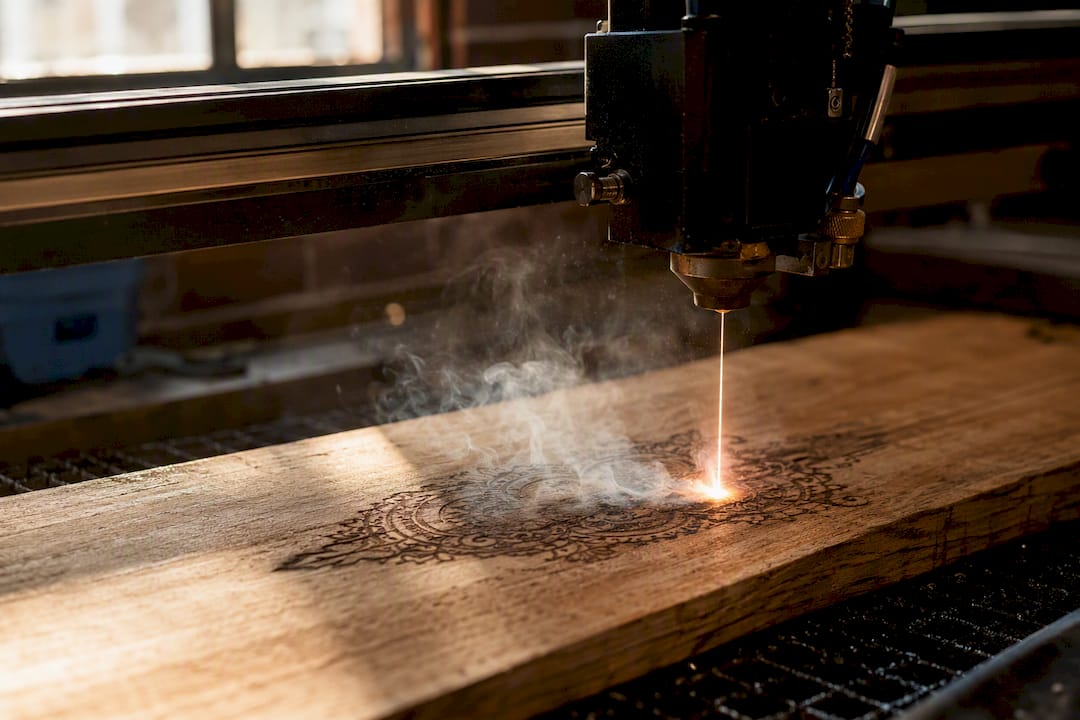
Every laser engraver, xTool included, works on the same principle: a focused beam of light hits the material’s surface and heats it fast enough to melt, vaporise, or scorch it in a controlled shape. The intensity and dwell time of that beam determine whether you get a light surface mark or a full cut through the material.
Where xTool machines differ is in laser type. Diode lasers, the most common option across xTool’s entry and mid-range machines, use a semiconductor to produce a beam typically around 455 nm (blue light). CO2 lasers generate a longer 10.6 μm wavelength using a gas tube, and fibre lasers produce a 1064 nm beam from a solid-state source. According to xTool’s own material processing guidance, CO2 and 455 nm blue-light lasers perform well on wood and acrylic, while 1064 nm fibre lasers are the standard choice for metals.
The wavelength matters because materials absorb light differently. Wood and acrylic soak up blue and CO2 wavelengths efficiently, which is why those lasers engrave them cleanly. Bare metal reflects most visible light, so a diode laser often struggles to mark it, whereas a 1064 nm fibre beam interacts with metallic surfaces far more effectively.
Pro Tip: If you’re planning to engrave anodised metal or bare steel, check the wavelength before you buy. A diode machine bought for wood and leather won’t give you clean metal marks without a fibre module.
Which xTool models suit different projects?
xTool’s line-up spans desktop diode engravers, hybrid diode/blade cutters, and more powerful multi-laser machines, so the right pick depends on what you’re making and how often.
- Entry desktop diode machines (the D1 range) suit hobbyists working mainly with wood, leather, and coated materials. They’re compact, quieter than CO2 systems, and forgiving for a first purchase, though raw power is lower, so thick or reflective materials take longer or need multiple passes.
- The F2, xTool’s portable dual-laser model, pairs a diode and fibre source in one enclosed unit, which means you can move between wood, acrylic, and metal marking without swapping machines. It’s a strong option for makers who take on varied small-business orders, though the enclosed footprint takes up more bench space than a bare desktop diode unit.
- Rotary-compatible models add a roller attachment that spins cylindrical items such as tumblers and bottles under the beam, opening up drinkware and rounded blanks as a product line without needing a separate machine.
Match the model to your material list before your budget, not the other way round.
What materials can you engrave, and which should you avoid?
Not every surface reacts to a laser the same way, and getting this wrong wastes material or, worse, creates a health hazard.
Reliable materials include:
- Wood (plywood, MDF, hardwood): absorbs blue and CO2 wavelengths well, giving crisp, dark engraving.
- Acrylic: cuts and engraves cleanly with CO2 or diode lasers, producing a frosted or flame-polished edge.
- Leather: engraves and cuts well, though thickness and tanning method affect settings.
- Coated or anodised metals: mark well with the correct wavelength, typically fibre for bare metal or diode for coated surfaces.
Materials to avoid entirely:
- PVC and vinyl: release chlorine gas when heated, which is corrosive to the machine and hazardous to breathe.
- Unknown or unlabelled leathers: some are chrome-tanned and produce similarly toxic fumes.
- Foams: many melt into hazardous compounds rather than engraving cleanly.
xTool’s own safety documentation is explicit on this point, warning against PVC, unidentified leathers, and foam because of fume risk to both the operator and the machine. Reflectivity and thermal conductivity also shape your results: highly reflective bare metal bounces light away rather than absorbing it, while dense woods hold heat differently to softwoods, which is why the same settings rarely transfer cleanly between materials.
Ventilation is not optional. Run an extraction fan or duct to an open window whenever you’re engraving, and never work in a sealed room.
Pro Tip: Before running a new material for the first time, check xTool’s material library for a pre-tested profile, then still burn one small test square on scrap. Five minutes of testing saves an entire ruined blank.
What does a typical xTool workflow look like?
Every xTool project, regardless of machine, follows roughly the same sequence. Here’s how it runs in practice:
- Design or import your artwork. Vector files (SVG, DXF) work best for clean line engraving and cutting; bitmap files (PNG, JPG, WEBP) suit photo-style engraving using Bitmap Engrave, which converts each pixel into an engraving depth.
- Load the file into XCS or xTool Studio and position it on your virtual workspace.
- Choose a material setting. xTool’s built-in EasySet library holds presets for common materials, or you can select Engrave to fill an area rather than just outline it, which the software’s own guidance notes needs correct power and speed to avoid burning or shallow results.
- Run a test array rather than committing straight to the full design. A test array is a small grid of squares, each engraved at a different power/speed combination, so you can see which setting gives the cleanest result on that exact piece of material.
- Save the winning combination as a user-defined material profile so you don’t have to repeat the test next time.
- Run the full job.
Before pressing start, confirm four things: the laser is focused correctly, the material is clamped flat, ventilation is running, and (on camera-equipped models) your alignment preview matches the physical piece. If you’re batching several items, xTool’s scanning path setting lets you choose “One by one,” which minimises head travel and shortens cycle time compared with engraving each item’s outline separately.
How do you get consistently better engraving results?
Most disappointing results trace back to one of three things: bad image prep, wrong settings, or a laser out of focus.
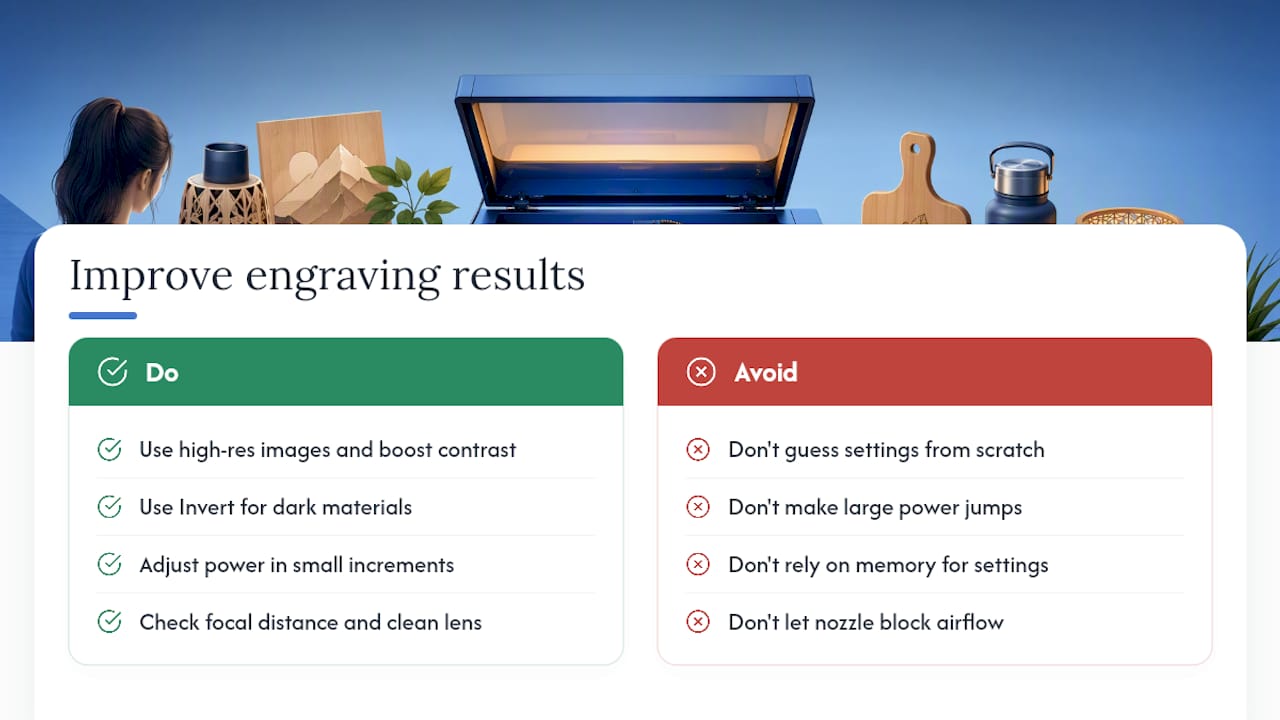
For Bitmap Engrave jobs, start with a high-resolution image and boost contrast before importing. Dark materials often need the Invert function in the bitmap settings, which flips light and dark values so the engraving reads correctly once burned. xTool’s own bitmap optimisation guidance points to this as one of the simplest fixes for low-contrast jobs.
For settings, xTool Academy’s approach is to start from a known formula for the material and adjust in small steps. The Academy course material recommends testing settings and saving what works, rather than guessing from scratch each time. In practice, that means adjusting power in small increments rather than large jumps, since a heavy jump usually means the difference between a clean mark and a scorched mess.
Focus matters just as much as settings. Check your focal distance before every job, especially when switching between materials of different thickness, and keep the lens clean since dust and residue scatter the beam and blur fine detail. If your machine has air assist, keep the nozzle clear too, as a blocked airflow lets smoke redeposit onto the surface mid-engrave.
Pro Tip: *Once you find a setting that works, save it as a named user-defined material profile immediately. Don’t rely on memory.
What can you actually make with an xTool laser?
Once the settings click, the range of projects opens up fast. Wooden signs, engraved slate coasters, acrylic awards, and leather keyrings are the natural starting point for most hobbyists, and they scale easily into gift runs once you’ve got a repeatable profile saved.
For small-business makers, the same machine covers prototyping, mark-and-brand jobs for local clients, and adding engraved detail to existing blanks inventory to lift their resale value. A rotary attachment extends the machine further into cylindrical items such as tumblers and bottles, which are consistently strong sellers in the personalised gift space.
- Personalised wooden signs and photo frames
- Engraved acrylic awards and plaques
- Leather keyrings, wallets, and small goods
- Rotary-engraved tumblers, bottles, and cans
- Branded blanks for local business clients
Why is my engraving too light, too dark, or blurry?
Most engraving problems have an obvious cause once you isolate the variable. Here’s what to check first.
- Shallow or faint engraving: increase power slightly or slow the speed down; the beam isn’t spending long enough or hitting hard enough on the surface.
- Charring or burning: reduce power or speed up the pass; you’re putting more heat into the material than it can handle cleanly.
- Blurred or fuzzy detail: check focus first, then check your source image resolution, since a low-resolution bitmap will never engrave sharp regardless of settings.
- Uneven lines across the piece: clean the lens and check the material is lying flat, since warped or uneven substrate throws the focal distance off mid-job.
If a quick fix doesn’t resolve it, run a fresh test array rather than guessing again. If problems persist even after retesting, check hardware: belt tension, rail alignment, and lens condition are the usual culprits behind consistent, machine-wide issues rather than material-specific ones. Change only one variable at a time so you actually learn what fixed it.
How do you choose the right xTool machine for your projects?
Work through a short checklist before you commit to a model:
- Workspace size: how big are the pieces you’ll typically engrave or cut?
- Material range: are you sticking to wood and leather, or do you need metal capability too?
- Power/wattage: thicker or denser materials need more power to cut cleanly rather than just surface-mark.
- Rotary capability: do you want to engrave bottles, tumblers, or other cylindrical items?
- Production volume: occasional hobby pieces versus repeat small-batch orders changes what speed and reliability you need.
- Ventilation setup: do you have space for extraction, or do you need a machine with built-in air filtration?
- Budget, including accessories: rotary attachments, extraction fans, and honeycomb beds add to the base machine cost.
A hobbyist making the occasional gift should prioritise ease of use and a manageable footprint over raw power. A small-business maker taking on repeat orders should weight material range and rotary capability more heavily, since that flexibility is what lets one machine cover several product lines instead of forcing a second purchase later.
A beginner’s honest note on getting started
What I’ve seen work consistently for beginners comes down to patience with settings, not talent. Run the small test squares before the real piece, save every setting that works, and treat ventilation as part of the machine, not an optional extra. Chris, who has written several in-depth guides on using xTool lasers, keeps coming back to the same point: the makers who get frustrated are usually the ones skipping the test array, not the ones with a worse machine.
Where SubliBlanks fits into your engraving setup
There are other places to source individual bits and pieces for a laser setup, but piecing together blanks, machines, and consumables from separate suppliers usually means minimum order quantities getting in the way of small projects. SubliBlanks supplies xTool laser engraving machines alongside laser-engraveable blanks, extraction accessories, and related consumables, with no minimum order quantity on any of it, so you can buy exactly what a project needs rather than a case you don’t.

Whether you’re kitting out a first hobby setup or stocking a small production line, browsing the SubliBlanks frontpage shows the full range of engraving machines and blanks in one place. If you’re also running sublimation alongside engraving, the sublimation printer collection covers the hardware side of that too. Have a look at what’s in stock and get your next material order moving.
Frequently asked questions
What is xTool laser engraving used for? It’s used for etching designs, text, or images onto materials like wood, acrylic, leather, and metal, covering everything from personalised gifts to small-batch business production.
Is xTool laser engraving safe to do at home? It’s safe with proper ventilation and by sticking to approved materials. Never engrave PVC, foam, or unidentified leathers, since burning them releases hazardous fumes.
Which xTool laser type should a beginner choose? A diode machine such as the D1 range suits beginners working mainly with wood and leather. If metal marking matters too, a dual-laser model like the F2 covers a wider material range from one machine.
Do I need special software for xTool laser engraving? Yes, xTool machines run through xTool Creative Space (XCS) or xTool Studio, which handle design import, material settings, and the test-array process that gets you reliable results.
Why does my xTool engraving come out patchy or uneven? This usually points to focus, lens cleanliness, or a material that isn’t lying flat. Check those three things before adjusting power or speed settings.
Sources
- Material processing guide — laser types and material interactions (xTool Support)
- How to use ‘Engrave’ in xTool Studio (xTool Support)
- How to set scanning path for engraving (xTool Support)
Recommended
- How to use an xTool laser: beginner’s guide 2026 – SubliBlanks Ltd
- What is a laser engraver: how it works and what to use it for – SubliBlanks Ltd
- Laser engraving process guide for beginners and small businesses – SubliBlanks Ltd
- Understanding laser engraver machines: a practical guide – SubliBlanks Ltd


