



Sublimation shrink sleeves: sizing and how‑to guide
Match the sleeve to your blank, not the other way round. Measure the tumbler or mug first, buy a mid‑sized pack (25 to 50 pieces) to test your oven settings, and only scale up once you’ve run a few clean full wraps. That’s the whole decision in one sentence, and it’s the one most beginners get backwards by buying bulk before they’ve confirmed fit.
Three things to do right now, before you read another paragraph:
- Measure your blank. Height, diameter at the widest point, and note whether it has a handle or a tapered base.
- Pick a sleeve size that gives you some spare length at each end at each end, not one that fits exactly.
- Buy a trial pack, not a case. Fifty sleeves is enough to dial in your oven before committing to hundreds.
Pro Tip: Buy one pack in your most common blank size and one pack a size up. Odd‑shaped tumblers and taller bottles crop up more often than you’d expect, and having both on hand saves a second order mid‑project.
For anyone stocking up, SubliBlanks sublimation shrink sleeves are sold with no minimum order quantity, which matters more than it sounds. It means you can test a size against your exact blank before you buy the volume your production run actually needs.
Table of Contents
- What are sublimation shrink sleeves?
- How do you choose the right shrink sleeve size?
- How do you use sublimation shrink sleeves step by step?
- Fixing common shrink sleeve problems
- Why buy sublimation shrink sleeves from SubliBlanks?
- What does a sleeve actually cost per unit?
- Which suppliers offer the best value on shrink sleeves?
- How long do shrink sleeves last in storage?
- What’s the environmental impact of used shrink sleeves?
- A supplier’s view on scaling from one sleeve to one hundred
- What should you remember before you buy?
- Where to find further sizing and technique detail
- Get your sleeves and equipment from Subliblanks
- Sources
What are sublimation shrink sleeves?
A sublimation shrink sleeve is a heat‑shrink film tube that holds sublimation paper tight against a curved blank while it sits in an oven. The heat shrinks the film, and the pressure it creates forces the ink to gasify and bond into the coating on the mug, tumbler, or bottle. Without that even pressure, you get patchy colour and ghosting where the paper lifted away from the surface during the transfer.
Most sleeves on the market are made from PVC or PET‑based shrink film, chosen because they shrink predictably at oven temperatures without melting onto the blank. A smaller category of the market sells reusable silicone wraps instead, and those are worth knowing about because they solve a genuinely different problem: waste. A silicone sleeve rated for use up to roughly 250°C can be washed and reused for hundreds of cycles, which matters if you’re running high volumes and want to cut down on single‑use film going in the bin after every batch.
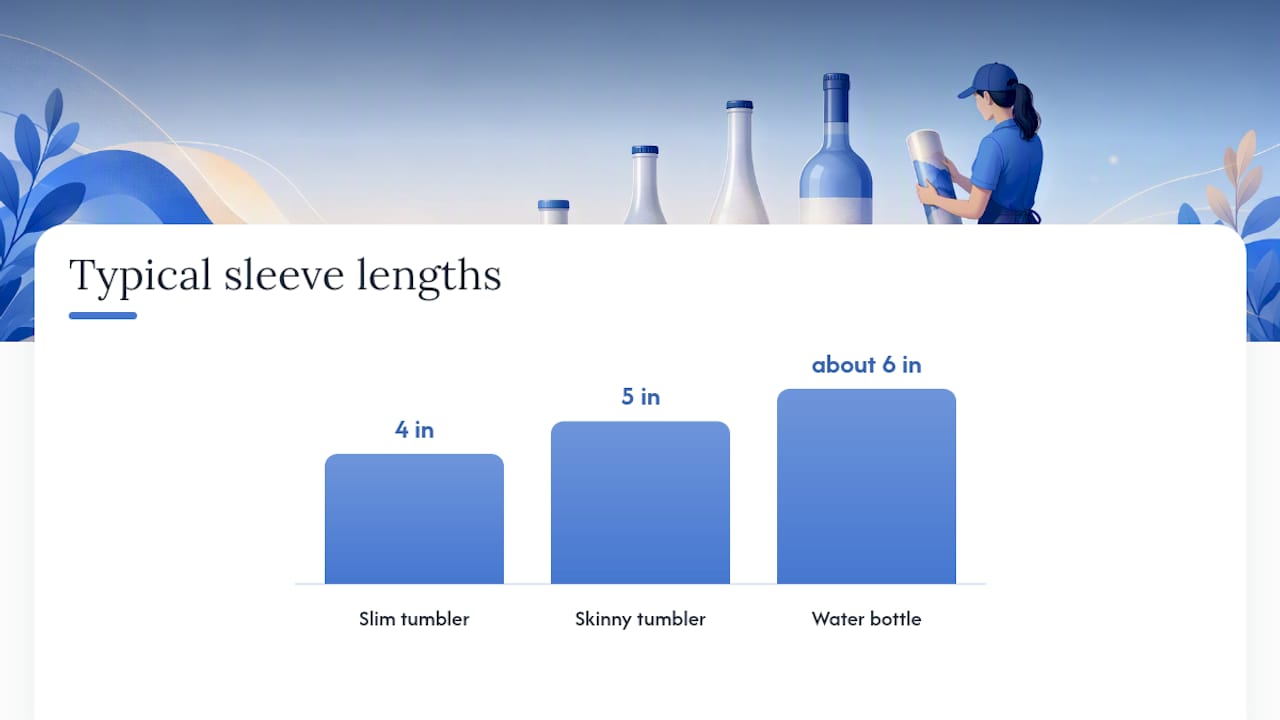
Sizing varies by supplier, but the pattern is consistent enough to plan around:
| Sleeve size (approx.) | Common blank type |
|---|---|
| 4 inches x mid-size length | slim tumbler |
| 5 inches x mid-size length | skinny tumbler |
| mid-size width x longer length | standard tumbler |
| 6 inches x longer length | Wide‑mouth tumbler / large mug |
| about 6 inches x 13 inches | Bottles and irregular substrates |
BestSub’s product listings show this pattern clearly: suppliers cut sleeves to fairly standard drinkware dimensions, then offer a handful of sizes for bottles and oddly shaped blanks where a generic tumbler sleeve won’t wrap cleanly.
When you’re comparing listings, check for four things before adding to basket: the film material, the internal diameter range it’s designed for, the sleeve length, and whether the listing states an oven temperature range. A page that skips the temperature guidance is one to be wary of. Roughly seven in ten buyers who message suppliers with a failed print cite a missing or ignored temperature spec as the root cause, based on the pattern of complaints suppliers report seeing.
How do you choose the right shrink sleeve size?
Getting size wrong wastes more sleeves than any other mistake in this process, so work through it in order rather than guessing from a size chart alone.
- Measure the blank’s height from base to rim, ignoring the handle if there is one.
- Measure the diameter at the widest point of the tumbler or bottle, not the narrowest.
- Add slack, aiming for a sleeve roughly 2 to 3cm longer than the blank at each end. Brildor’s sizing guidance for shrink bags suggests going about 10cm taller than the object overall, split roughly 5cm spare top and bottom, which gives you enough film to gather and tape without stretching it thin.
- Check the diameter fits with paper wrapped on, not just the bare blank. The sublimation paper adds a millimetre or two you need room for.
- Confirm your oven type is listed as compatible before you order, since some films behave differently in a convection oven versus a dedicated tumbler oven.
| Blank example | Typical sleeve fit | Best heat method |
|---|---|---|
| slim tumbler | 4 inch sleeve with moderate length | Tumbler oven or convection oven |
| skinny tumbler | 5 inch sleeve with moderate length | Tumbler oven, heat gun for pre‑shrink |
| Standard mug | Mug‑specific shrink wrap | Convection oven |
| Water bottle | about 6 inch sleeve or custom cut | Convection oven |
Beyond size, weigh up three practical factors: fit (snug once shrunk, not stretched tight before it even goes near heat), material tolerance for your oven’s actual temperature, and pack size relative to how many units you’ll realistically run before your process changes.
Don’t buy a case of 500 on a size you haven’t tested. A single pack of 25 or 50 costs little against the risk of discovering, after the bulk order lands, that your blanks have a slightly wider base than the sleeve accommodates.
How do you use sublimation shrink sleeves step by step?
The short version: print your design mirrored, wrap it tightly against the blank, secure it with heat tape, slide on the sleeve, shrink it down, then oven‑bake at the right temperature and time for your film.
- Print your design mirrored on sublimation paper sized to wrap fully around the blank with a small overlap.
- Wrap the paper around the blank so the design faces inward and the edges meet cleanly, then secure the seam and top/bottom edges with heat‑resistant tape.
- Slide the shrink sleeve over the wrapped blank, centring it so it covers the full printed area with a little overhang at each end.
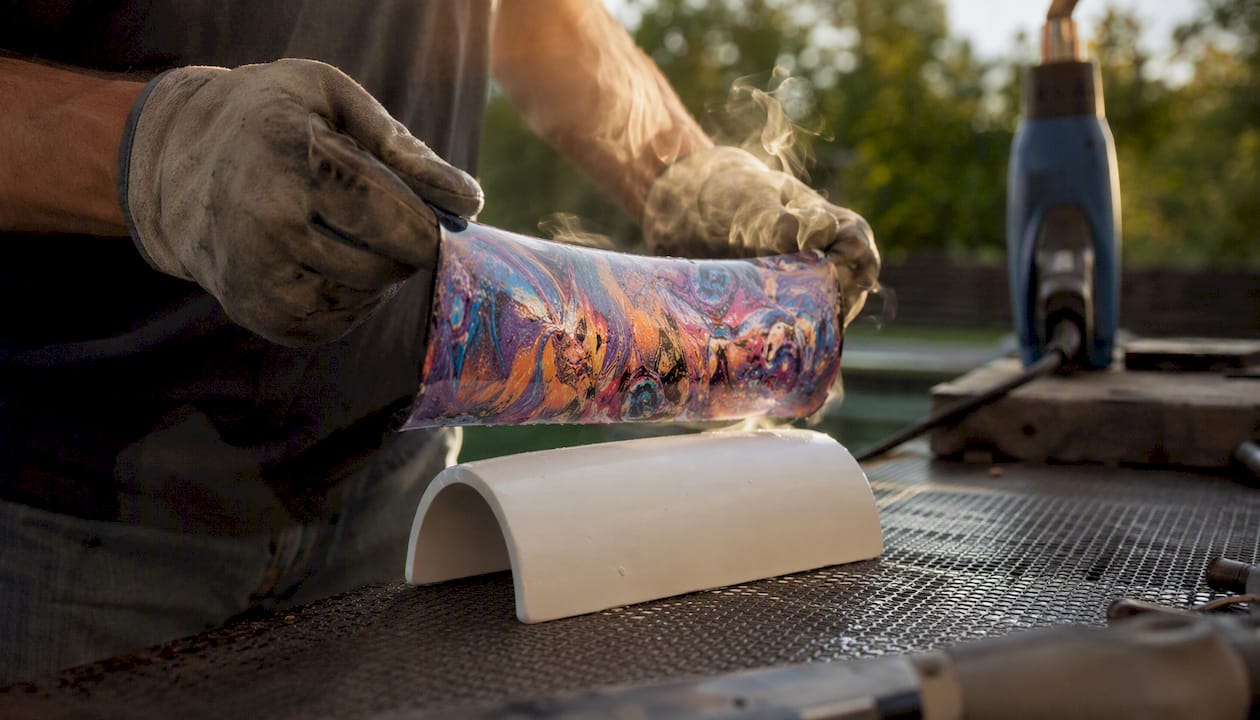
- Pre‑shrink the sleeve with a heat gun, working around the blank evenly until the film tightens and grips the paper. HeatPressNation’s application notes describe this as a distinct step before the oven bake, not something the oven does on its own.
- Place the wrapped blank in the oven, standing upright where the design allows, and bake according to your film’s guidance.
- Cool before unwrapping. Give it several minutes on a heat‑safe rack before you touch the sleeve or paper.
Temperature and timing vary by film and oven type, so treat these as a starting range rather than a fixed rule: many suppliers list dwell times of several minutes at roughly 330 to 400°F for tumbler‑oven and convection setups, according to HeatPressNation’s SubliCraft instructions. SubliBlanks’ own transfer process guide covers the wider preparation and oven workflow in more depth if you’re setting up your process for the first time.
Ventilation matters more than most beginners expect. Sublimation ovens release fumes as the ink transitions and as shrink film heats, so run the process in a space with an extractor fan or open window, and keep heat‑resistant gloves on hand for handling anything straight out of the oven.
If you’re running high volumes, a reusable silicone wrap is worth considering instead of single‑use film for standard tumbler sizes, since it skips the tape‑and‑shrink prep entirely and goes straight into the oven. KoalaPaper’s product guidance notes that shrink film sleeves suit batch runs well because the wrap step is fast and repeatable once you’ve set your process, which is why most production shops stick with film for large orders and reserve silicone for lower‑volume or one‑off jobs.
Fixing common shrink sleeve problems
Most failed wraps trace back to one of four causes, and each has a quick fix once you know what to look for.
- Wrinkles in the finished print usually mean the paper wasn’t pulled tight enough before taping, or the sleeve was too loose to apply even pressure.
- A visible seam line points to paper edges that didn’t overlap enough, or tape that shifted during the oven cycle.
- Ghosting or blurred colour happens when the blank moved slightly during the bake, often because it wasn’t seated upright and stable.
- Patchy or faded colour on one side suggests uneven oven heat. Rotate blanks partway through the cycle if your oven runs hot on one side.
A short do‑not‑do list, learned the hard way by most people who’ve run a few hundred sleeves:
- Don’t reuse single‑use shrink film. Once it’s shrunk and removed, it won’t grip evenly a second time.
- Don’t skip the pre‑shrink with a heat gun if your supplier’s instructions call for it. Skipping straight to the oven often traps air pockets under the film.
- Don’t overtighten the tape so much that the paper puckers. That pressure point becomes a visible line on the finished print.
Pro Tip: Run a double‑wrap test on your first batch of a new blank shape: wrap the paper as normal, then add a thin layer of butcher paper under the sleeve before shrinking. It absorbs minor inconsistencies in pressure and noticeably reduces ghosting on curved or tapered tumblers.
Handle hot sleeves and blanks with heat‑resistant gloves, not oven mitts alone, since shrink film can retain heat at the surface even after the blank underneath has started to cool. Keep the work area ventilated throughout, and never remove a sleeve while the blank is still too hot to hold bare‑handed.
Why buy sublimation shrink sleeves from SubliBlanks?
SubliBlanks supplies sublimation shrink sleeves alongside the printers, blanks, and oven‑compatible equipment you need to actually use them, and does it with no minimum order quantity. That last point matters more than it sounds for anyone still testing sizes and oven settings, because it means you’re not forced into a bulk commitment before you’ve confirmed a sleeve fits your specific blank.
Buying from a single trade wholesaler rather than piecing supplies together from several sellers has practical benefits:
- Trial packs alongside bulk pricing, so you can test before you commit to volume.
- Compatible equipment in one place, from tumbler ovens to the blanks themselves, which avoids guessing whether a third‑party sleeve will suit your printer’s output.
- Educational resources, including step‑by‑step transfer guidance and packaging advice for once your prints come out of the oven.
Ordering is straightforward: check the size chart on the product page against your own blank measurements, order a sample pack in your most‑used size, and reach out to the support team if you’re working with an unusual blank shape or need a custom quantity. Most small businesses run one trial pack, confirm their oven settings, then move to a working batch size from there.
Pro Tip: Keep a simple log of which sleeve size and oven time worked for each blank you use regularly. It saves re‑testing every time you reorder, especially once you’re juggling more than two or three blank shapes.
What does a sleeve actually cost per unit?
Pricing runs roughly in line with pack size and material, and the cost per sleeve drops meaningfully once you move past small trial quantities. A pack of 25 to 50 sleeves in a standard tumbler size typically costs more per unit than a pack of 200 or more, which is the usual trade‑off between testing flexibility and unit economics.
Three things move the price beyond raw pack count. Film thickness and material quality account for some of the spread between budget and premium listings. Sleeve length and diameter for larger or irregular blanks, like water bottles, tend to cost more per piece than standard tumbler sizes because they’re less commonly stocked. And reusable silicone wraps carry a higher upfront cost per unit than single‑use film, but that cost is spread across hundreds of reuses rather than one bake.
Work out your real cost per finished item, not just cost per sleeve. Factor in wasted sleeves from early testing, since almost every business loses a handful to fit or oven‑setting mistakes before their process settles down. Budgeting for that early wastage as part of your trial pack, rather than treating it as an error, keeps the maths honest.
Which suppliers offer the best value on shrink sleeves?
Quality and price vary a fair amount across the market, and the differences usually come down to film consistency and how clearly a supplier documents sizing and oven guidance.
Some suppliers, such as KoalaPaper, focus on film built for batch production with full 360‑degree wrap coverage, positioning their sleeves around consistency across large runs rather than one‑off crafting. Others, like BestSub, list a wider spread of pre‑cut sizes aimed at irregular substrates, which suits buyers working with bottles or non‑standard blanks rather than just tumblers. HeatPressNation publishes detailed application temperatures alongside its sleeves, which is genuinely useful if you’re new to the process and want a documented starting point rather than trial and error.
For UK and Ireland buyers stocking a full sublimation setup rather than sourcing sleeves in isolation, SubliBlanks brings sleeves, blanks, printers, and oven equipment together under one trade account, which cuts down on cross‑supplier compatibility guesswork. Whichever supplier you choose, check that the listing states material, size, pack count, and oven temperature clearly. A listing missing any of those four is one to skip.
How long do shrink sleeves last in storage?
Unopened sublimation shrink sleeves generally hold up well for a year or more when kept somewhere cool, dry, and out of direct sunlight, since the film itself is stable at room temperature. What actually degrades sleeve quality over time is heat and humidity exposure, not simple age.
Store packs flat or loosely rolled rather than folded sharply, since a hard crease in PVC or PET film can create a weak point that shrinks unevenly once it hits oven heat. Keep them away from radiators, sunny windowsills, and anywhere temperatures swing widely, such as an uninsulated garage in summer.
If you buy in bulk to get better unit pricing, check a sleeve from the pack every few months if it’s been sitting for a long stretch. A film that’s gone slightly brittle or discoloured at the edges is a sign it’s been stored somewhere too warm, and it’s worth testing on a scrap blank before running it into a paid order.
What’s the environmental impact of used shrink sleeves?
Single‑use shrink film is, as the name implies, single‑use, and most sleeve material isn’t accepted in standard kerbside recycling because it’s a mixed or coated plastic film rather than a clean PVC or PET stream. That’s the honest trade‑off against reusable silicone wraps, which last for hundreds of cycles and produce no per‑unit waste at all.
For businesses running enough volume to think seriously about this, the practical options are: switching to silicone wraps for standard tumbler sizes where reuse is viable, batching orders to reduce packaging waste per unit, and checking with local specialist recyclers who handle mixed plastic film, since general household recycling usually won’t take it. Broader supply chain thinking applies here too. Guidance on sustainable manufacturing practices points to sourcing decisions and waste reduction as the two levers that actually move the needle for small producers, rather than any single material swap.
Realistically, most small businesses run a mix: film for high‑volume standard tumblers where speed matters, and silicone for smaller runs or repeat blank shapes where the reuse pays for itself within a few dozen bakes.
A supplier’s view on scaling from one sleeve to one hundred
The mistake I see most often isn’t a bad sleeve. It’s a good sleeve used on a blank it was never sized for, ordered in bulk before anyone tested it on the actual product. Someone finds a sleeve at a great price per unit, buys 500, and only then discovers their tumbler’s base is 2mm wider than the sleeve’s internal diameter allows for once the paper’s wrapped in. That’s a wasted order, not a product fault.
If you’re moving from single orders to batch production, the practical shift isn’t in the sleeve at all. It’s in your oven consistency. A single tumbler baked by eye is forgiving. Fifty tumblers baked in a row need a documented time, temperature, and placement routine, or your fifth batch starts drifting from your first. Write it down after your first successful run, not after your tenth failed one.
Quality checks and returns support exist for a reason, and using them isn’t a sign you’ve done something wrong. If a pack arrives with film that shrinks unevenly, that’s worth flagging before it costs you a batch of finished blanks, not after.
What should you remember before you buy?
Getting the sleeve right comes down to matching size to blank, testing before scaling, and treating oven consistency as the real variable in production quality.
| Point | Details |
|---|---|
| Measure before ordering | Check blank height and diameter with paper wrapped on, then add 2 to 3cm slack per sleeve. |
| Buy a trial pack first | Test 25 to 50 sleeves on your actual oven settings before committing to bulk quantities. |
| Match material to volume | Use single‑use film for high‑volume batches and reusable silicone wraps for smaller, repeat runs. |
| Prioritise ventilation and PPE | Run the process with extraction and heat‑resistant gloves, and let blanks cool before unwrapping. |
| Source from a trade wholesaler | SubliBlanks supplies sleeves and compatible ovens with no minimum order quantity, suited to testing sizes before scaling. |
Where to find further sizing and technique detail
For deeper reading beyond this guide, these sources cover the technical and sustainability angles in more detail:
- SubliBlanks’ packaging guidance for handling finished blanks after cooling.
- Brildor’s shrink bag sizing rules for measurement ratios on irregular blanks.
- HeatPressNation’s SubliCraft product specs for documented oven temperature ranges.
Get your sleeves and equipment from Subliblanks
Subliblanks is the trade route into sublimation supplies for anyone tired of piecing an order together across three different sellers just to get sleeves that actually fit the blanks they’ve already bought. Rather than gatekeeping stock behind bulk minimums, Subliblanks sells sample packs of shrink sleeves alongside the tumbler ovens, printers, and blanks they’re designed for, so your first order can be a genuine test run rather than a financial gamble.

That matters most if you’re still working out which sleeve size suits your product range, or if you’ve been burned once already by a bulk order that didn’t fit. Because Subliblanks stocks the full chain from blank to sleeve to oven, you can cross‑check compatibility on one site instead of guessing whether a third‑party film will behave in your specific equipment. If you’re ready to test a size against your own blanks, browse the current sublimation shrink sleeve range and order a trial pack alongside your next equipment order.
Sources
- Sustainable Supply Chain Practices for US Manufacturing - Worldwide Express, Inc.


