



Trade Ready Silicone Wraps for Tumblers: Test Runs, No Minimum Orders
Silicone wraps work well for most straight and skinny 20oz tumblers, and they beat single-use shrink film on cost and waste for anyone running repeat batches. The one caveat worth knowing before you buy: full-wrap designs need a test run first, because the clamp overlap can leave a faint pressure gap right where the metal meets. Skip to the step-by-step method below, or head straight to Subliblanks for the blanks and tooling to test it yourself.
TL;DR:
- Proper sizing and a test run are essential to prevent pressure gaps caused by clamp overlap or taper differences, especially on curved or tapered tumblers.
- Consistent, snug fit and careful alignment of clamps over the seam reduce the risk of ghosting, uneven transfers, or blurred images during sublimation.
- Using a conservative temperature and time based on manufacturer guidelines, and verifying with test transfers, improve the quality and longevity of silicone wraps.
- Reuse and proper storage of silicone wraps make them cost-effective over multiple batches, but avoid pushing their temperature limits to prevent damage.
- Most issues with silicone wraps can be fixed by adjusting fit, clamp alignment, or performing thorough testing, avoiding the need for new equipment or replacements.
Table of Contents
- What are silicone sublimation wraps, and when should you use them?
- How do you measure a tumbler for the right wrap size?
- How do you use silicone wraps for tumbler sublimation?
- What do heat ratings and safety limits actually mean for you?
- Why do silicone wraps fail, and how do you fix it?
- What testing routine and sourcing habits actually work?
- When should a trade buyer choose silicone wraps over other methods?
- Source silicone wraps and compatible blanks without a minimum order
- Key resources for buying and specifying silicone wraps
- Sources
- FAQ
What are silicone sublimation wraps, and when should you use them?
A silicone sublimation wrap is a heat-resistant sleeve, usually rated to withstand temperatures up to 482°F/250°C, that clamps a printed transfer sheet tightly against a blank tumbler during heating. Metal clamps run down the seam, pulling the silicone taut so the paper transfer sits flush against the tumbler wall while the dyes gas onto the coating. That tension is the whole job: sublimation only works when the transfer paper is in constant, even contact with the blank.
Compare that with shrink film, the older method most hobbyists start with. Shrink wrap is disposable, fiddly to shrink evenly with a heat gun, and it goes in the bin after one use. A silicone wrap gets wiped down, folded flat, and reused dozens of times, which is why sellers increasingly pitch wraps as the sustainable alternative for makers running more than the occasional one-off gift.
Where wraps genuinely earn their keep:
- Batch production. If you’re pressing five or fifty tumblers in a session, not fumbling with fresh shrink film every time saves real minutes per unit.
- Oven-based curing. Wraps handle convection ovens cleanly, where loose shrink film can shift or scorch.
- Straight-sided or skinny profiles. The tighter and more uniform the tumbler’s diameter, the more even the clamp pressure across the whole wrap.
Where they’re less forgiving: tumblers with a pronounced taper or an unusual profile put uneven strain on the silicone, and any full-wrap design that runs a seam through a busy part of the image needs a test print before you commit good stock. The clamp overlap itself can create a narrow band of reduced pressure, which is a known limitation rather than a manufacturing flaw.
How do you measure a tumbler for the right wrap size?
Fit is everything with a silicone wrap. Too loose, and the transfer can shift or leave soft, blurred edges; too tight, and you risk warping the silicone or tearing the transfer paper on removal. Work through this before you order:
- Measure the height from the base to just below the lid rim, since most wraps are cut to cover the printable body only, not the cap area.
- Measure the circumference at the widest point, usually the top third on a tapered tumbler, and again near the base if the taper is noticeable.
- Check the taper difference. A genuinely straight or “skinny” 20oz tumbler will show almost no variance between top and base measurements; anything more than a few millimetres of difference means you’re dealing with a tapered profile, which changes how the wrap sits.
- Compare against the product’s stated size. Most listings and wrap suppliers publish standard dimensions aimed at common 15oz, 20oz and 30oz blanks, so match your own measurements against those figures rather than assuming “20oz” means one universal size.
- Allow for minor trimming. Pre-cut printed wraps are sized to standard blanks but sometimes need a small trim to sit flush, particularly around the base seam.
A correctly fitted wrap should stretch snugly with no visible slack, and the clamp should close without excessive force. If you’re getting consistent bunching at one end, the wrap is too large for that blank; if the silicone strains hard against the clamp, it’s too small. Both are fixable by matching your tumbler brand to the wrap manufacturer’s stated sizing rather than treating “20oz” as one interchangeable spec.
How do you use silicone wraps for tumbler sublimation?
Getting a clean result comes down to sequence: prep, position, heat, cool, inspect. Skip a step and you’ll usually see it in the finished print as a faint white line or a soft, doubled edge.
- Clean the tumbler. Wipe the blank with isopropyl alcohol and let it dry fully. Any grease, dust, or fingerprint under the transfer will show up as a light patch once the dye sublimates.
- Print and mirror the transfer. Your design needs to be printed as a mirror image on sublimation paper, sized to match your measured tumbler dimensions from the previous step.
- Wrap the transfer around the blank. Position the paper so the seam sits where you want the least visible join, then secure it with two or three small strips of heat-resistant tape to stop it shifting while you fit the silicone.
- Fit the silicone sleeve over the taped transfer. Pull it snug and centre it so the print area sits fully inside the silicone’s coverage zone.
- Position the clamps deliberately. This is the step most beginners rush. Align the clamp overlap directly over your taped paper seam, not over open design space, so any minor pressure drop lands where it’s least visible.
- Choose your heat method. A convection oven suits batch runs and even heat distribution around the whole tumbler; a mug press or heat press works well for single pieces and gives you more control over timing.
- Start with a conservative time and temperature. Manufacturer listings often suggest starting ranges, but they consistently flag these as test starting points rather than fixed settings, since oven calibration and press pressure vary between units.
- Remove carefully. Use heat-resistant gloves. The tumbler and silicone will both be hot enough to burn skin instantly straight out of the oven or press.
- Cool before unwrapping. Let the tumbler rest a few minutes before peeling the wrap and paper away; pulling it off too hot can smear the still-soft dye.
- Inspect the full surface. Check for ghosting, faded patches, or a visible line at the seam before you count the piece as finished stock.
Pro Tip: Run your first attempt on a “sacrificial” blank you don’t mind losing. Print a solid black or dense colour block rather than a detailed design, since flat colour shows uneven pressure and heat far more obviously than a busy pattern would.
What do heat ratings and safety limits actually mean for you?
Manufacturer listings for silicone sublimation sleeves typically claim heat resistance to around 482°F (250°C), which comfortably covers standard sublimation ranges used for tumblers. That figure is the silicone’s tolerance ceiling, not a target setting: running an oven or press right at the wrap’s rated maximum shortens its working life and increases the odds of scorching the tape or paper before the dye fully transfers.
A sensible working margin is to keep your actual process temperature well below that ceiling and confirm your specific setting through the test routine above, rather than pushing toward the manufacturer’s stated limit as a matter of course.
A few practical safety points worth building into your routine:
- Check tumbler coatings for food contact. If the finished tumbler will hold drinks, confirm the blank itself is rated food-safe; the wrap protects your transfer, not the tumbler’s food-contact status.
- Use gloves rated for oven or press temperatures, not general kitchen gloves, when handling hot wraps and blanks.
- Let pieces cool on a heat-safe surface rather than stacking them straight from the oven, which traps heat and risks warping the silicone.
- Store wraps flat or loosely rolled between uses so they don’t develop permanent creases that affect the next fit.
Coated tumblers vary in how they handle heat and pressure, and getting that mismatch wrong is a common cause of patchy prints. Subliblanks has covered the coating side of this in more depth in its guide to coated tumblers for sublimation, worth a read before you commit to a new blank supplier.
Why do silicone wraps fail, and how do you fix it?
Most problems trace back to one of four causes, and all four are fixable without buying new equipment.
Clamp overlap pressure loss. The metal clamp interlock is known to create a slightly weaker pressure zone right where it closes. The fix is positioning, not equipment: always align that overlap with your taped paper seam so any faint line falls in a spot you’ve already planned around, rather than across open artwork. Some makers add a narrow extra strip of heat tape directly under the clamp area to boost contact where pressure runs thinnest.
Uneven transfer or ghosting. A blurred double image usually means the paper shifted mid-heat. Check that your oven distributes heat evenly (rotate tumblers halfway through longer bakes) and confirm the wrap fit is snug rather than loose before you start.
Adhesion or coating mismatches. If the dye sits patchy or refuses to bond in patches, the blank’s coating is the likely culprit, not the wrap. Test new tumbler batches with a sacrificial piece before running a full order.
- Print a full-colour test design, not just black, to catch subtle colour-shift issues.
- Keep a log of time, temperature, and result per blank type so you’re not re-testing from scratch each time you switch suppliers.
When shrink film wins instead. For heavily tapered tumblers, oddly shaped mugs, or one-off pieces where reuse doesn’t matter, shrink film still has a place. It moulds more forgivingly to irregular shapes than a fixed silicone sleeve can.
Pro Tip: Keep two or three “test” tumblers in rotation specifically for dialling in new wraps or new blank batches. It costs a few blanks up front but saves far more in ruined finished stock later.
What testing routine and sourcing habits actually work?
Reliable results at scale come from a boring but effective habit: testing before you trust. Supplier guidance consistently points to the same routine, and it holds up in practice.
- Run sacrificial tumblers first. Before touching premium or branded stock, cycle a few cheap blanks through your exact time, temperature, and clamp setup.
- Print full-black test transfers. Solid dark colour reveals uneven pressure and patchy heat distribution far more clearly than a detailed design would.
- Adjust in small increments. Move time or temperature by short steps between tests rather than large jumps, so you can actually tell which change fixed (or broke) the result.
- Buy sample packs before committing to a full case. Ordering a handful of wraps and a handful of blanks from the same wholesale batch lets you confirm compatibility before you place a bulk order.
- Match tooling to your production volume. A hobbyist running the occasional gift order has different needs from a small trade buyer supplying a market stall every weekend.
This mirrors advice Subliblanks has published for makers moving from single-piece runs into small-batch production, including guidance on preparing sublimation blanks for custom merchandise and on the transfer process itself. Sourcing from a wholesaler with no minimum order requirement matters here specifically because testing eats stock. You don’t want to be locked into a case-size minimum just to find out whether a new wrap or blank actually suits your press.
When should a trade buyer choose silicone wraps over other methods?
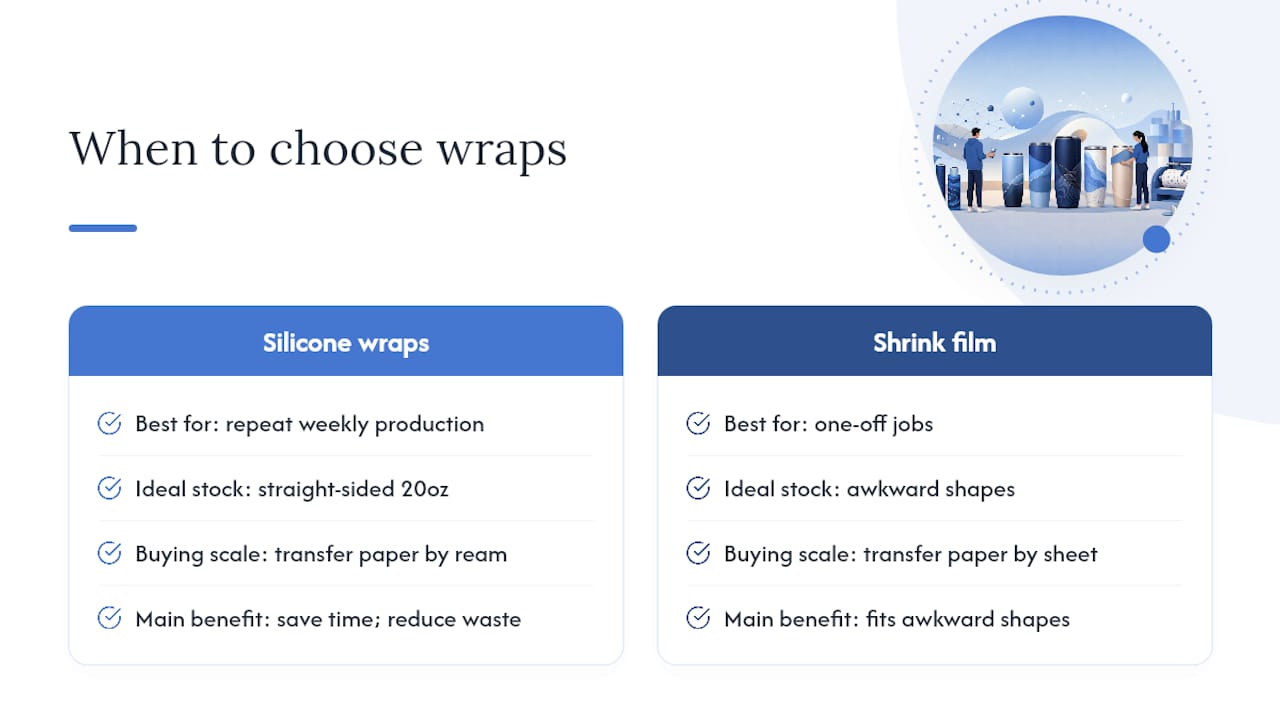
The decision comes down to volume and repeatability, not preference. If you’re producing tumblers weekly rather than occasionally, the time saved not re-cutting shrink film every run adds up fast, and the reduced waste matters more once you’re buying transfer paper by the ream rather than the sheet.
I’d favour wraps by default for straight-sided 20oz stock and switch to shrink film only for awkward shapes or one-off jobs where reuse buys you nothing. What conventional wisdom gets wrong is treating wraps as a drop-in replacement with zero adjustment. They’re not. Every new blank supplier, coating, or tumbler shape deserves its own short test run before it touches paying stock. Skip that step and the clamp seam that should be invisible becomes the first thing a customer notices.
— chris
Source silicone wraps and compatible blanks without a minimum order
Testing the routine above is only useful if you can actually get hold of sample wraps and blanks without committing to a full case first. Some suppliers run on a wholesale model with no minimum order quantity, allowing orders of small batches of straight 20oz tumbler blanks alongside wraps for testing before scaling up.

The Subliblanks front page covers the full range of sublimation blanks and related supplies if you’re stocking up for a batch run. If you’re also weighing up whether your current printer can keep pace with higher tumbler volumes, the sublimation printer collection is worth a look before you scale further. Start with a small sample order, run it through the test routine, and confirm compatibility before you commit to a full production batch.
Key resources for buying and specifying silicone wraps
Before placing a bulk order, check these for sizing conventions, heat claims, and coating compatibility:
- Vendor documentation on clamp overlap positioning, useful for planning seam placement before your first run.
- Standard 20oz wrap sizing guides from wrap suppliers, for cross-checking measurements.
- Subliblanks’ guide to coated tumblers for sublimation, for coating compatibility questions specifically.
Sources
- PINKSODIUM Reusable Silicone Wrap for Sublimation 20oz Tumblers. Shrink wrap Sleeve and Film Substitute Made with Silicone for 20 oz Skinny Straight Tumbler
- 20oz Tumbler Wrap 13 - Vibrant sublimation printed designs for 20oz tumblers
FAQ
Can you make your own silicone tumbler wraps?
Not practically at home. Silicone wraps require moulded, heat-rated silicone with fitted metal clamps, which is a manufacturing process rather than a DIY craft project; buying a sized wrap from a supplier is the realistic route.
What type of vinyl is best for tumblers?
Vinyl and silicone wraps serve different jobs: permanent or adhesive vinyl suits cold-application designs, while sublimation itself doesn’t use vinyl at all. It relies on heat-transferred dye sublimation ink through a paper transfer held by the silicone wrap.
What size should a tumbler wrap be?
It depends on the tumbler brand and profile, but wraps for standard straight 20oz tumblers are typically sized to that blank’s height and circumference, with minor trimming sometimes needed for a flush fit.
Can you sublimate on silicone?
No. Silicone itself doesn’t accept sublimation dye. The silicone wrap’s job is to clamp the transfer paper against a sublimation-coated tumbler blank; the dye transfers onto the tumbler’s coating, not onto the silicone.
Are silicone wraps better than shrink wrap for tumblers?
For straight or skinny tumblers produced in batches, yes. Silicone wraps are reusable and reduce waste compared with single-use shrink film, though heavily tapered or irregular shapes still suit shrink film better.


