



Examples of stamp making supplies for UK crafters
TL;DR:
- Stamp making supplies include materials like soft rubber blocks, precision carving tools, and specialized inks that influence impression quality. Laser engraving requires dense rubber sheets, design software, and secure mounting bases for detailed, repeatable stamps. Choosing supplies suited to skill level, target surfaces, and project volume ensures better results and reduces waste.
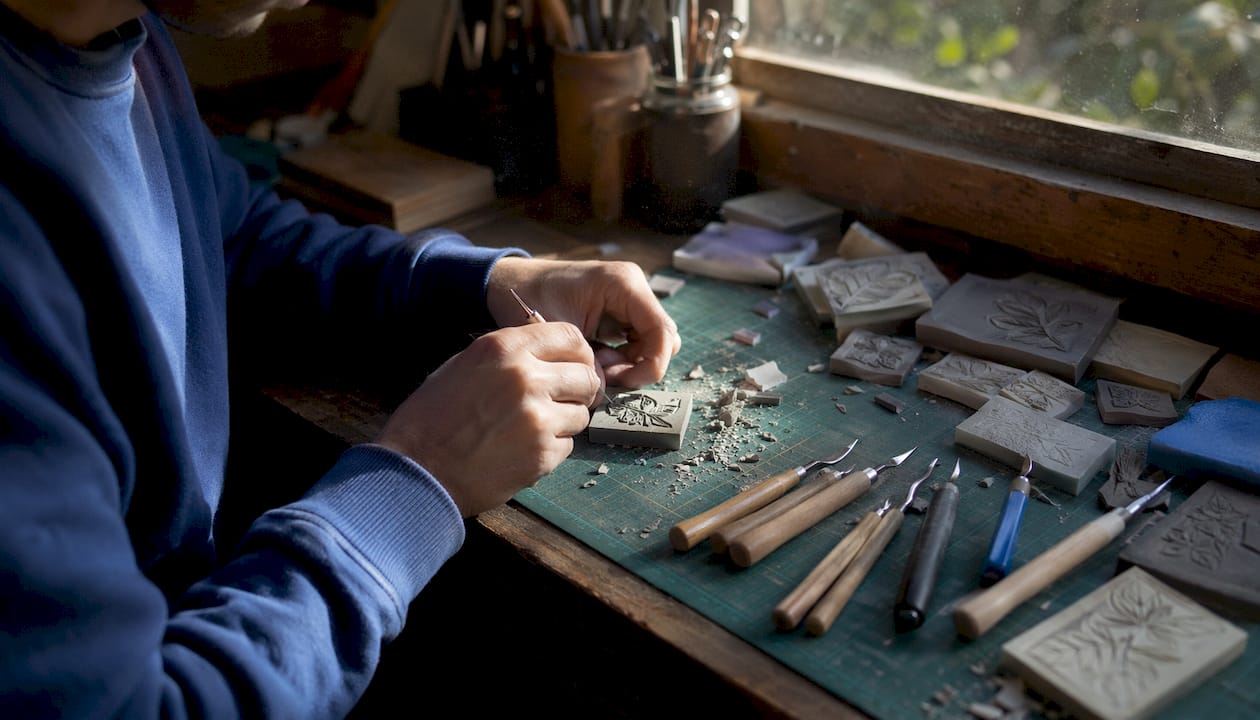
Stamp making supplies are the materials and tools that enable crafters to design and produce custom stamps from scratch. The best examples of stamp making supplies include soft rubber carving blocks, precision hobby knives with V- and U-shaped blades, self-healing cutting mats, pigment-rich ink pads, and laser-compatible rubber sheets for advanced work. Whether you hand-carve a floral motif or engrave a business logo with a diode laser, the supplies you choose determine the quality and consistency of every impression. This guide covers the full range of stamp creation resources available to crafters and hobbyists across the UK and Ireland.
1. What are the best carving materials for handmade stamps?
Soft rubber carving blocks are the best starting point for hand-carved stamps. They cut cleanly with minimal force, which means fewer slips and cleaner edges. Starter kits generally include four or more rubber blocks, a carving tool set, and a brayer roller, typically priced between £15 and £40. That range makes them genuinely accessible for anyone beginning their stamp making practice.
Linoleum is the firmer alternative. It holds finer detail than soft rubber, which is why printmakers and fine art crafters favour it for intricate designs. The trade-off is that lino requires sharper tools and more controlled cutting pressure. Beginners who move to lino too quickly often find the experience frustrating rather than rewarding.
Unconventional materials also work well as stamp making materials. Large erasers, wine corks, and even worn shoe soles can all accept a carved design. These options cost almost nothing and let you practise technique before committing to specialist blocks. Repurposed materials like erasers are a legitimate entry point before investing in purpose-made supplies.
- Soft rubber blocks: Easiest to cut, forgiving for beginners, widely available in UK craft shops
- Linoleum blocks: Firmer surface, holds finer lines, better for detailed or repeated designs
- Erasers and corks: Free or near-free, ideal for practising carving technique
- Foam sheets: Very soft, suited to simple shapes and children’s craft projects
Pro Tip: Darkening the carving block with a Sharpie before you cut makes it easy to see exactly which areas you have removed. The contrast between the marked surface and the carved grooves prevents costly mistakes.
2. Which cutting tools are essential for stamp making?
Precision hobby knives are the core cutting tool for hand-carved stamps. They accept interchangeable blades, including V-shaped blades for fine lines and U-shaped blades for scooping out larger areas. Blade sharpness directly affects both the quality of the cut and the enjoyment of the process. A dull blade drags through rubber rather than slicing it, which causes ragged edges and increases the risk of the knife slipping.
Carving gouges give you more control over material removal in wider areas. They come in sets with multiple profile widths, so you can switch between a narrow gouge for detail work and a wide one for clearing background rubber quickly. A self-healing cutting mat protects your work surface and keeps the block from sliding during cuts.
- Precision hobby knives: Best for fine lines and detailed outline work
- V-shaped blades: Create sharp, narrow channels ideal for lettering and thin lines
- U-shaped blades: Remove larger areas of rubber cleanly and quickly
- Carving gouges: Offer control in medium-to-large background removal
- Self-healing cutting mats: Protect your table and provide a stable, non-slip surface
Pro Tip: Match your tool to the complexity of the project. Simple geometric shapes need only a basic hobby knife. Detailed botanical or typographic designs benefit from a full gouge set with at least three blade profiles.
3. What types of inks and ink pads are ideal for different stamping projects?
Ink selection is one of the most overlooked aspects of stamp making materials. The wrong ink on the wrong surface produces faded, smeared, or uneven impressions regardless of how well the stamp is carved. Water-based ink pads suit paper and card and are the standard choice for scrapbooking, card making, and journalling projects.
Specialised inks handle non-porous and textile surfaces. Formulas designed for glossy card, plastic, or fabric contain different binders that grip surfaces water-based inks cannot. Products such as Noris 191 are designed specifically for non-porous surfaces. Textile-specific inks often require heat-setting with an iron to become wash-resistant.
Ink refill bottles let you re-ink pads rather than replacing them. They typically come in 25–28ml bottles, which is enough to re-ink a standard pad several times. This matters for crafters running large projects or producing batches of stamped packaging.
- Water-based pads: Best for paper, card, and most scrapbooking applications
- Pigment inks: Slower drying, richer colour, ideal for embossing powder techniques
- Dye inks: Fast drying, vibrant, suited to high-volume stamping on paper
- Non-porous surface inks: Formulated for glossy, plastic, or coated materials
- Textile inks: Fabric-compatible, usually heat-set for permanence
Maintaining your ink pads extends their life considerably. Store them face-down to keep the surface moist, and keep lids sealed when not in use. Re-ink pads before they dry out completely rather than waiting until impressions become patchy.
4. What stamp making supplies are used in laser engraving techniques?
Laser engraving is the advanced method for producing stamps with fine, repeatable detail. The core supply is a laser-compatible rubber sheet, which is a dense, low-odour material engineered to ablate cleanly under diode or CO2 laser power. Standard craft rubber blocks do not perform well under laser heat and can produce toxic fumes or uneven results.
Design preparation is as important as the physical materials. Software such as LightBurn handles image preparation, power settings, and engraving paths for most desktop laser engravers. Mirroring the image before engraving is a non-negotiable step. A stamp that is not mirrored in the design file will produce a reversed impression on paper.
Securing the rubber sheet flat during engraving prevents distortion. Many crafters use small magnets at the corners to hold the sheet against the laser bed. Uneven material causes the laser focal point to shift, which produces inconsistent engraving depth across the design.
| Supply | Purpose | Notes |
|---|---|---|
| Laser-compatible rubber sheet | Engraving surface | Must be rated for diode or CO2 laser use |
| LightBurn software | Design preparation and machine control | Supports image mirroring and power settings |
| Desktop laser engraver | Engraving the rubber surface | Diode models suit home studios; CO2 suits professional use |
| Plywood mounting base | Handle and backing for the finished stamp | Requires sealing and strong adhesive |
| Industrial adhesive | Bonding rubber to mounting base | Prevents rubber detachment with repeated use |
Mounting bases from plywood must be sealed or painted before the rubber is glued down. Unsealed wood absorbs moisture and warps over time, which causes the rubber face to lift away from the base. Industrial adhesive outperforms standard craft glue for long-term durability. Subliblanks supplies xTool laser engraving machines alongside laser-engraveable blanks suited to stamp making projects of this kind.
5. How to select the right stamp making supplies for your crafting needs
The right supplies depend on three factors: your skill level, the surface you are stamping, and how many impressions you need to produce. A beginner making greeting cards needs different tools from a small business producing branded packaging at volume.
For beginners, a starter kit covers the basics. Starter kits for hand-carving typically include rubber blocks, a carving tool set, and a brayer roller. They give you everything needed to complete your first project without buying individual items separately. Once you understand which tools you use most, you can invest in higher-quality individual pieces.
There is no single universal tool for all stamp projects. Hobby knives are sufficient for hand-carved decorative stamps, while professional branding work requires precision laser equipment and specific rubber sheets. Knowing where your project sits on that spectrum saves you money and frustration.
| Scenario | Recommended supplies | Budget range |
|---|---|---|
| Beginner hand-carving | Soft rubber block, hobby knife, ink pad, self-healing mat | £15–£40 |
| Intermediate hand-carving | Lino block, gouge set, pigment ink pads, brayer | £40–£80 |
| Advanced laser engraving | Laser rubber sheet, desktop engraver, LightBurn, plywood base | £200+ |
| Textile stamping | Rubber stamp, textile ink, heat source for setting | £20–£60 |
Recycled materials reduce cost at the beginner stage. Erasers and corks work well for practising before you buy specialist blocks. As your confidence grows, the quality difference between budget and mid-range supplies becomes more noticeable, particularly in blade sharpness and ink pigment richness. You can find a detailed walkthrough of the full process in this step-by-step stamp making guide from Subliblanks.
Key takeaways
The most effective stamp making supplies match your skill level, chosen technique, and target surface. Buying the wrong materials for your method wastes money and produces poor results.
| Point | Details |
|---|---|
| Match materials to method | Soft rubber suits hand-carving; laser-compatible sheets are required for engraving. |
| Blade sharpness matters | Replace blades regularly to maintain clean cuts and reduce the risk of slipping. |
| Ink choice affects results | Select water-based inks for paper and specialised formulas for fabric or non-porous surfaces. |
| Mirror designs before laser engraving | Failing to mirror the image in software produces a reversed stamp impression. |
| Seal plywood mounting bases | Unsealed wood warps and causes rubber faces to detach with repeated use. |
My honest view on choosing stamp making supplies
The biggest mistake I see crafters make is buying the cheapest possible supplies and then blaming their technique when results disappoint. A blunt blade on a soft rubber block will tear rather than cut, and a low-pigment ink pad will produce washed-out impressions no matter how well the stamp is carved. The supplies genuinely matter.
That said, expensive does not always mean better for beginners. A £5 eraser and a decent hobby knife will teach you more about carving technique than a premium lino block used with the wrong tools. I always recommend starting with the most forgiving materials, which means soft rubber and a fresh blade, before moving to firmer substrates.
The area where I think crafters consistently underinvest is ergonomics. Ergonomic stamp handles and premium inks improve impression consistency far more than most crafters expect. A well-balanced handle distributes pressure evenly across the stamp face. Without it, you get darker impressions at the edges and a faded centre, which is a problem no amount of re-carving will fix.
Laser engraving opens up a completely different level of detail and repeatability. If you are making stamps for a small business or producing batches of personalised items, the investment in a desktop laser engraver and proper rubber sheets pays back quickly. The custom stamp creation guide from Subliblanks is worth reading before you commit to any equipment purchase at that level.
— chris
Subliblanks: your source for stamp making supplies in the UK and Ireland
Subliblanks is a UK and Ireland trade wholesaler with no minimum order quantities, which means you can buy exactly what you need whether you are a hobbyist making your first stamp or a small business scaling up production.

The Subliblanks range covers carving blocks, inks, xTool laser engraving machines, and laser-engraveable blanks suited to both hand-carving and laser engraving methods. There are no minimum order requirements, so you are not forced to buy in bulk before you know which supplies suit your projects. Visit the Subliblanks product range to browse the full catalogue of stamp making materials and equipment available for delivery across the UK and Ireland.
FAQ
What are the most common examples of stamp making supplies?
The most common stamp making supplies are soft rubber carving blocks, precision hobby knives with V- and U-shaped blades, self-healing cutting mats, and pigment-rich ink pads. Laser engraving projects additionally require laser-compatible rubber sheets, design software, and a plywood mounting base.
Can beginners make stamps at home without specialist equipment?
Yes. Beginner hand-carving projects require only a soft rubber block, a hobby knife, an ink pad, and a self-healing mat, all available in starter kits priced between £15 and £40.
What ink should I use for stamping on fabric?
Textile-specific inks are formulated to bond with fabric fibres and typically require heat-setting with an iron to become wash-resistant. Water-based inks designed for paper will fade or wash out when used on fabric.
Do I need special software for laser stamp making?
Yes. Software such as LightBurn is used to prepare designs, set engraving power, and mirror images before sending them to the laser engraver. Mirroring is critical because a non-mirrored design produces a reversed impression on paper.
How do I stop my plywood stamp base from warping?
Seal or paint the plywood before attaching the rubber face, and use an industrial adhesive rather than standard craft glue. Sealed plywood bases resist moisture absorption and maintain their shape through repeated use.


