


Solve printing problems: a step-by-step guide for small businesses
TL;DR:
- Troubleshoot printers systematically by checking error lights, paper jams, and connection issues first.
- Regular maintenance, proper supplies, and workflow setup prevent most common printing problems.
- Understanding your printer’s specific brand and model helps resolve issues more efficiently and avoids unnecessary replacements.
Your best-selling product design is ready, the order deadline is tomorrow, and your printer decides to stop working. If you run a small creative business, that scenario will feel painfully familiar. Printing problems cost you time, materials, and confidence at exactly the wrong moment. The good news is that the vast majority of faults follow predictable patterns, and with the right approach you can restore your workflow without calling a technician. This guide walks you through every stage, from setting up your workspace and diagnosing the fault to solving jams, quality issues, and network errors across different printer types.
Table of Contents
- Gather tools and prepare your workspace
- Diagnose the problem: start simple, move methodically
- Fix common printing issues: jams, quality, and slow output
- Troubleshoot network and connectivity errors
- Special tips for inkjet, laser, and popular printer brands
- Our take: stop treating your printer like furniture
- Get the right supplies and equipment for your business
- Frequently asked questions
Key Takeaways
| Point | Details |
|---|---|
| Start with self-test | Printing a test page narrows the problem to hardware or software quickly. |
| Safety first | Always unplug your printer before attempting to clear jams or handle internal components. |
| Tailor your steps | Troubleshooting varies by printer type, brand quirks, and network setup. |
| Prevent recurring issues | Regular cleaning, proper supplies, and weekly test prints prevent most faults. |
| Use official supplies | Genuine inks and toners reduce error risk and improve print reliability. |
Gather tools and prepare your workspace
Before jumping into troubleshooting steps, it helps to gather everything you need and prepare your workspace. Attempting repairs on a cluttered desk, or under poor lighting, increases the risk of missing something small that turns into a bigger problem later.
What you will need:
- A lint-free cloth for cleaning rollers and printheads
- A small Phillips screwdriver for accessing internal trays on some models
- A laptop or desktop with access to the printer driver and settings panel
- Fresh, correctly specified paper (always check gsm and size for your model)
- Replacement ink or toner cartridges that match your printer exactly
- An isopropyl alcohol wipe for contact points
- A USB cable as a backup to test around Wi-Fi issues
Static electricity can damage internal components, so avoid working on carpet or synthetic surfaces. Good overhead lighting matters more than most people expect; shadows inside the paper tray make it easy to miss a stray piece of torn paper that causes a recurring jam.
Pro Tip: Unplug your printer from the mains before opening any panel or touching rollers. This protects both you and the machine’s finer components.
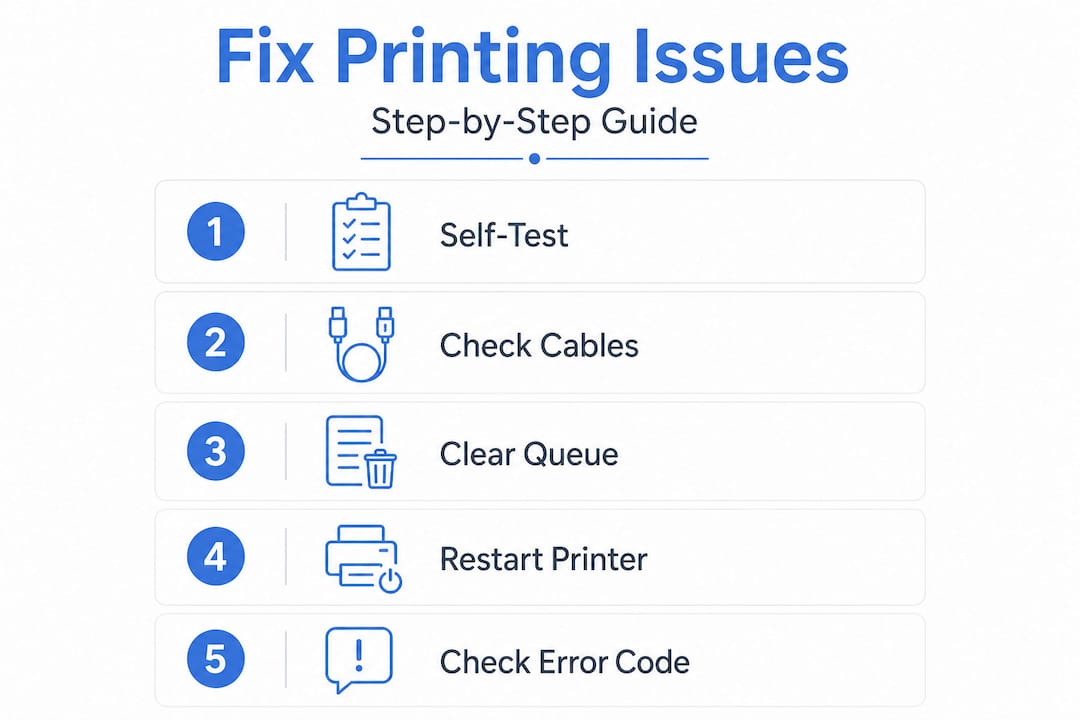
Basic troubleshooting steps for printing issues include checking error lights, clearing the print queue, restarting the print spooler, verifying connections, ensuring the correct printer is selected, checking the paper tray, installing up-to-date drivers, inspecting ink and toner levels, and running self-tests. Running through this checklist before you open the machine physically will often solve the issue before tools even leave the table.
| Item | Why you need it |
|---|---|
| Lint-free cloth | Clean rollers and printheads without leaving fibres |
| Laptop with admin access | Run driver updates, print queue, and diagnostic tools |
| Correct paper stock | Wrong gsm or size is a leading cause of jams |
| Matching cartridges | Mismatched cartridges trigger authentication errors |
| USB cable | Bypass Wi-Fi to isolate connectivity faults |
| Screwdriver | Access panels on some inkjet and laser models |
| Isopropyl wipe | Clean electrical contacts on cartridge slots |
If you work with specialist equipment like heat presses or sublimation printers, having a dedicated toolkit is even more important. A good starting point is reviewing sublimation equipment essentials so that your whole setup is optimised, not just the printer in isolation.
Diagnose the problem: start simple, move methodically
Once your area is set up, approach faults with a structured method to avoid missing key details. Jumping straight to driver reinstalls when the issue is actually a loose USB cable wastes time and can introduce new problems.
Step-by-step diagnostic process:
- Read the error lights or on-screen message carefully before touching anything.
- Check the most obvious physical issues: is the printer powered on, is the paper tray seated, is there a jam visible in the output tray?
- Run a printer self-test from the control panel (usually held by pressing the settings or information button).
- Check all cables and, if using Wi-Fi, confirm the printer appears on the network device list.
- Open the print queue on your computer and clear any stalled jobs.
- Restart the print spooler service (on Windows: Services > Print Spooler > Restart).
- Check whether the correct printer is selected as the default device.
- Verify that drivers are current by visiting the manufacturer’s support page.
The self-test is your fastest diagnostic tool. Prioritising the self-test page is key: if the self-test fails, you are dealing with a hardware or ink issue; if it passes, the fault sits in software or drivers. That single result cuts your investigation time dramatically.
Pro Tip: Screenshot error codes before you restart anything. Codes disappear on reboot and can be critical information if you later need manufacturer support.
| Symptom | Likely cause |
|---|---|
| Blank pages printing | Empty cartridge, clogged printhead, or wrong paper loaded |
| Printer shows as offline | Network disconnect, firewall block, or wrong default printer |
| Faded or streaky output | Low ink or toner, dirty printhead, or wrong paper type |
| Paper feed fails | Overloaded tray, misaligned guides, or worn rollers |
| Error light flashing | Jam inside machine, open cover, or cartridge not seated |
| Slow print jobs | High resolution setting, Wi-Fi bottleneck, or memory limit |
Understanding printer efficiency in business helps put these faults in context. When your workflow depends on consistent output, methodical diagnosis is not just good practice, it is essential for protecting your margins.
Fix common printing issues: jams, quality, and slow output
Once you have identified the probable cause, use these targeted solutions to resolve the specific issue. Guessing and retrying wastes consumables and can damage internal parts.
Clearing a paper jam safely:
- Power off the printer completely and unplug from the mains.
- Open every accessible panel: front, rear, and the duplexing door if present.
- Grip jammed paper firmly and pull slowly in the direction of the paper path. Never yank against the path.
- Check for small torn fragments; even a corner of paper left inside will trigger the next jam.
- Clean the rollers with a lint-free cloth lightly dampened with water.
- Reload the tray with fresh paper, aligned correctly within the guides.
- Plug back in, power on, and print a test page before resuming your job.
Paper jams are most often caused by misaligned paper, the wrong size or type of stock, dirty rollers, or an overloaded tray. Removing paper slowly and cleaning rollers with a lint-free cloth are the two most effective physical fixes. Use paper rated between 75 and 100gsm for standard inkjet and laser printers; thinner paper curls and thicker stock needs a machine rated for it.
Improving print quality:
- Run a nozzle check from the printer utility software first.
- Follow with one or two cleaning cycles, but do not run excessive cycles as this wastes ink.
- Check your paper type setting matches the stock you have loaded.
- Align the printhead if the test pattern shows offset colours.
- Replace cartridges that are below 10% capacity; they produce inconsistent results before fully emptying.
“Consistent, high-quality output starts with correct materials. Matching your paper type, cartridge specification, and resolution settings is not optional, it is the foundation of professional results.”
If your output is physically good but every job takes far too long, the fix is usually one of these: slow print speeds can be addressed by reducing quality settings, lowering image resolution, switching from Wi-Fi to an Ethernet connection, or upgrading RAM on higher-volume business models. Most small business owners never realise that printing detailed graphics over a congested Wi-Fi network is one of the biggest speed killers in the creative workspace.

Looking at the best printers for quality output can also inform whether your current hardware is genuinely capable of what you are asking from it, or whether an upgrade would save more time than any setting change. Equally, following a consistent printer maintenance routine prevents the majority of quality issues from appearing in the first place.
Troubleshoot network and connectivity errors
Some problems are rooted in the network setup. Here is how to get your device reconnected and keep business flowing when the printer shows offline or simply will not communicate.
Quick-win steps:
- Power cycle everything: turn off the printer, router, and computer, wait 30 seconds, then restart in that order.
- Check the physical Ethernet cable or confirm Wi-Fi strength at the printer location.
- Open the print queue and verify the correct printer is set as default.
- On Windows, run the built-in printer troubleshooter from Settings > Devices > Printers.
Advanced network steps:
- Print a network configuration page from the printer’s control panel to find its current IP address.
- Ping that IP address from your computer’s command prompt (type: ping 192.168.x.x) to confirm the network can see it.
- Check your router’s device list to confirm the printer is assigned an address.
- Set a static IP address through the printer’s network settings to stop the router reassigning a different address after each restart.
- Check your firewall is not blocking the printer port (port 9100 for most models).
Network connectivity issues like offline status require verifying connectivity by pinging the printer IP, checking firewall rules, and confirming the printer and PC are on the same subnet. These steps apply whether you are running Windows, macOS, or a mixed-device setup in a shared workspace.
Industry data suggests that network-related faults account for around 30% of unresolved printing downtime in small business environments, making this category well worth investing time in rather than defaulting to hardware blame.
Pro Tip: If Wi-Fi keeps dropping your printer offline, run a temporary Ethernet cable and test for a week. If the problem disappears, the issue is signal strength or router interference, not the printer itself.
A solid printer setup process from the start eliminates most network issues before they occur. Getting the IP addressing and driver installation right at setup is far faster than troubleshooting it repeatedly later.
Special tips for inkjet, laser, and popular printer brands
Not all printers behave the same. Brand and technology details matter enormously for lasting solutions.
Epson printers: Epson’s waste ink pad counter triggers a “Service Required” message after roughly 1,000 to 2,000 pages. This is not a hardware failure; it requires a reset utility available from Epson’s support pages. Clogs from idle periods are also common on Epson inkjets. The fix is a power flush, which means switching the printer off and waiting at least six hours before running a cleaning cycle. This allows the cleaning solution to soften dried ink effectively.
Brother printers: Brother-specific faults often stem from an overlooked toner seal on a new cartridge, SNMP status interference in the printer properties, or a dirty corona wire inside the drum. Resetting the drum counter after a drum replacement is also essential. If a Brother laser will not print despite showing ready, disabling SNMP status under port settings in the driver properties clears the issue in most cases.
Inkjet vs laser patterns: Inkjet printers clog easily when left idle, whereas lasers are more robust during long periods of low use but require drum and toner checks. Genuine cartridges reduce the risk of authentication errors on both types.
Common edge cases and prevention tips:
- Never switch off an inkjet at the wall socket; always use the power button so the printhead parks correctly
- Store spare paper flat and in a sealed bag to prevent moisture-related feed problems
- Use the printer at least once per week if you are on an inkjet, even a single test page keeps nozzles clear
- Avoid mixing third-party and OEM cartridges in the same machine as this can confuse the firmware
- Check the toner cartridge is fully shaken side to side after fitting on a laser printer
Pro Tip: Set a weekly calendar reminder to print a colour test page on any inkjet you use for business. It takes under ten seconds and prevents the costly printhead replacements that come from weeks of inactivity.
For sublimation-specific issues, sublimation printing tips for UK small businesses address the unique quirks of sublimation ink behaviour, profile management, and temperature interaction that standard troubleshooting guides rarely cover.
Our take: stop treating your printer like furniture
Here is the uncomfortable truth that most troubleshooting articles skip: the majority of printer failures are not random. They are the accumulated result of ignoring maintenance, using cheap consumables, and expecting the machine to perform perfectly after weeks of sitting idle.
We see this pattern consistently among creative businesses that come to us for advice. The printer worked fine for months, then it did not. But when you trace back the timeline, there were warning signs: slightly faded prints last Tuesday, a paper feed hesitation the week before, a warning light that was dismissed. Printers communicate before they fail. The businesses that listen are the ones that avoid emergency breakdowns.
There is also a tendency to blame the hardware when the real issue is the setup around it. A sublimation printer running on congested Wi-Fi, with an outdated driver, printing on paper it was never designed for, is not a broken printer. It is a misconfigured workflow. Fixing that workflow, rather than replacing the machine, is almost always the right and more cost-effective move.
Investing in quality equipment matters, but investing in understanding that equipment matters more. The hour you spend learning your printer’s self-test output, its error code patterns, and its maintenance schedule will return many hours of saved downtime across a year of business operation.
Get the right supplies and equipment for your business
Running through this troubleshooting guide is far easier when you have quality supplies to hand and equipment built for business use.

At Subliblanks, we supply small businesses and creative entrepreneurs across the UK and Ireland with everything from sublimation printers and equipment to DTF supplies, xTool laser engraving machines, badge-making kits, and 3D printing filaments. There are no minimum order quantities, so you can stock exactly what you need without committing to bulk. Whether you need replacement consumables to carry out today’s fixes or want to upgrade to a more reliable setup, browse our full range at subliblanks.com and get back to producing work you are proud of.
Frequently asked questions
What should I do if my printer suddenly shows as ‘offline’?
First, check network cables or Wi-Fi strength and restart both the printer and router, then verify the PC is on the same network subnet. Offline status issues are most reliably resolved by pinging the printer IP and checking firewall settings.
How can I stop paper jams happening repeatedly?
Use clean, high-quality paper rated between 75 and 100gsm, avoid overloading the tray, and clean rollers regularly with a lint-free cloth. Dirty rollers and overloaded trays are two of the most common repeat causes that are entirely preventable.
What is the fastest way to fix poor print quality?
Run a nozzle check or printhead cleaning cycle, use the correct paper type and resolution settings, and avoid using old or refilled cartridges. Poor print quality is frequently caused by HP cartridge authentication errors and Epson clogs from infrequent use.
Which settings should I check if my printer is too slow?
Switch to standard print quality, use Ethernet instead of Wi-Fi, and lower image resolution where your output allows. Reducing quality settings and switching to a wired connection deliver the fastest speed improvements without additional cost.
Are non-OEM inks safe to use?
Non-OEM inks are less expensive but carry a meaningful risk of clogging nozzles or triggering cartridge authentication errors, particularly in business-critical environments. Non-OEM ink risks versus cost savings is a genuine trade-off worth evaluating honestly against the cost of downtime in your workflow.


