



Silk PLA Finish for 3D Prints: Calibrate 205–215°C, Dry 4–6 Hours
Yes, silk PLA can deliver a genuinely glossy, near-factory sheen straight off the plate, but only if you control three things: nozzle temperature, outer wall speed and filament dryness. Get those wrong and you get patchy satin instead of shine. The rest is calibration, and if you want extra polish, a light finishing pass afterwards.
TL;DR:
- Maintaining filament dryness between 45 and 55°C for 4 to 6 hours and storing in sealed, low-humidity containers is crucial to preserve silk PLA’s gloss level.
- Optimal printing temperature typically ranges from 205 to 215°C, but running a temperature tower test ensures perfect shine and consistent results for each spool.
- Slow and consistent outer wall speeds (25 to 40 mm/s) and a layer height of 0.12 to 0.16 mm significantly improve surface gloss and minimize banding.
- Ensuring a clean, wear-free nozzle and controlling motion settings like belt tension and vibration prevent micro-stutters that dull silk PLA’s shiny finish.
- Finishing techniques such as light wet sanding and polishing or applying a thin water-based clear coat can enhance gloss only when calibration alone cannot achieve the desired surface quality.
Table of Contents
- What is silk PLA and how does it differ from standard PLA?
- How should you dry and store silk PLA before printing?
- What slicer settings produce the best silk PLA gloss?
- How do printer hardware and motion settings affect gloss?
- Should you add a clear coat, sand, or polish silk PLA?
- Why do silk PLA prints string, split or turn cloudy?
- Where Subliblanks fits into repeatable silk PLA results
- Why calibration beats copying someone else’s settings
- Where to buy silk PLA and the supplies that keep it glossy
- Sources
- FAQ
What is silk PLA and how does it differ from standard PLA?
Silk PLA gets its shine from additives, usually variations on standard colourants combined with a different molecular structure, that change how light scatters off the printed surface. Standard PLA has a slightly matte, semi-diffuse finish because its surface is microscopically rougher. Silk PLA’s smoother extrusion surface reflects light more directly, which is what your eye reads as gloss.
That shine comes at a cost. Silk PLA is an appearance-first filament: it hides layer lines beautifully but tends to be more brittle and bonds between layers slightly less reliably than PLA+ or PETG. That trade-off decides where it belongs:
- Display models, figurines and vases where surface finish matters more than load-bearing strength
- Decorative homeware, gift items and prototypes destined for a shelf rather than a workbench
- Cosplay props and lighting diffusers where the sheen does visual work on its own
- Anything printed purely to photograph well
If a part needs to survive drops, bending or sustained mechanical stress, standard PLA or PLA+ is the better call.
How should you dry and store silk PLA before printing?
Moisture is the single fastest way to kill a silk PLA finish. Wet filament pops and hisses through the nozzle, leaving micro-bubbles and a hazy, satin surface where you wanted a mirror. Community troubleshooting threads consistently point to moisture and worn nozzles as the two most common causes of ruined silk PLA gloss, and drying fixes far more problems than tuning ever will.
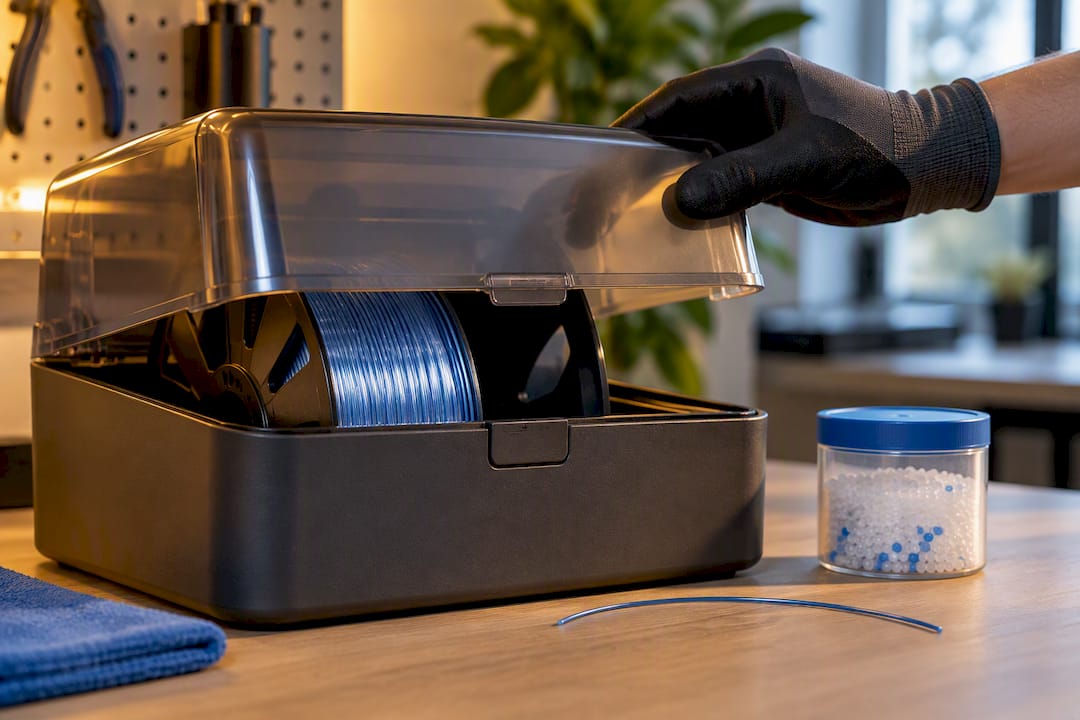
Dry silk PLA at around 45 to 55°C for 4 to 6 hours if it feels tacky or has been open longer than a week, then store it in a sealed container with fresh desiccant between prints. A dedicated filament moisture control routine, keeping humidity down around 10 to 20% RH, saves you from reprinting the same vase three times.
Run this checklist before every silk PLA job:
- Dry the spool if it’s been unsealed more than a few days.
- Inspect the nozzle for wear, carbon build-up or a partial clog; do a cold pull if unsure.
- Check the filament path for kinks, tangled spool tension or a dragging bearing.
- Confirm the extruder gear is clean and gripping evenly.
- Print a small calibration cube before committing to the full model.
Pro Tip: Keep a dedicated, sealed tub just for silk filaments. Sharing storage with PETG or nylon means every time you open it for another spool, your silk PLA absorbs a little more moisture than you’d like.
What slicer settings produce the best silk PLA gloss?
Temperature does more work on gloss than any other single setting. A controlled testing range of 200 to 220°C covers most silk PLA brands, but the true sweet spot sits closer to 205 to 215°C for many of them, and it genuinely varies by manufacturer and even by colour batch. Don’t trust a spool label or a forum post for your exact number, print a temperature tower.
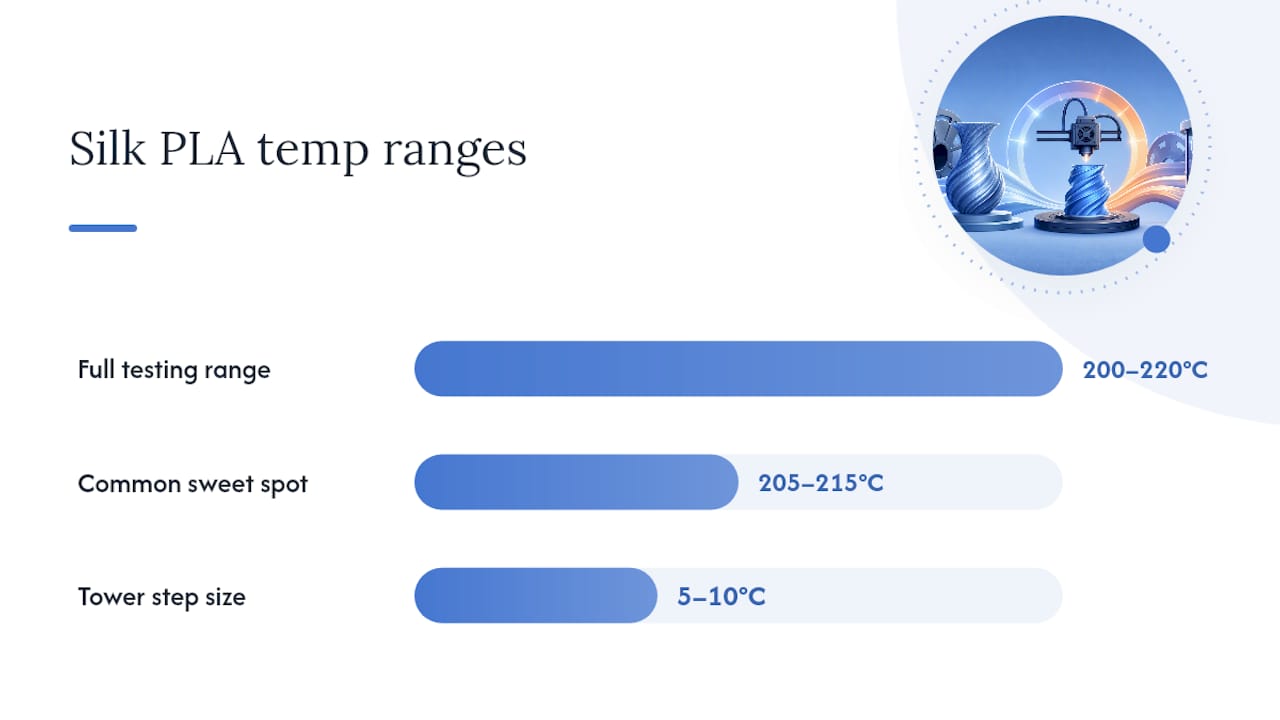
A tower is a single print that steps through 5 to 10°C increments every few layers, letting you watch gloss and colour depth peak in real time rather than guessing. It’s the most reliable calibration method precisely because it removes the guesswork a generic “print at 210°C” recommendation can’t account for.
Beyond temperature, four other settings shape the final surface:
- Outer wall speed: keep perimeters slow and consistent, roughly 25 to 40 mm/s, since manufacturer guidance links speed spikes directly to visible banding.
- Layer height: 0.12 to 0.16 mm gives the smoothest highlight without stretching print time unreasonably.
- Wall count: two or three perimeters is usually enough on show surfaces, more than that rarely improves gloss further.
- Seam placement: hide the seam on a back edge or corner and use a small wipe distance, since seam pimples become far more obvious on a glossy surface than a matte one.
Ironing can lift top-surface sheen further, but it’s fussy. It only pays off on long, continuous flat sections and needs its own calibration tile before you trust it on a finished part.
How do printer hardware and motion settings affect gloss?
A worn or partially clogged nozzle is invisible on matte prints and glaring on silk PLA, because every micro-stutter in extrusion shows up as a dull patch or ripple. Before a show print, inspect the nozzle tip for wear and confirm the filament path runs smoothly from spool to hotend without drag.
Motion settings matter almost as much as thermal ones:
- Lower acceleration and jerk on outer walls specifically, most slicers let you set a separate profile for perimeters.
- Point part cooling directly at the extrusion line rather than diffusing it across the whole nozzle assembly.
- Consider an enclosure if your room temperature swings, since draughts cause inconsistent cooling and visible satin bands.
- Check belt tension and listen for stepper skipping. Loose belts create a fine shimmer pattern that reads as texture under raking light.
This is the same principle machinists rely on when tuning CNC surface finish, where controlling vibration and feed consistency, not just the cutting parameters, decides the final roughness reading. Print motion works the same way: smooth mechanics beat smart settings.
Should you add a clear coat, sand, or polish silk PLA?
If your print already looks glossy off the plate, leave it alone. Finishing adds risk, and a well-tuned silk PLA surface rarely needs help. Reach for a finishing pass only when calibration alone hasn’t closed the gap, or when you need to hide small print artefacts a client or judge would notice.
- Test on scrap first. Any spray or sanding technique should be trialled on an offcut before it touches the actual model.
- Wet sand progressively through 600, then 1000, then 2000 grit, keeping the surface wet throughout. Sanding with water stops heat build-up and prevents smearing the silk skin, but sanding alone will dull the shine unless you follow it with polish or a coat.
- Polish with a plastic-safe compound and a microfibre cloth to restore clarity after sanding.
- If spraying, use a thin, water-based, PLA-safe acrylic, held 20 to 30cm away, in several light passes rather than one heavy coat that pools or clouds.
- Reserve resin or epoxy coats for pieces that need serious durability. They add real gloss but can also shift the surface tone and occasionally over-gloss a part that already looked good.
Pro Tip: If a clear coat looks cloudy after drying, it’s almost always applied too thick or too close. Strip it back and redo it in thinner passes rather than adding another layer on top.
Why do silk PLA prints string, split or turn cloudy?
Most silk PLA problems trace back to one of three causes: moisture, inconsistent flow, or mismatched cooling. Matching the symptom to the fix saves hours of trial and error.
- Stringing: dry the filament, tighten retraction settings, and drop nozzle temperature by 5°C.
- Patchy or inconsistent gloss: stabilise outer wall speed so it never varies mid-perimeter, and check that your fan isn’t cycling on and off unevenly.
- Layer splitting or delamination: raise temperature slightly, since silk formulations often need a touch more heat for reliable layer bonding than standard PLA, and avoid under-extrusion, which weakens adhesion further.
- Cloudy or hazy ironing passes: lower the ironing temperature and speed, or skip ironing altogether on geometry that doesn’t allow long, unbroken strokes.
Where Subliblanks fits into repeatable silk PLA results
Consistent gloss depends on consistent inputs, dry filament, a clean nozzle, and spools that print the same way from the first metre to the last. Subliblanks stocks 3D printing filament alongside the drying and storage kit that keeps it that way, so the preprint checklist above is easy to actually follow rather than something you read once and forget. Educational guides on the site cover the wider workflow too, from choosing filament to managing the print-to-finish process.
Why calibration beats copying someone else’s settings
Most silk PLA advice online hands you a single “magic number” for temperature and moves on. That’s the weak point in almost every guide you’ll find: it treats gloss as a fixed setting rather than a variable that shifts with brand, colour batch, and even the specific spool you’ve opened this week.
The temperature tower isn’t an optional extra step for perfectionists, it’s the actual method that separates a lucky glossy print from a repeatable one. Skip it and you’re guessing every time you switch filament brands or colours. Run it once per spool type and you’ve got a number you can trust for the next fifty prints.
The other place conventional advice falls short is mechanical. People chase slicer settings for weeks while ignoring a nozzle that’s due for replacement or a belt that’s a quarter-turn loose. Silk PLA is unforgiving of exactly the kind of small mechanical drift that matte filaments quietly hide. Fix the hardware first, then calibrate. Do it the other way round and you’ll spend hours tuning around a problem that was never a software issue to begin with.
Prioritise dryness and mechanical soundness before touching a single slicer profile. That order matters more than any specific number in this article.
— chris
Where to buy silk PLA and the supplies that keep it glossy
Getting a reliable shine isn’t really about finding a “better” filament brand, it’s about having dry, well-stored spools and a printer that isn’t fighting you. Wholesale suppliers offer 3D printing filament with no minimum order quantity, making it straightforward to pick up a single test spool before committing to a full production run.

Browse the 3D Supplies range for silk PLA spools, filament dryers and sealed storage tubs in one place. If you’re setting up a repeatable workflow rather than a one-off project, buy a dryer alongside your first spool rather than after your third ruined print, it pays for itself fast. Check current stock and grab a test spool today to run your own temperature tower before your next show piece goes on the plate.
Sources
- Silk PLA guide: Achieving shiny surfaces
- How to get a perfect shine from your silk PLA prints
- Bambu PLA Silk / Silk+ filament printing guide
- Silk PLA filament: what it is and how to print it
FAQ
What is silk PLA?
Silk PLA is a variant of standard PLA filament with additives that change how light reflects off the printed surface, giving it a glossy, silk-like sheen rather than the semi-matte look of regular PLA. It hides layer lines well but is generally more brittle than PLA+ or PETG, so it suits display pieces rather than load-bearing parts.
How do you make silk PLA shinier?
Start with a temperature tower to find your specific spool’s sweet spot, typically somewhere in the 200 to 220°C range, then keep outer wall speed slow and consistent. If the print still isn’t glossy enough, light wet sand followed by polish or a thin water-based clear coat can lift the finish further.
Is silk PLA harder to print than standard PLA?
It’s more sensitive rather than harder. Silk PLA punishes moisture, inconsistent flow and worn nozzles far more visibly than standard PLA does, so the same mistakes that go unnoticed on a matte print show up as dull patches or ripples on silk. Careful drying and a clean nozzle path solve most of the difficulty.
How long does a silk PLA print last?
Silk PLA holds up well for display purposes indefinitely if kept out of direct sunlight and high heat, since UV exposure and warmth are what degrade PLA over time, not age alone. Because it’s more brittle than PLA+, it’s better suited to decorative pieces handled occasionally rather than items that get regular mechanical stress.


