



Trade Tested: Engraving Acrylic Types and the 3–6mm Decision
Cast acrylic gives the brightest, whitest frosted engrave you can get on PMMA, and a CO2 laser is the right machine for most engraving work on it. Extruded sheet is the better call when you need tight thickness tolerance, a lower price, or you’re covering something that will never be seen edge-on. Everything else in this guide is about the exceptions and the settings that make that first sentence true in practice.
TL;DR:
- Cast acrylic is ideal for bright, white frosted engraves and produces cleaner edges, especially for display or premium projects above 6mm thickness; extruded acrylic is cheaper and better suited for thin or protective covers.
- CO2 lasers deliver the most reliable and professional results on acrylic, producing smooth edges and deep frost marks, while UV and diode lasers are limited to fine detail or coated surfaces; fiber lasers are unsuitable for acrylic engraving.
- Testing consistency through a systematic swatch protocol that varies power, speed, and frequency is crucial due to batch-to-batch differences and material variability, especially for thicker cast acrylic.
- Elevating sheets on a pin bed, using masking film, and maintaining proper airflow and focus are essential to avoid defects like melting, hazing, and uneven contrast during engraving.
- Selecting acrylic based on thickness, edge quality, and intended use is key, with cast preferred for display-grade work and extruded suitable for protective or budget applications in the 3–6mm thickness range.
Table of Contents
- Engraving acrylic types: cast, extruded, mirrored and coloured
- Best laser type for acrylic engraving: CO2, UV, diode and fibre
- Dialling in your laser settings: a test protocol that actually works
- Preparing and protecting your acrylic and yourself
- Getting the finish you actually want: front, back and reverse engraving
- A supplier’s view on sourcing acrylic for engraving
- Quick decision checklist: cast or extruded?
- How Subliblanks can help you get engraving-ready
- Sources
- FAQ
Engraving acrylic types: cast, extruded, mirrored and coloured
Not all acrylic is the same plastic wearing different labels. The manufacturing process is what determines whether your engrave comes out bright white or barely visible, and it’s worth understanding before you buy a single sheet.
Cast acrylic is made by pouring liquid monomer between two sheets of glass and letting it polymerise slowly. That slower, more controlled process gives you better optical clarity, a more consistent depth of material, and, critically for engraving, a bright frosted finish where the laser hits it. Cut edges come out fire-polished and glassy without extra finishing. If you’ve ever seen an award plaque or a backlit sign with a crisp white engrave, that’s almost always cast.
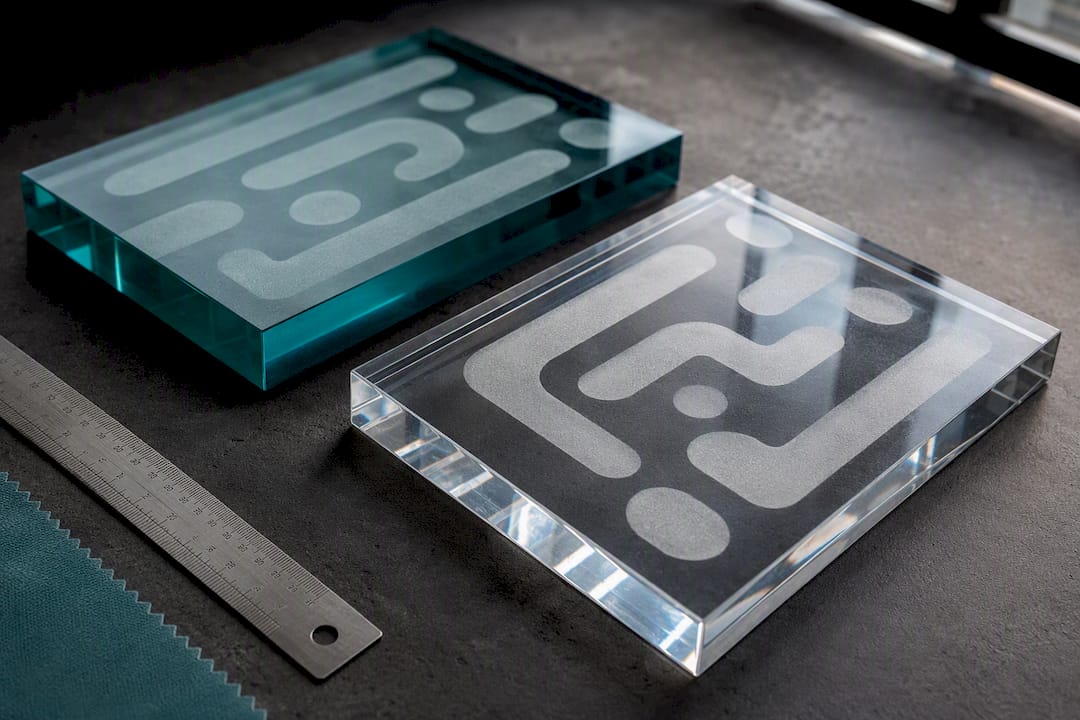
Extruded acrylic is pushed through a die as a continuous sheet, which is faster and cheaper to produce. The engrave tends to come out greyer and less defined, and cut edges often need flame polishing afterwards to look presentable. Trotec’s own material guidance recommends its cast grade (GS) specifically where edge quality and engraving contrast matter, and its extruded grade (XT) where dimensional accuracy and production cost are the priority.
Beyond the basic cast/extruded split, a few speciality types come up often enough to plan around:
- Mirrored acrylic engraves well for etched logos and decorative panels, but the reflective backing means test cuts are essential. Errors show up doubled.
- Coloured and opaque sheets change the contrast equation entirely. Darker or pigmented acrylics generally show stronger visible contrast because the laser energy interacts differently with pigment than with clear PMMA, so a black sheet engraved to reveal a lighter core layer can look sharper than a clear frost effect.
- Diffusing or backlit-grade acrylic is designed to scatter LED light evenly. Engraving into it for light-up signage works, but test your depth carefully. Too shallow and the light doesn’t catch the mark; too deep and you risk a rough finish that scatters light unevenly.
- Two-tone or laminate acrylic (a thin colour layer bonded to a contrasting base) gives you the highest possible contrast for reverse engraving, since removing the top layer reveals a completely different colour underneath.
Thickness matters as much as the type itself. Below about 3mm, the visual difference between cast and extruded is often too subtle to justify paying more, particularly for protective covers or parts nobody examines closely. Above roughly 6mm, cast becomes the clear recommendation for anything on display, because the edge finish and the engrave depth both benefit from the more uniform material structure. Industry guidance consistently points to this 3–6mm zone as the point where your choice starts to actually show.
Best laser type for acrylic engraving: CO2, UV, diode and fibre
Your material choice only gets you halfway there. The laser doing the work has just as much influence on whether the result looks like a professional product or a scorched mess.
CO2 lasers are the general-purpose choice for both engraving and cutting acrylic, and for most makers and trade shops, that’s the machine to build a workflow around. The 10.6-micron wavelength is absorbed well by PMMA, producing that clean frosted engrave and smooth, sealed cut edges in a single pass. If you’re choosing one laser for acrylic work, this is it.
UV lasers operate at a much shorter wavelength and mark the surface through a “cold” ablation process rather than melting the material. That makes them excellent for extremely fine detail, tiny text, and jobs where you want a mark without disturbing the surrounding surface finish. The trade-off is depth: UV marking tends to produce shallow, subtle contrast rather than the deep frosted look CO2 delivers, so it suits detail work overdramatic visual impact.

Diode lasers are common in hobby setups, but they genuinely struggle with clear acrylic. The beam passes straight through transparent PMMA instead of being absorbed, so you often get little to no visible mark. Workarounds exist. Coating the surface with a dark marker or paint before engraving gives the beam something to bite into, and reverse engraving through the back of a coloured or coated sheet can help. Neither matches CO2 results for production work, but they’re workable for occasional hobby projects.
Fibre lasers are built for metal marking and are usually the wrong tool for acrylic. Their wavelength isn’t well absorbed by PMMA, so in a mixed workshop that already has a fibre laser for metal badges or tags, don’t assume it will double up on acrylic jobs without serious testing and likely disappointing results.
Dialling in your laser settings: a test protocol that actually works
Guessing at settings wastes sheet after sheet. The fix is a repeatable test-swatch protocol, and it’s the standard approach shop guides recommend precisely because acrylic batches vary even within the same supplier.
- Cut identical test swatches from the actual stock you’ll be using for the job, not a scrap of unknown origin.
- Record your machine model, lens focal length, focus height, and the date and time you ran the test. Lasers drift as tubes age.
- Change one variable per swatch: power, then speed, then frequency. Never adjust two at once or you won’t know what caused the result.
- Engrave a grid of settings on one swatch where possible, labelling each square, so you can compare frost quality side by side.
- Note airflow and extraction settings too. Poor airflow redeposits soot on the surface and dulls your contrast.
As a rough starting point for CO2 machines, thinner acrylic (under 3mm) generally needs lower power and higher speed to avoid burning through, while thicker cast sheet (6mm and above) can take more power at a slower speed for a deeper, whiter frost. Pulse frequency and focus height both materially affect how frosty the final mark looks, so treat frequency as a variable worth testing, not a setting you leave on default. Multiple light passes at lower power often beat one aggressive pass, because a single hot pass is more likely to melt and re-clear the surface rather than frost it.
For diode users stuck with clear stock, a common hobbyist trick is colouring the target area with a black permanent marker before engraving, then wiping the excess away once you’re done. It’s not a production-grade method, but it works for occasional projects when a CO2 machine isn’t available.
Pro Tip: Keep a simple settings logbook, even a spreadsheet, noting supplier, batch, thickness, and the exact power/speed/frequency that worked. Acrylic from different suppliers, or even different batches from the same one, can engrave noticeably differently.
Preparing and protecting your acrylic and yourself
A good engrave can be ruined by poor set-up before the laser ever fires. A few habits solve most of the recurring problems.
- Elevate the sheet on a pin bed or grid rather than laying it flat on the machine bed. This stops beam reflection off the surface below from marking the underside of clear stock.
- Leave protective masking film in place until you’ve confirmed the engrave looks right, then peel it back carefully. Avoid adhesive tapes that leave residue on the surface.
- Fixture the sheet securely. Acrylic shifts easily, and even a slight movement mid-engrave ruins fine detail.
- Run proper extraction. Acrylic releases PMMA fumes when heated, and adequate ventilation isn’t optional in an enclosed workshop.
- Keep basic fire precautions in place, including a means to interrupt the laser quickly, since offcuts and masking film are both flammable near a beam.
Getting the finish you actually want: front, back and reverse engraving
Front engraving, where you mark the visible surface directly, is the simplest approach and works well for text or logos meant to be touched or seen up close. Back or reverse engraving, where you engrave the reverse side so the mark is viewed through the clear material from the front, gives a glassier, more protected finish since the engraved texture sits behind an untouched surface. It also means your artwork needs mirroring before you send it to the machine.
Getting a bright, frosted result rather than a faint scratch usually comes down to a handful of levers: sufficient power for the thickness, correct focus height, and enough passes without overheating the surface.
| Symptom | Likely cause | Fix |
|---|---|---|
| Melted or rough edges | Power too high or speed too low | Reduce power, increase speed, add a pass if needed |
| Little or no visible contrast | Power too low, wrong laser type, or clear diode-incompatible acrylic | Increase power incrementally, switch to CO2, or coat surface for diode |
| Reflective haze or double marks | Sheet not elevated, reflection off bed | Raise sheet on pin bed or grid |
| Yellowing or discolouration | Excess heat from too many slow passes | Lower power, increase speed, improve extraction airflow |
Once engraved, a soft cloth and mild soapy water clean the surface safely. Avoid solvent-based cleaners near the engraved area, since some solvents cause crazing or clouding on acrylic that’s already had its surface structure disturbed by the laser.
A supplier’s view on sourcing acrylic for engraving
Some suppliers stock both cast and extruded grades because different trade customers ask for different things depending on the job: a display piece needs cast, a protective cover often doesn’t. For any production run, ask your supplier for a material test report (MTR) or a sample swatch before committing to bulk quantities. It’s the only reliable way to confirm a batch behaves the way the datasheet says it should.
The most common mistake we see is buyers ordering the wrong thickness band for their fixturing, or skipping masking preferences entirely and discovering too late that adhesive residue ruined an otherwise good engrave. Ask about both upfront.
— Chris, Subliblanks
Quick decision checklist: cast or extruded?
Choosing between them doesn’t need to be complicated:
- Visible edges, display pieces, or premium finish → go with cast.
- Thin protective covers, tight thickness tolerance, or a tighter budget → extruded does the job.
- Sitting in the 3–6mm range → test a swatch of both if you can, and let the edge finish requirement decide it.
How Subliblanks can help you get engraving-ready
Getting from “which acrylic type” to “finished product on the shelf” usually means sourcing the sheet, the machine, and the consumables from three different places, and hoping they all play nicely together. Some suppliers offer laser-engravable blanks, laser machines, and the masking and consumables that go with them under a single trade account, without minimum order quantities, allowing customers to test new materials before committing to bulk purchases.

Browse the range of laser-engravable blanks if you’re sourcing sheet stock, or check the laser machine collection if you’re weighing up a CO2 setup against what you’re currently running. If you want to see finished examples before you buy, our guide to laser engravable blanks for UK makers shows common formats and finishes. Whatever stage you’re at, request a spec sheet or sample swatch before placing a bulk order. It costs nothing and saves you from finding out the hard way that a batch doesn’t engrave the way you expected.
Sources
For material-specific settings and datasheets, Trotec’s acrylic processing guide and the cast versus extruded comparison from Wetop Acrylic are worth comparing against your supplier’s own MTR before you commit to a production run.
- Cast vs Extruded Acrylic: 20–40% Cost Gap, Tolerance Limits | Wetop Acrylic
- Tips and tricks for processing acrylic with Trotec Laser
- How to Laser Engrave Acrylic: A Step-by-Step Guide - Laser Delta
FAQ
What type of acrylic is best for laser engraving?
Cast acrylic is the best all-round choice for engraving because its manufacturing process produces a bright, frosted contrast that extruded acrylic rarely matches. Extruded remains the sensible option for budget builds or parts where the edge and surface finish won’t be scrutinised closely.
What are the different styles of engraving on acrylic?
The main styles are front engraving (marking the visible surface directly), back or reverse engraving (marking behind a clear surface so it’s viewed through the material), and deep engraving for a heavier, more dramatic frosted texture.
What settings should I use to engrave acrylic?
There’s no universal setting because results vary by machine, lens, and even the acrylic batch, so the reliable approach is running a test swatch grid that changes power, speed, and frequency one variable at a time. As a general pattern, thinner sheet needs lower power and higher speed, while thicker cast acrylic can handle more power at a slower speed for a deeper frost.
What are the different types of acrylic materials?
The core categories are cast and extruded, with speciality variants including mirrored, coloured or opaque, diffusing/backlit grades, and two-tone laminate sheets designed for high-contrast reverse engraving. Each behaves differently under a laser depending on how it was manufactured and what pigments or coatings it contains.
Which laser is best for engraving acrylic?
A CO2 laser is the best general-purpose option for engraving acrylic, since its wavelength is well absorbed by PMMA and produces clean, frosted results. UV lasers suit fine detail marking, while diode lasers struggle on clear acrylic unless the surface is coated or the sheet is coloured.


