



3 Daily Checkpoints for DTF White Ink Management for Shop Technicians
The single most important step in white ink management is daily agitation and recirculation, paired with a consistent start-up and shutdown sequence. Follow the manufacturer’s daily prompts and you get steadier opacity, fewer nozzle recoveries, and a longer-lived printhead. Skip it for even a few days, and pigment settling starts compounding into the clogs and grey whites that eat production time.
TL;DR:
- Proper agitation and recirculation are essential daily to prevent pigment settling and clogging, which can cause grey whites and production delays.
- White ink’s suspension nature and pigment density require precise handling, including scheduled flushes and careful tubing, to maintain opacity and flow.
- Adjusting RIP settings for density, choke, and registration is critical; improper levels lead to halo effects, grey whites, or transfer issues.
- Routine troubleshooting should always check circulation hardware, nozzle condition, and pouch seating before considering hardware failure.
- Storing pouches flat, sealed, and with circulation running during idle periods helps preserve white ink quality and reduces sedimentation risks.
Table of Contents
- Quick DTF white ink management checklist for every shift
- Why white ink behaves differently to CMYK inks
- The daily white ink maintenance procedure, step by step
- Circulation hardware: pumps, tubing and where they fail
- Getting white RIP settings right: density, choke and registration
- Troubleshooting clogs, dropouts and banding
- Storing white ink pouches and handling idle periods
- How curing and powder application change the final white
- What years of white-ink complaints have taught the industry
- SubliBlanks supply for a reliable white ink workflow
- Sources
Quick DTF white ink management checklist for every shift
A shift built around three checkpoints catches most problems before they reach the film.
- Start of shift: agitate new pouches per the pack instructions, agitate any pouch already loaded in the bay, check connector seating, then run a nozzle check and alignment pass.
- During the run: watch the circulation indicator lights, pull a sample print every hour or two to check for banding, and confirm powder is applying evenly across the underbase.
- End of shift or short break: swab the white nozzles or leave circulation running safely. For anything longer than a day or two, move to the full flush and storage procedure.
Pro Tip: Keep a laminated version of this checklist taped to the printer. Operators skip steps from memory far more often than they skip steps they can physically see in front of them.
Why white ink behaves differently to CMYK inks
White ink is a suspension, not a solution. Titanium dioxide (TiO2), the pigment that gives DTF white its opacity, is dense and settles out of the carrier fluid faster than colour dyes ever do. Particle size and dispersion quality determine how fast that settling happens and how much opacity survives once it does.
Viscosity shifts with temperature, and pouches stored on their side or upside down jet differently once installed than pouches stored correctly. Proper dispersion chemistry, including rheology modifiers and dispersants, slows this settling and keeps particles suspended between agitation cycles, according to formulation guidance from ASTRA CHEMICAL. Watch for these warning signs:
- Mottled or patchy opacity across a single print
- Whites drifting towards grey rather than staying bright
- Inconsistent coverage between the first and last print in a batch
- Nozzle checks showing faint or missing white lines that colour channels don’t show
Left unaddressed, settled pigment doesn’t just weaken opacity. It thickens near the bottom of the pouch, which is exactly where feed lines draw from, so the problem gets worse the longer it’s ignored.
The daily white ink maintenance procedure, step by step
Manufacturer documentation, including Brother’s daily white ink maintenance procedure, sets out specific agitation counts and timings rather than vague “shake it a bit” advice, and it’s worth following that precision.
- Agitate new pouches before installation. Follow the pack’s stated count or duration exactly. Under-agitating a fresh pouch defeats the purpose before it’s even loaded.
- Agitate in-cartridge pouches daily. Remove the pouch from its bay, work it gently along its length rather than shaking it violently, and reseat it in the same slot it came from. Swapping slots can confuse ink detection sensors.
- Clean connectors with isopropyl alcohol (IPA). A light wipe on the pouch flag and the printer’s connector pins removes dried residue that causes intermittent flow or false empty readings. Confirm you hear or feel the connector click before closing the bay.
- Run a nozzle check and alignment pass once agitation and reseating are done, before starting production.
- Weekly, go deeper. Swab the printhead cap station, inspect tubing for creases or discolouration, and check the peristaltic pump rollers for wear.
- Monthly, plan a full flush on schedule rather than waiting for a failure to force one.
Pro Tip: Write the agitation time on a wall clock sticker rather than trusting a mental count. Under-agitation is the single most common shortcut operators take when they’re behind schedule, and it’s invisible until the white starts turning grey days later.
Circulation hardware: pumps, tubing and where they fail
Printers handle circulation one of three ways: continuous loop systems that keep ink moving constantly, peristaltic pumps that push ink in timed pulses, and manual agitation with no motorised assistance at all. Continuous loop needs the least operator intervention but the most hardware to maintain. Peristaltic pumps are common on mid-range machines and their tubing is the weak point.
- Air locks show up as inconsistent flow with no visible blockage; cycling the pump or briefly disconnecting and reseating tubing often clears them.
- Worn peristaltic tubing loses its elasticity over months of rolling contact and stops pushing ink efficiently, even though it looks intact.
- Pump starvation happens when a creased or twisted pouch restricts flow at the source, not the pump itself.
- Restricted flow from pouch creases is often mistaken for a pump fault, so straighten the pouch and reseat it before assuming the hardware has failed.
Check tubing for kinks, confirm the pouch sits flat in its bay, and listen for the pump’s normal cadence before logging a service ticket. Most circulation complaints trace back to one of these three causes rather than a failed motor.
Getting white RIP settings right: density, choke and registration
White output lives or dies on three RIP controls: density (how much ink lays down), choke (how far the white underbase pulls back from the colour edges above it), and registration (how precisely the white aligns to the colour layer). Get any one wrong and you get grey whites, halos, or a transfer that feels like a plastic sheet on the garment, as Printstep’s technical breakdown of DTF white settings explains.
- Higher density and multiple passes improve opacity but stiffen the final hand-feel and can push curing times beyond what the film tolerates.
- A tighter choke reduces halo risk around fine detail but too tight a choke leaves colour edges unsupported by white beneath them.
- Registration tolerance matters more on detailed artwork than on solid blocks of colour.
- Keep separate presets for large solid-white areas versus fine-detail work rather than one compromise setting for everything.
Run a small test print on each new film, powder or fabric before committing to a full batch. Vary density and choke incrementally across a test sheet and cure it exactly as production would, since curing behaviour changes how the settings actually look on fabric.
Troubleshooting clogs, dropouts and banding
When white starts dropping out or banding appears, work through this ladder before reaching for a part swap.
- Run a diagnostic nozzle check strip first. It tells you immediately whether the fault is isolated to white channels or affecting colour too.
- Check circulation status. Confirm the pump or agitator is actually cycling and that indicator lights show normal operation.
- Inspect tubing and pouch seating. A creased pouch or a loose connector causes more dropouts than actual ink failure does.
- Swab the printhead with IPA for light residue, but reserve the manufacturer’s full flush procedure for anything beyond a superficial clean, since over-flushing wastes ink and time. Canon’s guidance on managing a white ink workflow recommends swabbing before extended idle periods specifically to avoid this kind of dropout.
- Escalate to service if a full flush doesn’t restore consistent nozzle firing after two attempts.
Pro Tip: Before calling for service, photograph the nozzle check strip and note the print settings, ink batch number, and how long the printer has been idle. That single record cuts diagnostic time in half because a technician can rule out half the usual causes without visiting the machine.
Storing white ink pouches and handling idle periods
Store pouches flat and sealed within recommended temperatures; avoid nozzle-down positions to reduce sedimentation at feed points.
-
Label pouches with the date opened and rotate stock so older ink gets used first.
-
Check batch or certificate-of-analysis information where the supplier provides it.
-
For idle periods of 24 to 72 hours, leave circulation running rather than powering down completely.
-
For anything longer, follow the manufacturer’s flush procedure and reseal opened pouches properly, a practice EraSmart’s maintenance guide treats as standard idle-period protocol.
How curing and powder application change the final white
Print settings only tell half the story. Over-curing yellows white ink and can make the transfer glossy in a way that reads as a lower-quality finish. Under-curing leaves poor adhesion that fails in the first few washes, undermining even a perfectly printed underbase, as outlined in DTF Dallas’s guide to white ink’s role in transfers.
- Uneven powder coverage creates patchy opacity even when the white layer printed cleanly.
- Oven dwell time that’s too short leaves powder under-fused; too long risks the same yellowing curing does on the press.
- Run a control swatch with each new batch of film, powder or garment fabric, cure it exactly as production will, and check both opacity and a quick wash test before committing to a full run.
What years of white-ink complaints have taught the industry
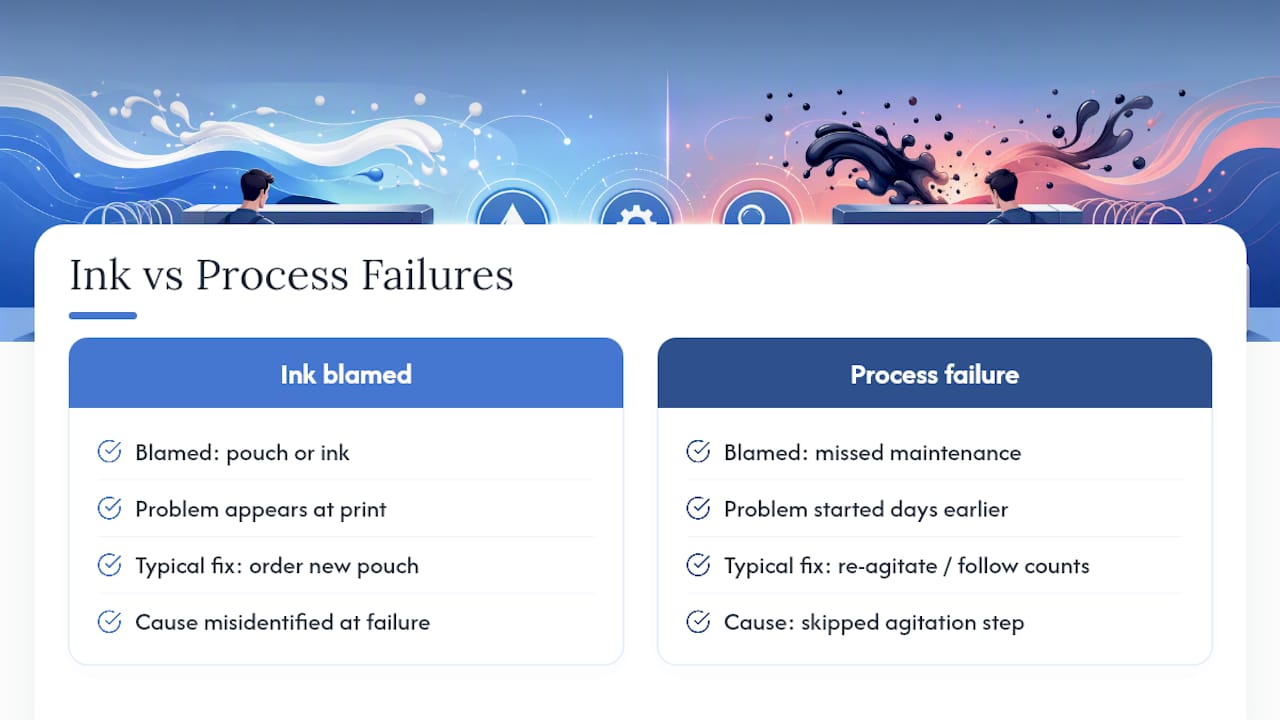
Most white ink failures aren’t ink failures. They’re process failures dressed up as ink failures, and that distinction changes how you should spend your maintenance time. Operators who chase every grey-white print with a new pouch order are often solving the wrong problem: the fix usually sat in a skipped agitation step three days earlier, not in the ink itself.
The daily discipline costs a few minutes per shift. A failed head or a wasted batch of garments costs considerably more, and that arithmetic is exactly why manufacturer documentation is so specific about counts and timing rather than leaving agitation to guesswork. Understanding how DTF printing works end to end helps explain why the white layer carries so much of the process’s risk: it’s the only layer doing double duty as both colour foundation and adhesion base.
The businesses that treat white ink care as a production step, not an afterthought, tend to see it show up directly in fewer service calls and steadier output between them.
— chris
SubliBlanks supply for a reliable white ink workflow
Once the routine is in place, the remaining variable is what’s going into the printer. SubliBlanks supplies DTF inks, films, powders and agitation accessories at trade wholesale.

Browse the full range of sublimation and DTF equipment for exact SKUs, technical datasheets, and compatible consumables before your next order. If you’re also weighing up printer options to pair with a stable white ink routine, the sublimation printer collection is a practical starting point, and the DTF supplies guide covers what a well-stocked starter kit actually needs. Check current stock and place an order directly through the SubliBlanks website when you’re ready to restock.


