



Scale to 30 Coasters: Slate Engraving Settings for Makers
Yes, slate engraves brilliantly with any common laser, producing a bright, permanent mark against dark stone with no masking or paint needed. Run a quick test grid on the smoother face, keep your artwork bold and high-contrast, then finish with mineral oil. That’s the whole recipe: test grid, smooth face, bold art, finish. Diode, CO2 and fibre lasers all handle it well once you’ve found your numbers, and the results hold up across batches once you record what worked.
TL;DR:
- Choosing evenly colored, dark slate blanks with smooth faces ensures consistent engraving quality and minimizes uneven absorption of laser energy.
- Matching the blank thickness to your laser’s power and avoiding mixed thicknesses in a batch helps maintain focus and consistent results.
- Running a detailed test grid on the highest, smoothest surface of the blank at varied power and speed settings is crucial for achieving bright white engravings.
- Proper cleaning, leveling, and recording your test results for each batch prevent waste and ensure faster setup for future runs.
- Applying mineral oil after engraving enhances contrast and reduces dullness, while sealing is optional depending on the coaster’s intended use.
Table of Contents
- Supplies, blanks and safety you need before engraving slate coasters
- Which laser and starting settings work best for slate?
- How do you prepare the coaster and run a test grid?
- What design choices make slate engraving pop?
- How do you batch slate coasters for consistent results?
- Should you seal slate coasters after engraving?
- Troubleshooting common slate engraving problems
- SubliBlanks supplier note: sourcing slate blanks that scale
- How do you align designs precisely across multiple passes?
- What does the full workflow look like from file to finished coaster?
- Do different slate types need different settings?
- How should you clean up after engraving, beyond finishing?
- An author’s take on what actually separates good results from great ones
- How Subliblanks helps you scale slate coaster production
- Where to read more on slate engraving settings
- Sources
- FAQ
Supplies, blanks and safety you need before engraving slate coasters
Not all slate is equal, and the blank you choose decides half your result before the laser even fires. Look for pieces with an even, dark colour and minimal mineral streaking. Streaks and pale patches engrave unevenly because they absorb laser energy differently to the surrounding stone. Every blank has two faces: one rougher, one smoother. Always test the smoother face first, since it holds fine detail and gives a cleaner white contrast.
Thickness matters more than people expect. Mixed thicknesses in the same batch mean re-focusing constantly, so sort blanks before you start rather than mid-run.
On machines, a 20W to 40W diode laser handles hobby volumes comfortably, while small businesses running dozens of coasters a week often move to CO2 for speed, a point backed by maker guidance on laser choice for slate. Beyond the machine, you’ll want:
- A lint-free cloth and isopropyl alcohol for cleaning blanks before engraving
- A soft brush for clearing dust without smearing the fill
- Small shims or a folded card for levelling uneven pieces
- Felt or foam pads to protect furniture once the coaster’s finished
- Mineral oil for the final contrast boost
- A simple jig, even just a taped guide, to keep repeat placements consistent
Safety matters here more than with wood or acrylic. Engraving stone throws up fine respirable dust, so run good ventilation or a fume extractor and avoid breathing it in over repeated sessions. Wear eye protection whenever the lid’s open and keep hands clear of the bed during focus checks.
Which laser and starting settings work best for slate?
Diode, CO2 and fibre lasers can all engrave slate convincingly, but they get there differently. Diode machines are the budget-friendly workhorse for hobbyists and small studios: slower per piece, but capable of the same bright contrast once tuned. CO2 lasers cut through the job faster and suit higher-volume production, which is why many small businesses graduate to CO2 as order counts climb, according to maker consensus on production speed. Fibre lasers can mark slate too, though they’re less commonly used for this material outside of industrial setups.
Here’s a set of starting points to test from, not final answers. Slate behaves differently to wood: it rewards higher power and slower speed for a clean white mark, a pattern documented across maker settings reports for slate.
| Laser type | Speed | Power | DPI | Passes |
|---|---|---|---|---|
| Diode (20–40W) | several hundred mm/s | high percentage | 250–300 | 1–2 |
| CO2 (40–60W) | around 300 mm/s | 40–60% | 250–300 | 1 |
| Fibre (20W) | up to several hundred mm/s | moderate percentage | 300–400 | 1 |
Treat every row as a midpoint to build your grid around, not a guaranteed setting. Batch quality, blank thickness and lens condition all shift these numbers.
On air assist, less is often more. Strong airflow can blow pale stone dust across the surface mid-engrave, leaving a faint smear over your design, a known issue with slate-specific engraving behaviour. Many makers run air assist low or off entirely for slate, saving full airflow for materials that actually need cooling, like acrylic.
Pass strategy matters just as much as power. One aggressive, high-power pass chips edges more often than two or three lighter passes at the same total energy. If your design shows flaking along fine lines, that’s usually the fix, not a slower speed.
Pro Tip: When scaling up from a single test coaster to a batch of thirty, don’t just multiply your single-piece settings by the job count. Re-run a mini test grid at the exact thickness and orientation you’ll batch, because clamping pressure and airflow behave slightly differently across a full bed than on one centred piece.
How do you prepare the coaster and run a test grid?
Grit and dust residue ruin fills before the laser even fires, since trapped debris scatters the beam and leaves patchy, grey marks instead of clean white ones. A quick wipe with isopropyl alcohol or a damp cloth removes this, a step confirmed by cleaning advice from experienced slate engravers.
- Clean the blank. Wipe both faces with isopropyl alcohol or a damp cloth, then let it dry fully before loading.
- Shim to the highest point. Slate is rarely perfectly flat, so check for high spots with a straight edge and shim underneath until the surface is level across your engraving area.
- Focus on that highest point, not the average height, since even a millimetre of drift blurs fine detail on one side of the design.
- Build a grid. Lay out a simple table of squares varying speed and power at your intended DPI, keeping every other variable fixed.
- Run it and inspect closely. Look for the brightest, most even square with no chipping at the edges. That’s your working setting for this batch.
- Log it immediately. Note the blank supplier, thickness, and winning settings before you move on, because slate quality varies enough between batches that this record saves you re-testing every time, a point echoed by batch-testing guidance from stone laser projects.
Skipping the grid is the single most common reason new coaster makers get inconsistent results across a run. It’s a five-minute step that saves hours of wasted blanks later.
What design choices make slate engraving pop?
Slate rewards boldness and punishes fine detail. Silhouettes, thick strokes, and solid fills read cleanly on stone because the material’s slightly textured surface breaks up hairlines before they ever reach the laser bed. Fine hatching, thin serif fonts, and delicate line art tend to blur into a grey smudge rather than a crisp mark, especially on rougher blanks.
- Choose bold sans-serif fonts or thick script over anything with hairline strokes
- Favour silhouettes and solid shapes over intricate line drawings
- Set text and logos around 250 to 300 DPI; only push to 400 DPI or higher on unusually smooth, fine-grained slate meant for photo-style engraving
- Lower your power slightly as you raise DPI, since more passes per inch means more cumulative heat in the same area
- Keep every design element at least half an inch from the edge; edge-to-edge art looks cramped on a coaster and risks chipping during the final pass
- Convert logos and text to vector files where possible for the cleanest edges; use greyscale raster only for genuine photo engraving
Vector files give you the sharpest line quality because the laser follows a clean path rather than interpreting pixel density. Save raster and greyscale settings for photographs or gradient-heavy designs, where dithering actually adds useful texture instead of noise.
How do you batch slate coasters for consistent results?
Group blanks by thickness before you touch the laser. Even a millimetre of variation between pieces shifts focus enough to blur fine detail, and refocusing for every single coaster wastes time you don’t need to spend, a workflow small businesses lean on according to production advice on grouping by thickness.
- Sort every incoming batch into thickness groups first, then focus once per group rather than per piece
- Use a simple jig, even a taped outline on the bed, to keep placement and orientation consistent across dozens of pieces
- Where your machine’s camera or software allows it, use alignment tools to speed up positioning instead of measuring by eye each time, a technique shown in practical coaster project tutorials
- Tile multiple coaster designs into a single job file where your bed size allows it, cutting total run time significantly on larger batches
Timing varies by machine class, but a rough guide helps with planning. A 40W diode laser typically takes several minutes per coaster at production settings, while a 60W CO2 machine can run noticeably faster on the same design. Test your own numbers once and use them to quote turnaround honestly rather than guessing under pressure before a craft fair.
Explore more laser engraving project ideas if you’re pairing coaster sets with other personalised items for a fuller product range.
Should you seal slate coasters after engraving?
Mineral oil is the simplest finishing step and the one that does the most visible work. A light coat rubbed into the engraved surface deepens the white contrast against the dark stone almost immediately, a technique confirmed across maker finishing guides for slate.
- Apply mineral oil with a soft cloth, working it into the engraved area, then wipe away any excess after a few minutes
- Reach for a food-safe stone sealer only if the coasters will see regular liquid contact, such as serving boards or coasters used daily rather than displayed as gifts
- Add felt or foam feet to the underside once finishing is done, protecting furniture and stopping the rough base from scratching surfaces
- For coloured engraving, rub acrylic paint into the recessed mark, let it sit briefly, then wipe the surrounding stone clean before it dries fully
Sealing isn’t mandatory for every set, but it’s worth doing for anything sold as a functional drink coaster rather than a decorative piece.
Troubleshooting common slate engraving problems
Most engraving faults trace back to one of four causes, and matching the symptom correctly saves you from adjusting the wrong variable.
| Symptom | Likely cause | Fix |
|---|---|---|
| Grey or dull mark instead of bright white | Focus off, or power too low for that blank | Re-check focus at the highest point; increase power or slow speed; try a different blank from the batch |
| Chipping or flaking along edges | Too much energy in a single pass | Reduce per-pass power and run two or three lighter passes instead of one aggressive one |
| Pale dust smear across the design | Air assist too strong, or wiped too soon after engraving | Lower or disable air assist; brush or rinse gently rather than wiping immediately, per documented air assist behaviour on slate |
| Uneven sharpness across one design | Blank not level in the bed | Shim the low side and refocus before re-running |
If a fix doesn’t resolve the fault after one retest, suspect the blank itself before blaming your settings. Slate quality varies between suppliers, and a crumbly or mineral-streaked piece can sabotage an otherwise correct setup.
SubliBlanks supplier note: sourcing slate blanks that scale
Sourcing consistent blanks matters as much as dialling in your settings, since a batch of uneven stone undoes a perfectly tuned laser job. Subliblanks supplies slate and rock coaster blanks in both glossy and matte finishes, in round and square shapes, with no minimum order quantity, so testing a small pack before committing to a full production run is straightforward.
Alongside blanks, laser-engraveable materials and supporting equipment are available for businesses scaling from single pieces to regular batch runs. Browse laser engravable blanks examples for a sense of finish quality and edge presentation before ordering, or check pricing and lead-times directly on the relevant product pages.
How do you align designs precisely across multiple passes?
Multi-pass engraving only looks clean if every pass lands in exactly the same spot, and slate’s texture makes drift more visible than it would be on wood or acrylic. The biggest cause of misalignment isn’t the software, it’s the blank shifting slightly between passes if it isn’t clamped or seated firmly.
Start by locking the blank against a fixed edge or jig rather than relying on friction alone. Even a fraction of a millimetre of movement between passes shows up as a doubled or blurred edge on fine text.
If your machine has camera-based alignment, use it to register the design against the actual blank position rather than an assumed origin point, particularly useful when blanks vary slightly in size from batch to batch. Where no camera is available, a taped corner guide or a simple frame jig achieves the same result manually.
For designs that combine engraving with a cut line, such as a shaped coaster edge, always run the engrave pass before the cut. Cutting first risks the piece shifting or dropping slightly before the engrave completes, throwing off registration on the final pass. Keep your home position and job origin consistent across the whole batch too. Re-homing the machine between individual coasters, rather than only at the start of a session, is a small habit that prevents accumulated drift on longer runs.
What does the full workflow look like from file to finished coaster?
Getting from a design file to a finished coaster follows a consistent sequence regardless of which laser software you’re running. Import your artwork first, whether that’s a vector file for text and logos or a greyscale raster for photo-style engraving, and check it’s scaled to the actual coaster dimensions rather than a placeholder size.
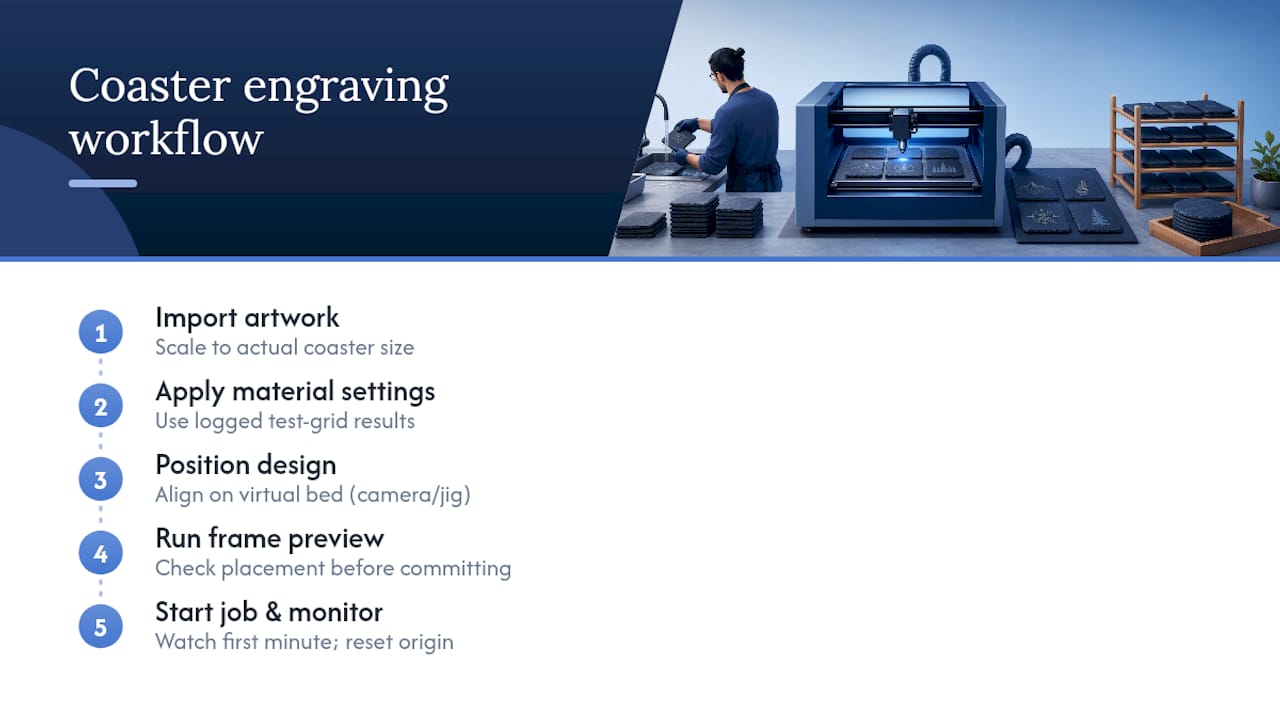
Next, select or dial in your material settings, ideally starting from your logged test grid results rather than a generic preset. Position the design on the virtual bed to match where the physical blank sits, using camera alignment or a jig reference if your setup allows it. Run a quick frame or outline preview before committing, since this catches placement errors while they cost nothing to fix.
Once the preview looks right, start the job and stay nearby for at least the first minute. Early smoke behaviour and sound tell you quickly if something’s wrong, such as excessive flaking noise that signals too much per-pass energy. After the engrave finishes, resist opening the lid immediately if you’re mid-batch. Let residual dust settle for a few seconds before lifting the piece, which reduces smearing across the fresh mark. Reset the origin point and load the next blank, keeping the same workflow order every time so nothing gets skipped under time pressure during a longer production run.
Do different slate types need different settings?
Slate isn’t a single uniform material, and thickness is the variable that causes the most confusion for makers switching suppliers. Thinner blanks, often around a quarter inch, focus and engrave predictably at standard settings, but thicker pieces, closer to half an inch, can behave differently because more of the laser’s energy dissipates into the extra mass before it fully marks the surface.
In practice, this means thicker slate often needs a touch more power or an extra light pass to reach the same bright white contrast that a thinner piece achieves in one pass. It doesn’t need a completely different formula, just a small adjustment layered onto your existing test grid results.
Colour and mineral content vary between suppliers too, and darker, more uniform slate consistently produces cleaner contrast than lighter or heavily streaked pieces, a pattern that holds regardless of which laser type you’re using. This is exactly why a fresh test grid per new supplier batch matters more with slate than with manufactured materials like acrylic, where consistency is built in rather than natural.
If you’re running mixed thicknesses in the same session, resist the temptation to average your settings across them. Group by thickness first, as covered earlier, and treat each group as its own mini test rather than assuming one setting covers everything on the bed.
How should you clean up after engraving, beyond finishing?
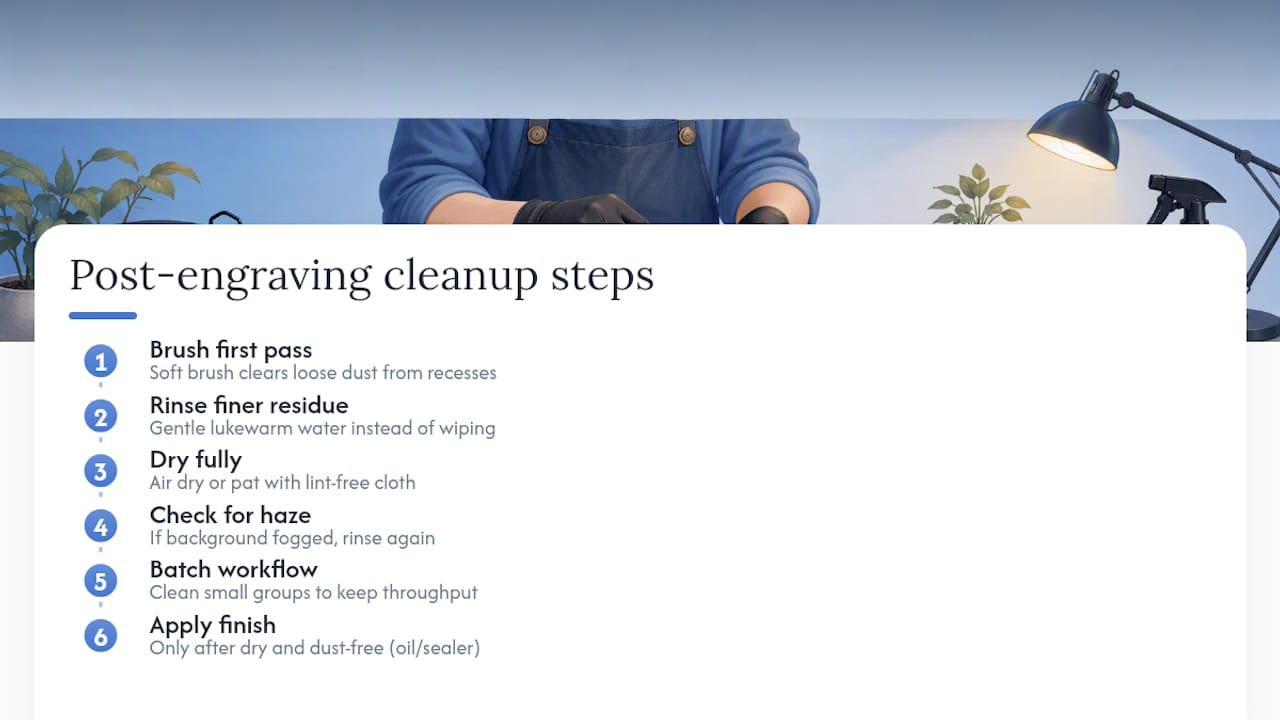
Dust removal matters before you even reach for mineral oil, because residue trapped in the engraved recesses affects how evenly any finish absorbs afterwards. A soft brush is the safest first pass, clearing loose dust from the recessed lines without dragging grit across the surrounding stone surface.
For finer residue that a brush won’t shift, a gentle rinse under lukewarm water works better than wiping with a dry or damp cloth immediately after engraving. Wiping too soon can smear fine dust into the fill itself, dulling the bright white contrast you just created. Let the piece air dry fully, or pat it with a lint-free cloth, before moving on to oil or sealer.
If you notice a faint haze or fogged appearance across the background rather than just the engraved lines, that’s usually leftover dust from air assist rather than a settings problem, and a proper rinse resolves it more reliably than repeated wiping. For batch production, doing this cleanup step in small groups rather than one piece at a time keeps the workflow moving without compromising the finish on any individual coaster.
Once dry and clean, the piece is ready for mineral oil or sealer as covered earlier, and skipping this stage is one of the more common reasons a finished coaster looks slightly duller than the test piece that sold you on the settings in the first place.
An author’s take on what actually separates good results from great ones
The single habit that separates repeatable slate engraving from a frustrating guessing game is running and recording a test grid every time you change batch or supplier. It sounds almost too simple to matter, but slate’s natural variation means the settings that nailed last month’s order can underperform on a new pallet from the same supplier.
Slate is genuinely cheap to learn on, and that low barrier is exactly why it’s such a strong addition to a personalised product lineup. But cheap to learn doesn’t mean careless to run. Keep ventilation and eye protection non negotiable parts of your setup, not afterthoughts reserved for “serious” jobs.
— chris
How Subliblanks helps you scale slate coaster production
Slate and rock coaster blanks are available in glossy and matte finishes, round and square, often with flexible order sizes, so you can order a small test pack rather than committing to a large quantity before dialling in your settings. That matters most when you’re switching suppliers or piloting a new design line and want real blanks to run your test grid against, not a generic sample.

Alongside coaster blanks, the range covers laser-engraveable materials and equipment that small businesses use as order volumes grow, from entry-level diode setups through to CO2 machines suited to faster batch runs. Lead-times and trade pricing sit directly on each product page, so you can plan a production run around realistic delivery windows rather than guessing. Head to the Subliblanks product range to check current slate blank options and order a test pack before your next batch.
Where to read more on slate engraving settings
For deeper settings tables and real-world reports, the PrintCutCarve guide to engraving slate and Bonny Creations settings breakdown both cover test-grid approaches in detail. Maker forums and project write-ups, including beginner stone and slate projects from LCFabLab, add useful real-world caveats worth reading before your first run.
Sources
- Laser engraving slate settings, tips and what makes it sell | Bonny Creations
- Best laser engravers 2026 | Austin Gallery (blog)
FAQ
How do you engrave on slate coasters?
Clean the blank, level and focus on its highest point, then run a small power and speed test grid at your intended DPI to find the brightest, chip-free setting before committing to a full batch.
Can you engrave on any type of slate?
Most natural slate engraves well, but colour consistency and mineral streaking vary between suppliers, so testing a sample piece from each new batch matters more than with manufactured materials.
Do you need to seal slate coasters after engraving?
Sealing isn’t essential for every set. Mineral oil alone lifts contrast nicely for display pieces, while a food-safe stone sealer suits coasters that see regular daily liquid contact.
Is slate easy to engrave compared with other materials?
Yes, slate is considered one of the more forgiving materials for new laser owners because it produces a bright white mark on dark stone without masking, paint, or specialist coatings.
Where can you buy slate blanks for engraving projects?
Subliblanks stocks slate and rock coaster blanks in glossy and matte finishes with no minimum order quantity, making it straightforward to order a small test pack before scaling to a full production run.


